Top Live Video Streaming Tools of 2023
So, you want to broadcast to Facebook Live, YouTube Live, LinkedIn Live, Twitter, or others?
But maybe you are confused with all the options?
Do you broadcast from your smartphone or your computer?
Do you use a live video streaming tool or do you go native?
What does all that even mean?!

If you feel confused, you’re not alone. It is confusing!
There are so many tools out there!
But I am here to help.
In this mega-article, I’ll explain the main differences between broadcasting from your phone and your computer.
I'll also cover the differences between the live video platforms and what kinds of features the tools offer.
Finally, I’ll go through all the major tools out there with their features and their pros and cons.
If you’d rather skip to the comparison of the top live video streaming tools, click here.
Otherwise, are you ready for the fun ride?!
Let’s begin!
What Is a Live Video Streaming Tool?
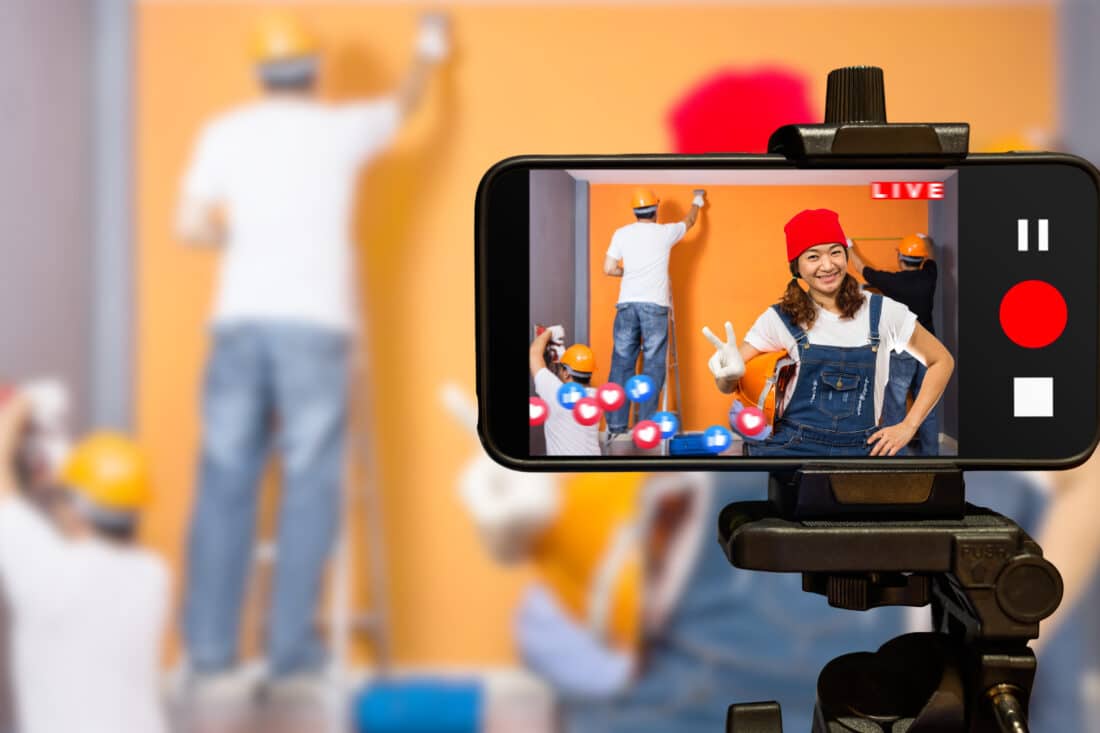
Image from depositphotos.com
Live streaming tools have two main features - switching and streaming.
Switching
You could just live stream one camera all the way through your live stream. But that's not very interesting. Most live video tools allow you to switch between different layouts or scenes. This means you could switch between different hosts and guests, pre-recorded videos and more.
Streaming
To broadcast live to a platform like Facebook, LinkedIn or YouTube, you’ll need an app. This will take your video and audio and broadcast it to the platform which in turn will broadcast it out to your audience.
Many of the main live video platforms such as Facebook and YouTube have this facility built in to their web or mobile apps. This means you don’t have to use a 3rd party tool - and it’s very easy.
But some platforms (such as LinkedIn Live) require you to use a 3rd party tool. And there are some big advantages and extra features you’ll get if you use another tool.
These tools are called a variety of fancy names such as “live streaming video encoders” and “live video tools”.
On a basic level, they take your video (for example your camera or a pre-recorded video) and stream it to your destination. It’s quite an intensive process and you’ll need a reasonably powerful computer or phone to do this.
RTMP or API?

Were you tempted to skip past this bit?
If so, I am not surprised! It sounds very geeky!
It is, but I’ll try and make this as quick and painless as possible. It's important to understand what these jargon acronyms mean.
As I just mentioned, some services (such as Facebook and YouTube) allow you to broadcast directly through their mobile app or web app. When you do that, you don’t really need to know how the magic happens. It just does.
But if you use a third-party tool, such as the ones I am talking about in this article, they will broadcast either via RTMP or using the platform’s official API.
RTMP

Streaming video requires a special type of connection or “protocol”. Websites use a protocol called “http” or “https”. Streaming video uses “rtmp” or “rtmps”. This stands for Real-Time Messaging Protocol. It was initially developed by Macromedia, but Adobe has now released a public version of this which anyone can use.
You may have also seen RTMPS - that’s just a secure version of it - where your video stream is encrypted. Most live video platforms prefer RTMPS.
With RTMP, you’ll need a special link (or Stream URL) and a key (the stream key). This allows your tool to connect with the platform’s server and send the information.
When you use RTMP, you’re just sending your stream to the platform. They don’t know who you are and the tool isn’t able to get information such as comments from the platform. The tool can’t create the live video post - so you’ll need to create that manually on the platform. Also, bear in mind that not all live video platforms allow you to connect via RTMP (such as LinkedIn Live).
API
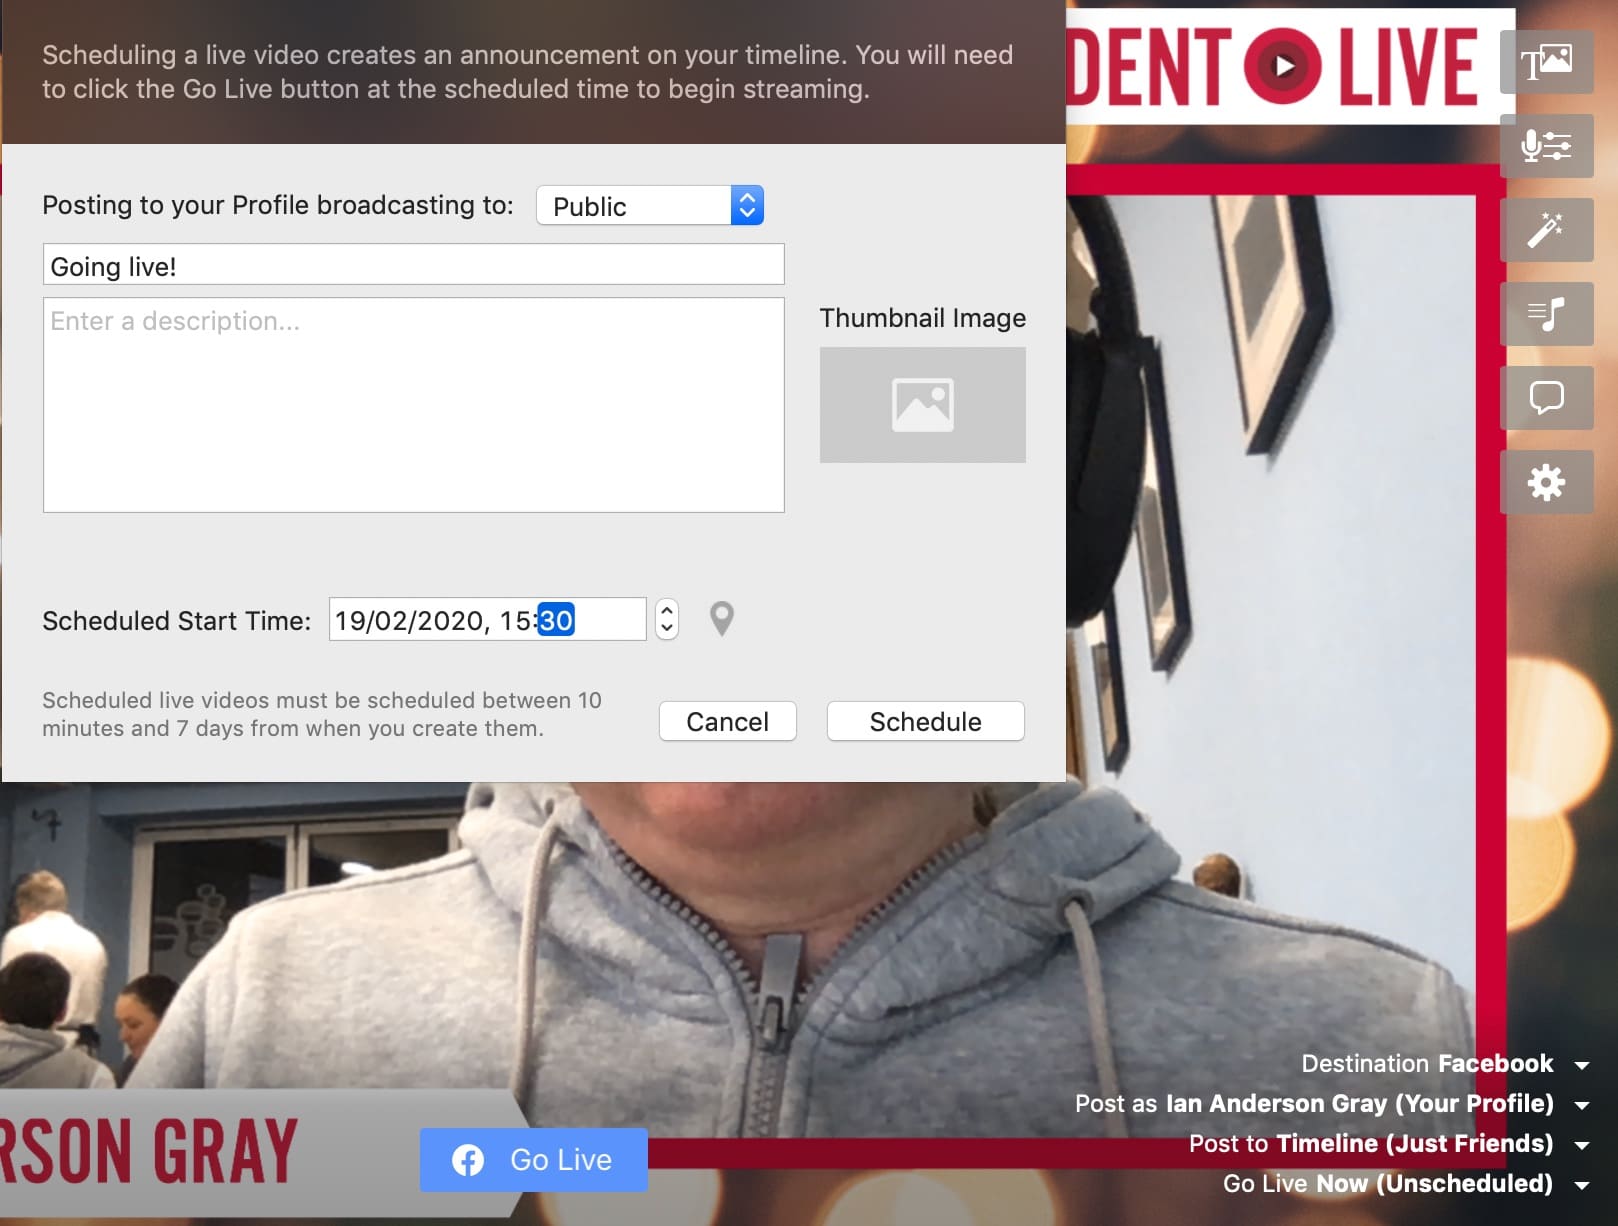
Most live video platforms such as Facebook & YouTube Live have an API (Application Programming Interface). This allows a tool to connect to the live video platform. Basically, they can talk to each other. This means the live video tool can schedule, edit and delete the live video post and potentially retrieve live comments. This makes it much easier for you to control your live videos from a tool.
Going Native

Some live video platforms allow you to go live directly from their app. That means you don’t have to use a separate live video tool and you can broadcast from their mobile app or web app.
Facebook, for example, lets you broadcast live from their web app or mobile app. The web app allows you to use your webcam and microphone or you can share your screen. You can’t do both or switch partway through - you need to make that choice at the start.
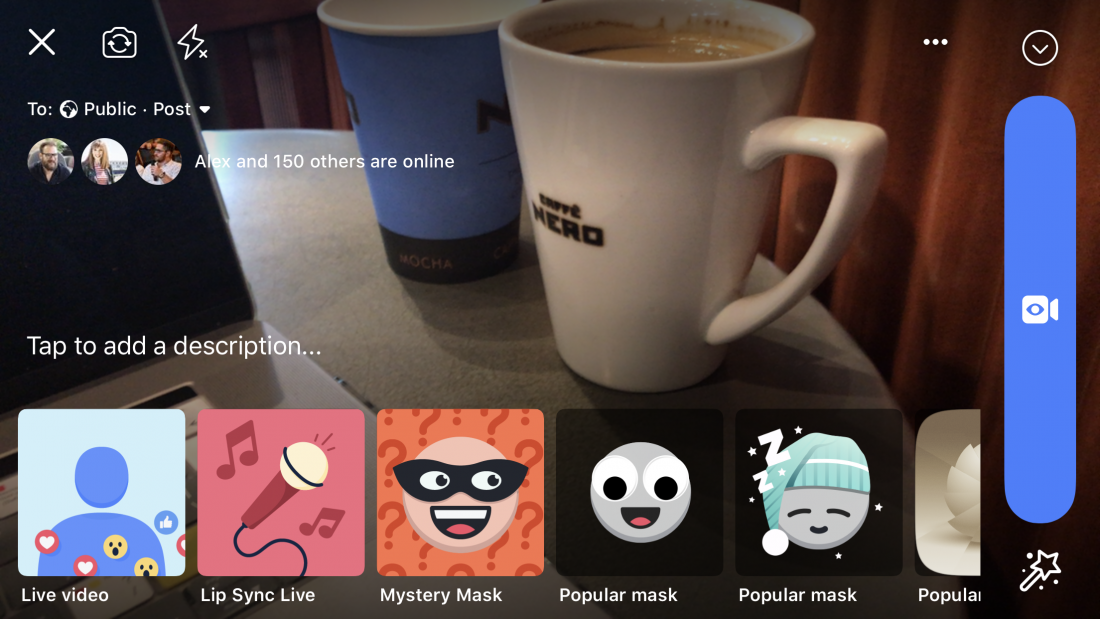
Facebook’s mobile app is pretty powerful, but it will depend on whether you are using iOS or Android, and what features Facebook has given you. Some features include adding special filters and effects, flipping your image, flipping which camera you use and more.
YouTube has a similar facility. Everyone can stream from their computer using their webcam, but only people with over 1,000 subscribers will be able to broadcast live from the YouTube mobile app.
Broadcasting Live from your Phone
Advantages
Disadvantages
A dedicated live video tool will allow you to make your live videos look more professional, schedule your live videos, highlight comments, bring in remote guests and more.
The 8 Categories of Live Streaming Tools
Not all live video tools are the same. We’ve covered the native web and mobile apps. But there are other types of different live streaming tools are there.
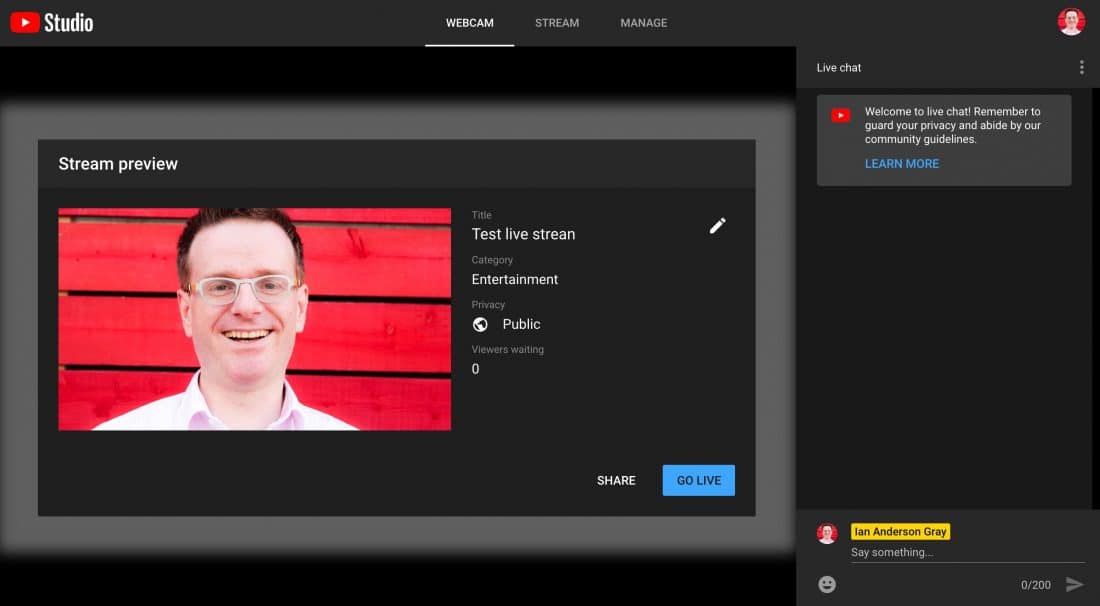
#1 Native Mobile Apps
Facebook, YouTube, Periscope, Instagram, and Twitch all have smartphone apps with in-built live streaming. LinkedIn doesn’t have in-built live streaming yet.
#2 Native Web Apps
Facebook, YouTube, and Twitch all allow you to stream live via the web through their websites. Instagram is mobile-only, so you can’t stream from your computer. LinkedIn doesn’t have built-in live streaming via their website yet - you’ll need to use a 3rd party tool.
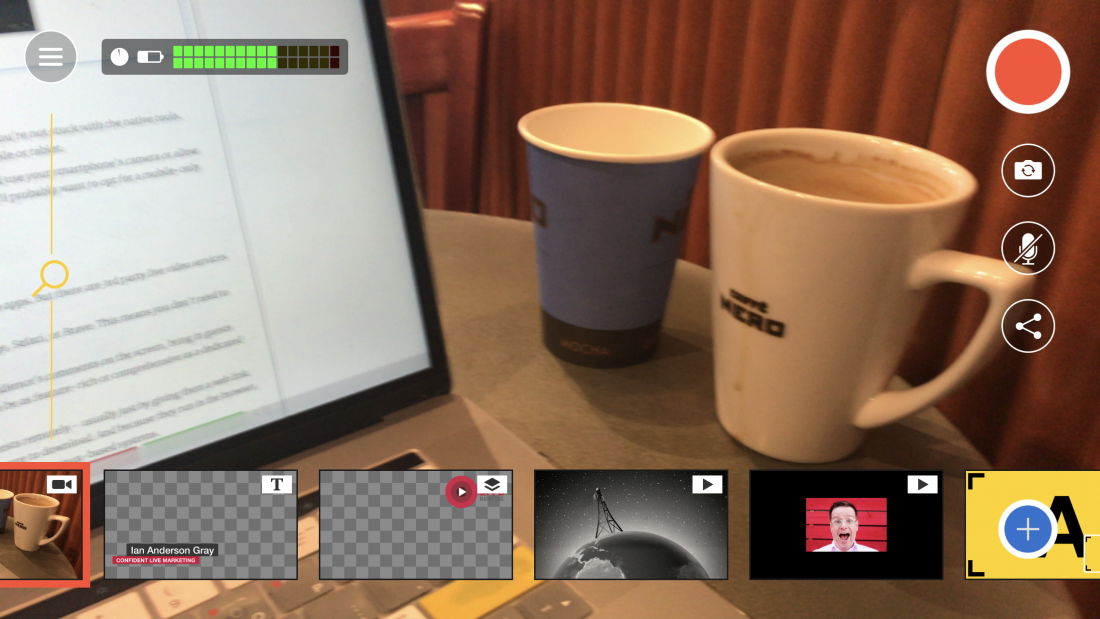
#3 Third-Party Mobile-only Apps
If you want to broadcast from your smartphone or create a mobile live video studio, you’re not stuck with the native tools. Some services such as Switcher Studio are specifically designed to work on your mobile or tablet.
Of course, some other types of tools allow you to broadcast from your computer and use your smartphone’s camera or allow you to share your phone’s screen. But if you want a truly mobile solution then you’ll probably want to opt for a mobile-only live video tool.
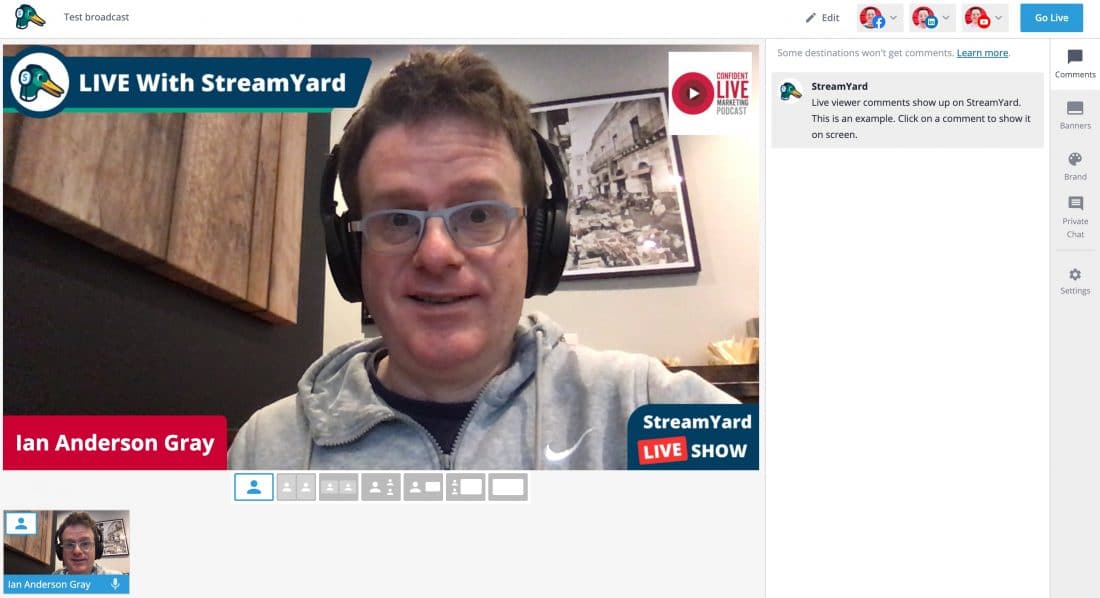
#4 Third-Party Web Apps (through browser)
I mentioned that you can stream to Facebook and YouTube through their web apps. But there are 3rd party live video services that are web apps too.
Web apps run through your browser - whether that’s Chrome, Firefox, Edge, Safari, or Brave. This means you don’t need to download any software, and they tend to be easy to use as a result.
Many of them are pretty feature-rich - allowing you to highlight your audience's comments on the screen, bring in guests remotely and even saving your video for later. But they’re never going to be as feature-rich or comprehensive as a dedicated live video tool.
One big advantage of these tools is the easy way you can bring in guests remotely - usually just by giving them a web link. They’ll be able to come in using their web browser, with no extra software to download. And because they run in the browser, they’re cross-platform meaning they’ll work on PCs, Mac, Chromebooks, and Linux-based systems.
Examples include Restream Studio, StreamYard, BeLive and Lightstream.
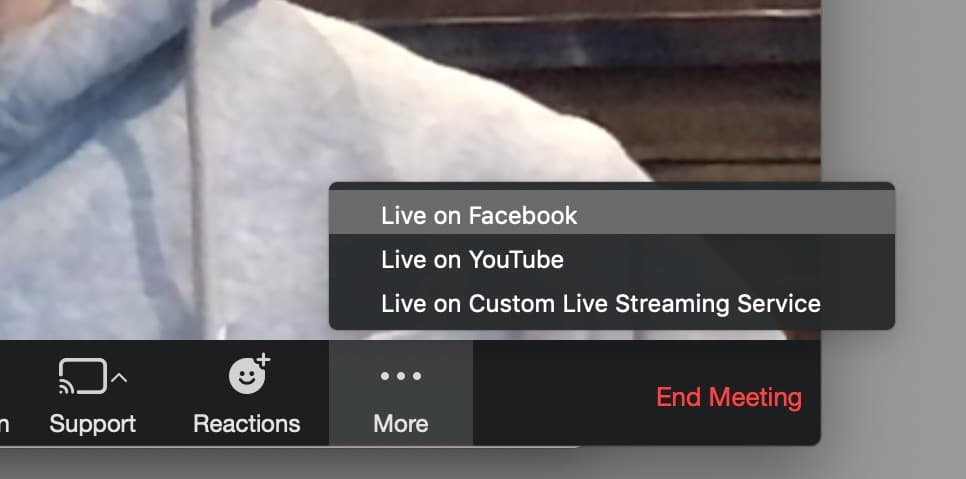
#5 Video Conferencing & Webinar Tools
There are lots of video conferencing and webinar tools out there such as Crowdcast and Zoom that also have live-streaming built-in. Video conferencing tools are designed for virtual meetings. Webinar tools are designed for, well, webinars! If you want to live stream your virtual meeting (or webinar) to Facebook, YouTube or other destination, it’s fairly easy to set this up through many of these tools.
Because these tools don’t primarily focus on live streaming, the live video element can be fairly basic. Most of the tools will add their brand as a watermark, and you won’t be able to change the layout, add your own branding, highlight comments and that kind of thing. But for simple broadcasts, they’re fine.
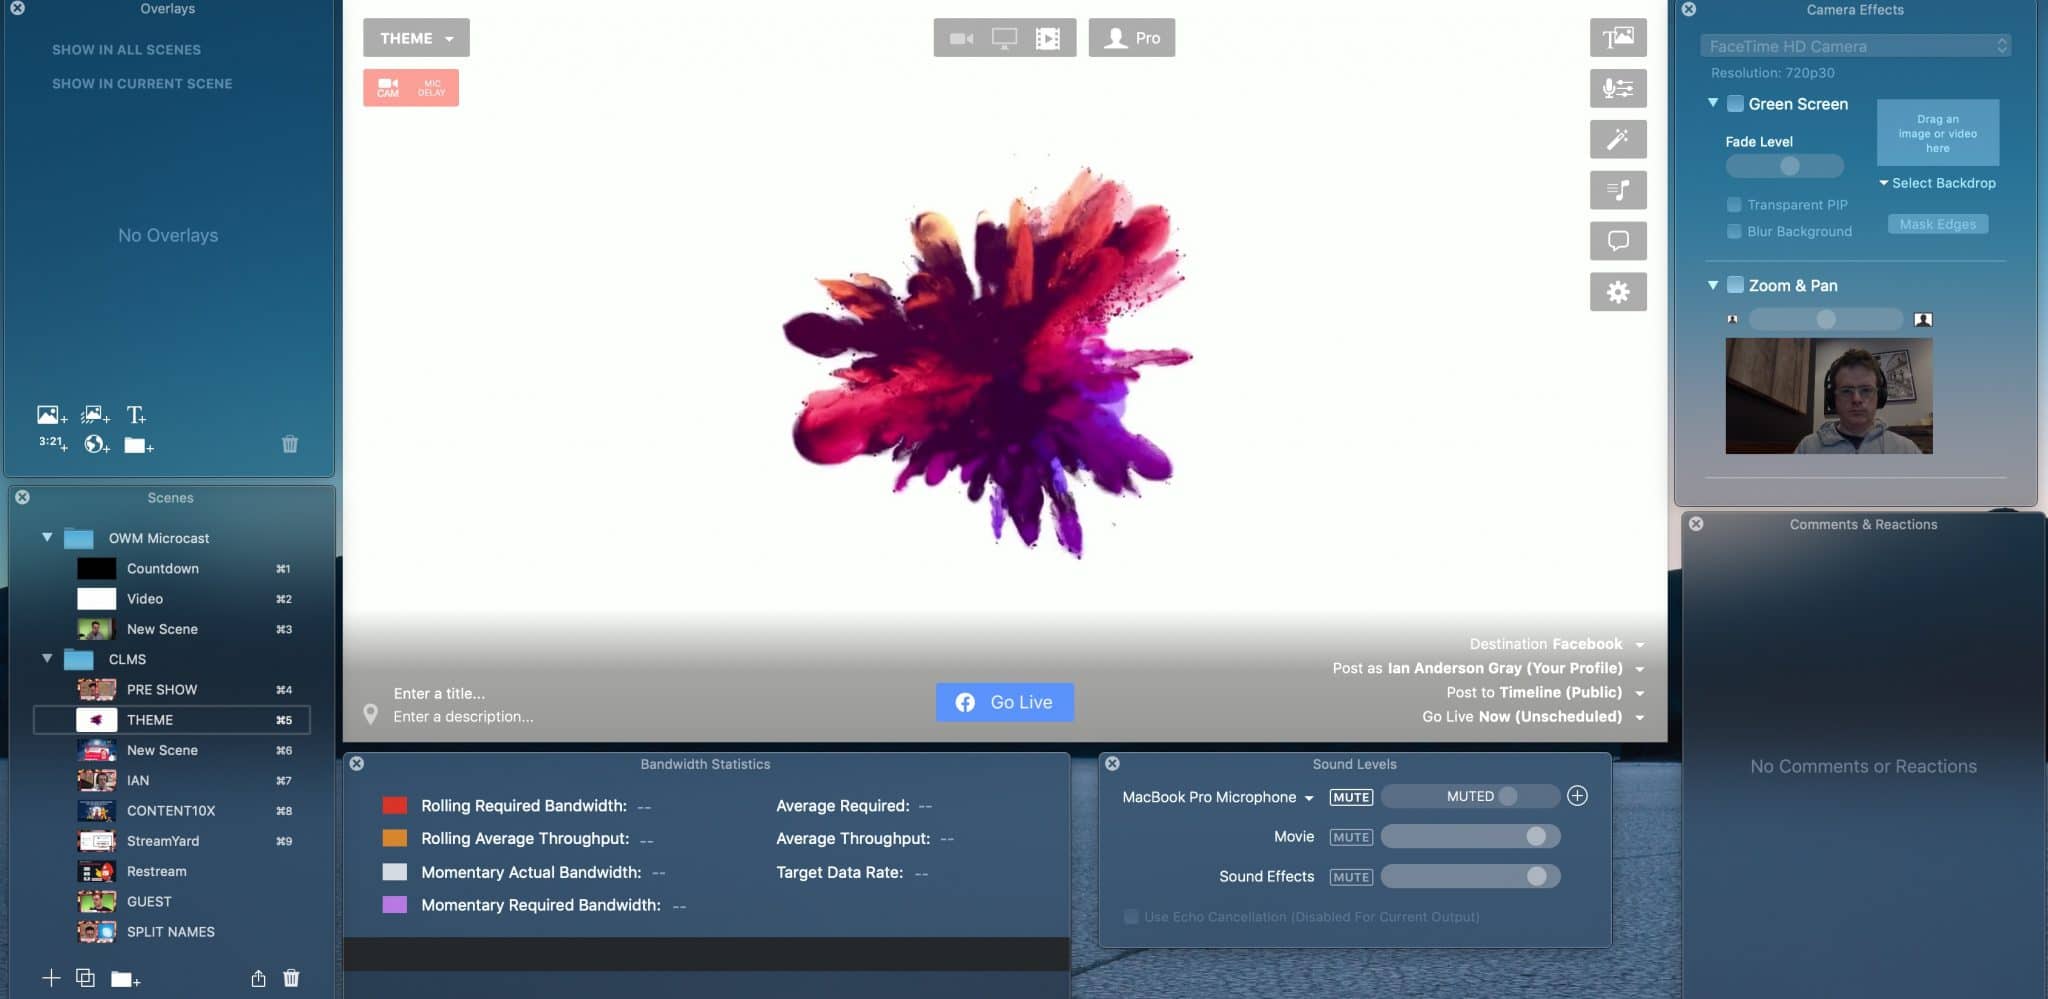
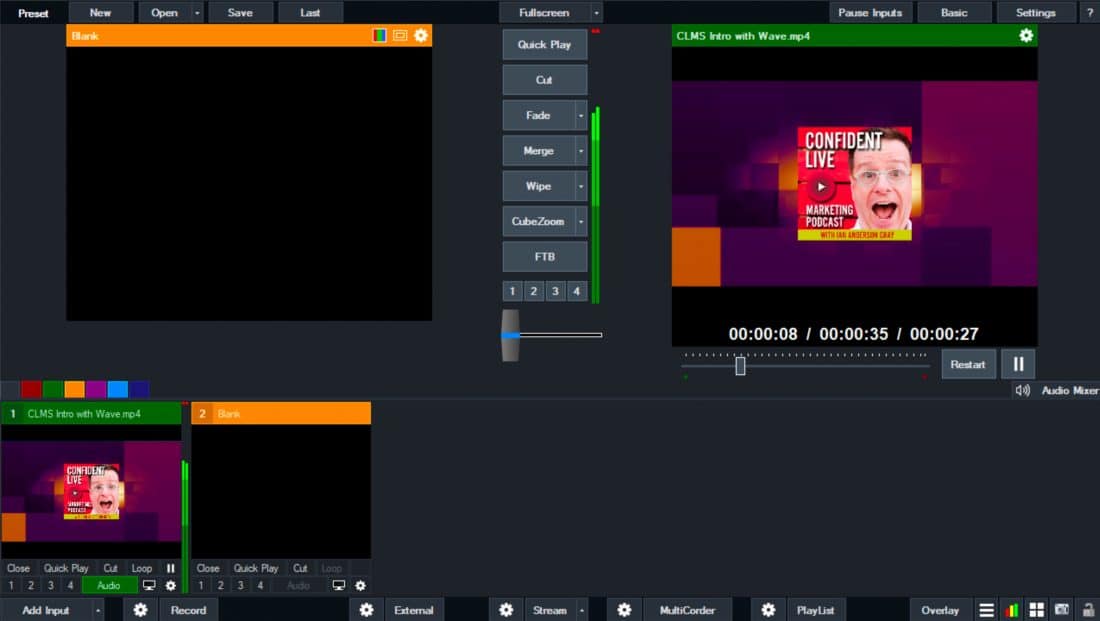
#6 Dedicated Desktop Apps
If you want to level things up and create a more professional broadcast, then you’ll want a dedicated app. Dedicated live streaming tools need to be downloaded and installed onto your computer. Some are cross-platform (usually Mac and PC) and some are PC or Mac-only.
Cross-platform apps are great in that they will work on both your Mac and PC. But dedicated apps (such as Ecamm Live for Mac and vMix for PCs) are focused on getting the best out of the platform they run on.
Dedicated apps often give you much more control over your live streams such as changing your layouts, switching between multiple cameras and microphones, bringing in pre-recorded video and more. Because of the powerful features, you’ll need a more powerful computer.
Some dedicated apps give you the option to save a high-quality version of your live stream, and offer advanced features like green screen. Some allow you to highlight comments on the screen, although some require you to use extra software. Bringing in guests remotely often will require to use extra software and can be a bit more fiddly. But dedicated live video apps allow you to do so much more than other kinds of tools.
#7 Restreaming Services
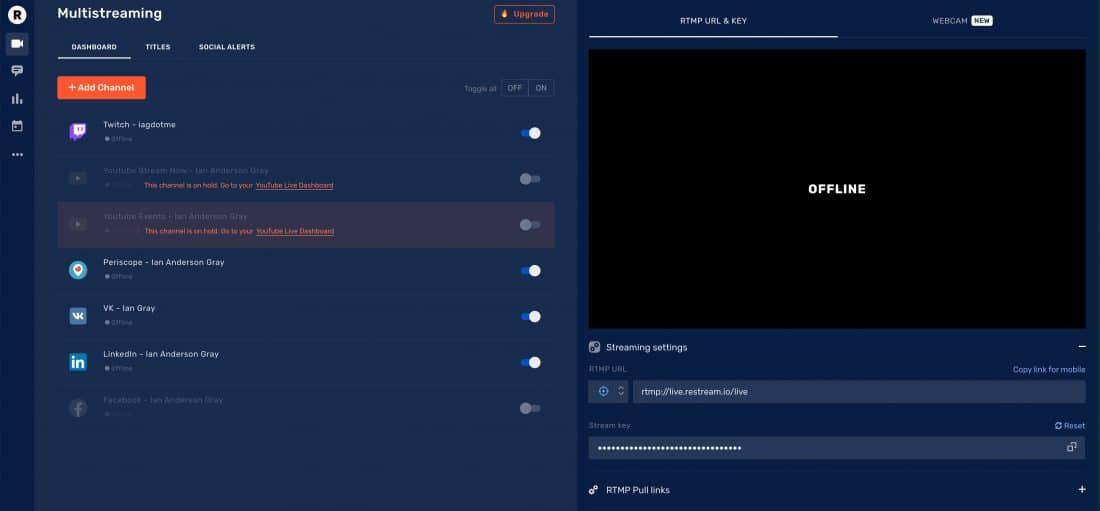
Most live video streaming tools will only allow you to stream to one platform. So, you'll need to choose whether you are going to broadcast to either Facebook Live or YouTube Live. But, some allow you to stream to more than one platform simultaneously. Examples include Restream Studio, Wirecast, vMix or StreamYard. Some tools will allow you to broadcast to two or more platforms from your computer (such as vMix and Wirecast). You'll need a powerful computer and a beefy internet connection for this. Some tools (such as Restream and StreamYard) do the multistreaming from the cloud - meaning you just need to send one stream, and they'll take care of the rest.
A restreaming or multicasting service will take your stream and broadcast it to many platforms at the same time. The big advantage of this is that you don't need a mega-powerful computer. Also, you can stream to it from another tool such as OBS Studio or Ecamm Live - and that tool doesn't need to have multicasting built-in. Examples of restreaming services include Restream and Switchboard Live.
My friend, Jeff Sieh uses a multicasting service to stream from vMix for all his shows.
#8 Hardware-Based Tools
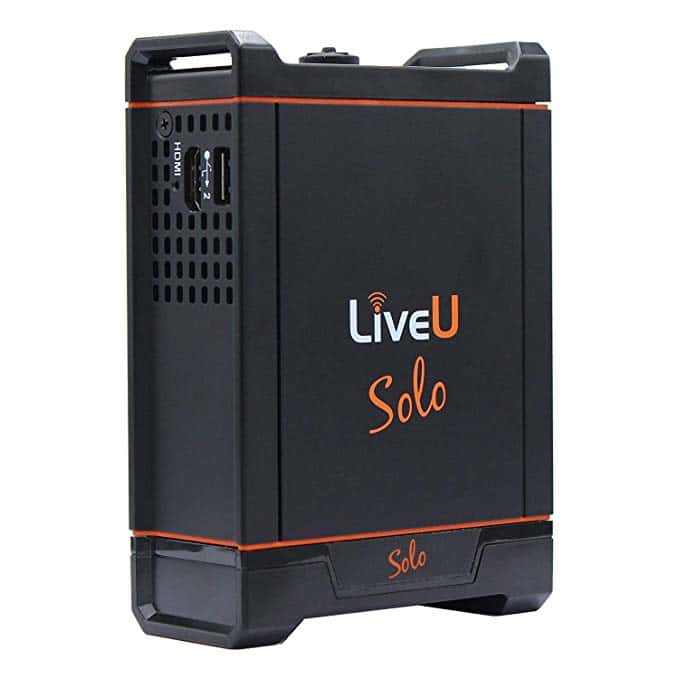
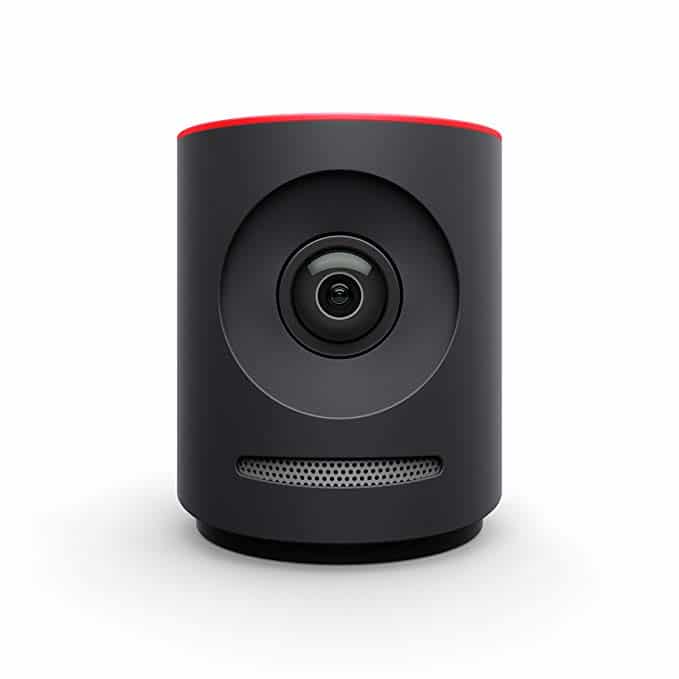
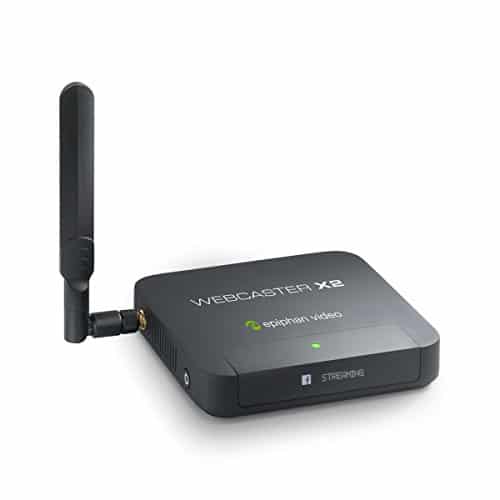
Finally, there are hardware-based tools out there that allow you to create your live video broadcasts. Some of these are mobile such as the LiveU Solo. Some are portable and give you multi-camera switching from one 4K camera such as the Mevo and Mevo Plus. There’s the Epiphan Webcaster X2 which is a streaming box with HDMI and USB inputs. And then we get onto the high end dedicated live streaming boxes. I’m not covering hardware-based tools in this article.
Live Video Tool Priority List
Let's now talk about tools.
How do you choose?
There are so many!
In this article, I am highlighting the most popular ones out there.
All have their pros and cons.
And I hate to break it to you. None of them are perfect. But they all have fantastic features.
When you are choosing the tool for you, it’s important to work out your top priorities. Then you can produce your own live video tool shortlist (keep it to 2-3 tools max).
Then have a play with those 2-3 tools (most have free trials) and see which one you’re most happy with.
I’ve come up with a list to get you started:

Live Video Tool Priority Checklist
-
PC or Mac? Both? Or do you want a fully mobile solution?
There are pros and cons with Macs and PCs. You can build a more powerful PC for much less money - and they tend to be more powerful for live streaming. But Mac live streaming software tends to be easier to use. The easiest tools are web apps that work in the browser and so work on both Macs and PCs. Or maybe you want a fully mobile solution?
-
How easy do you want the software to be? How geeky are you?
Some tools are really easy to use and some have a steep learning curve. Of course, there is a compromise - the easiest to use software often won’t have the same powerful features that the more advanced software has.
-
Which networks do you want to stream to?
Facebook Live? YouTube Live? LinkedIn Live? Periscope? Others? Not all the tools integrate with all the live video platforms. Most will stream to Facebook and YouTube. But only a limited number integrate with LinkedIn Live, for example.
-
Is repurposing important? Do you want to be able to record a high quality version of the stream to use later?
Facebook and YouTube allow you to save the video for later - that’s great for repurposing. But (at least in the case of Facebook) the quality of the downloaded video is very poor. If repurposing is important to you, choose a tool that saves the video in a high quality format at the same time as streaming.
-
Is streaming to more than one network at one time really that important?
Multicasting isn’t for beginners. Being able to broadcast to more than one network at the same time sounds exciting, but it’s much more difficult to engage with more than one audience at the same time. Also, bear in mind that not all tools will allow you to see and highlight the comments from the different networks you are simultaneously streaming to.
-
Do you want to bring in guests onto your show? How many guests?
Some tools allow you to bring in guests on to your show really easily. Some use video conferencing tools like Skype. Some work through the browser. Some don’t have this feature built-in and you’ll need to jump through a few hoops. And then you’ll need to think about how many guests you want to bring in since each tool has their maximum.
-
Viewing & highlighting comments
How important is being able to view comments and highlight them on the screen? One of the most powerful features of live video is being able to interact with your audience, which means that viewing and highlighting comments is going to be important for most people. Not all tools out there allow you to see the comments and highlight them on the live video.
-
Full control over the look and feel?
Do you want full control over the look and feel of the video, or do you want it quick and easy? Some tools give you basic layouts and some allow you to customize just about everything on your video.
-
What’s your budget?
Some tools are free. Some have one-off fees. And some charge a monthly fee. It can vary a lot - from free to thousands of dollars every year. What is your budget for live video marketing?
How to Choose the Perfect Live Video Tool
If you want to dig deeper into finding your perfect live video tool, have a listen to this podcast episode on How to Choose the Perfect Live Video Tool.
The Tools
It’s time to share the top tools with all their features!
StreamYard
Platform: Web app (runs in the browser). Mac & PC. Also iPhones, iPad, Android via web browsers.
What is StreamYard?
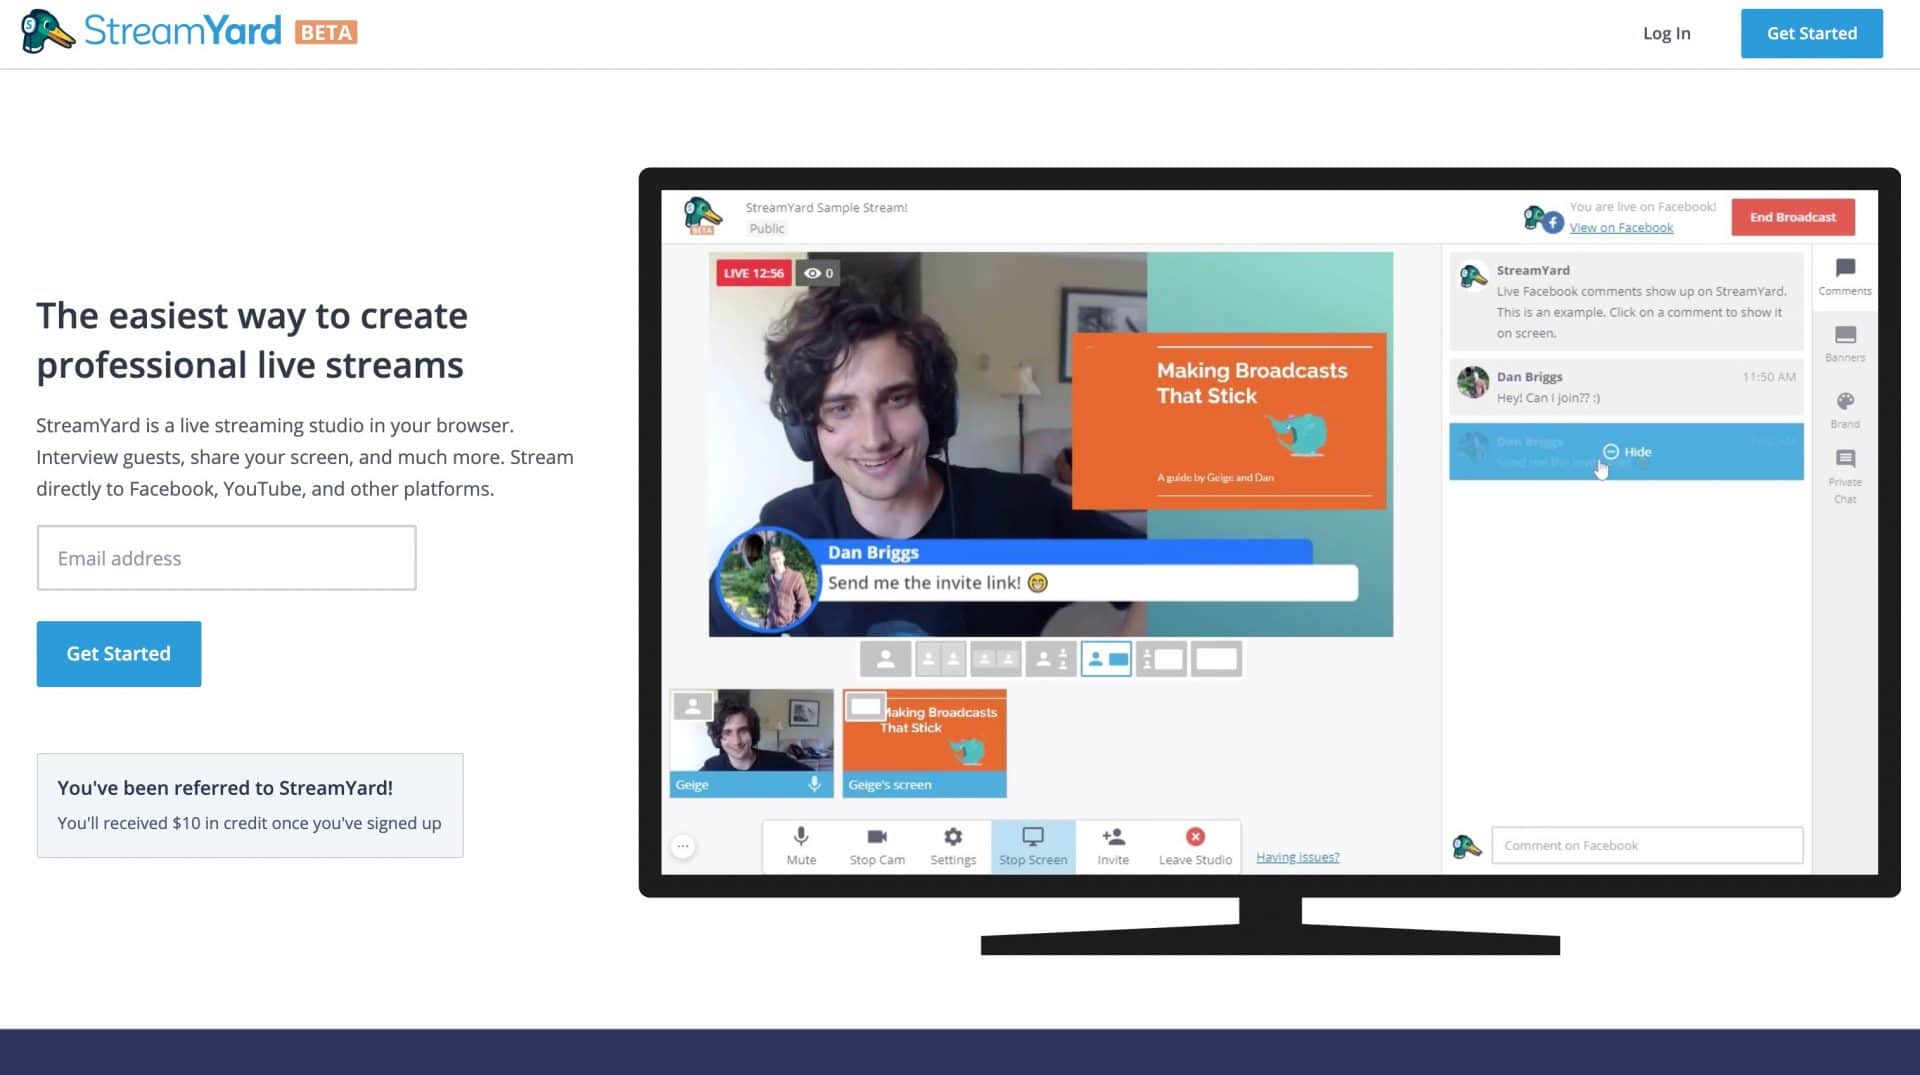
StreamYard was launched in 2018 and is a live streaming tool that works through the browser. It’s really easy to use since it’s a web app and works through your browser. It integrates with all the main platforms including Facebook Live, YouTube Live, Periscope, and one of the only tools in this list to integrate with LinkedIn Live. And it allows you to multicast - broadcast to more than one platform at the same time without requiring a supercomputer! It allows you to have up to 9 guests on your show and you can highlight comments on the screen.
Listen to episode 24 of the Confident Live Marketing Podcast, where I interviewed one of the co-founders of StreamYard, Geige Vandentop.
Pricing
StreamYard has 3 plans - Free, Basic, and Professional.
The Free plan is very generous. You do have to put up with a StreamYard watermark on the top right of your live streams though and has a limit of 20 hours of streaming per month. But you do get up to 9 remote guests (up to 10 people can be on-screen at one time), screen sharing, green screen functionality, video sharing, on-screen comments, and banners.
The Basic plan removes the StreamYard watermark, gives you unlimited streaming, the ability to add your own branding, recording of up to 4 hours, and multicasting to up to 3 destinations. It costs $25 per month (or the equivalent of $20 per month if you pay yearly).
The Professional plan gives you 8 hours of recording each month and multicasting to up to 8 destinations. It also adds full HD streaming (1080p) although the max resolution you'll get from your webcam is 720p. This costs $49 per month (or the equivalent of $39 per month if you pay yearly).
Pros
StreamYard is really easy to use and works through your web browser. Because of that, it works on both PCs and Macs.
The paid versions have multicasting built-in, meaning you can broadcast to more than one live platform at the same time. Multicasting is so easy to use, and because it’s all done in the cloud, you don’t need a mega-powerful computer to do it. The most amazing feature is that it allows you to view and highlight comments from all the destinations it streams to (except LinkedIn Live). And yes, it does integrate with LinkedIn Live.
The free version has some powerful features like the ability to bring in up to 5 guests, screen sharing (for hosts and guests) and green screen. Another killer feature is the ability to record high-quality versions of your live streams (available in the paid versions).
Cons
StreamYard is focused on making live streaming easy. So it doesn’t have the same level of customization as some other tools in this list. There are limitations in the different layouts on offer and the kinds of layers. One issue used to be that you couldn't stream in 1080p. But it's now available on the professional plan. Like other web apps, you can’t create different scenes ahead of time.
My thoughts
I am excited about StreamYard as it has so many great features. The ability to stream to more than one platform, bringing in comments from those different platforms, and recording your stream is a killer combination. StreamYard is also about simplicity, so it’s never going to have the same level of customization as Ecamm Live, Wirecast, or vMix. I would love the ability to create scenes with multiple layers. But since it’s a web app, you can produce the show in another app, and bring that into StreamYard, which will handle the live streaming and the comments. I love it!
StreamYard Features Summary
Video Features
- Preview & Live Windows: no
- Live Video Resolution: 720p (free and basic plans) or 1080p (professional plan)
- Aspect Ratio: widescreen - 16:9 only
- Ability to Record Live Video: yes. The first 6 hours of each broadcast is saved in the basic plan, and the first 10 hours of each broadcast is saved in the professional plan. You get 50Gb of storage and each broadcast is stored indefinitely.
- Green Screen / Chroma Key: yes (host and guests)
- Green screen mask edges: no
- Fading controls: yes
- Bluescreen: yes
- Video background supported: no
- Screenshare: yes (on all plans) - share desktop, application window or Chrome tab. Guests can share their screen on all plans including free.
- Capturing Desktop Audio: no (but audio can be captured from a Chrome tab).
- Picture in Picture: Sort of. With screen sharing, StreamYard has a layout that displays your screen and you and your guests as smaller videos on the left.
- Ability to Stream and Record at the Same Time: yes
- ISO Recording: no
- Instant Replay: no
- Live Captions: no
- Stereo Audio: no (mono only)
- Automatic Echo Cancellation: host and guest audio
Live Video Platforms
- Facebook Live YouTube Live LinkedIn Live Periscope Twitch RTMP
Live Video Platform Specific Features
- Facebook Page Crossposting: no
- Facebook Branded Content: no
- Facebook Destinations: profile timeline, pages, groups
- Facebook Privacy: public only
- Set Place/Location on Facebook Page: no
- 360 Facebook Live Streams: no
- YouTube Destinations: events only
- YouTube Privacy: Public, unlisted, private
- Ability to Add, Edit and Delete Scheduled Live Videos: yes
- Ability to View Scheduled Live Video Broadcasts that Have Been Created With Another Tool and Stream to Them: no
Multicasting
- Multicasting: yes (up to 3 on basic plan and up to 8 on pro plan)
Comments
- Highlighting Comments: yes (including LinkedIn Live)
- Ability to post comments: yes (Facebook, YouTube, Periscope)
- Integrates with Restream.io comments: no
Layers & Scenes
- Multiple Layers: One of each type
- Overlays: logo (fixed to top right), image/video overlay, background image
- Overlay Control: full screen - no options to crop, resize or adjust
- Multiple Scenes: no, but StreamYard offers a selection of pre-built layouts. You can switch off/on overlays and text options.
- Layouts: yes (fixed layouts - solo, grid, split, picture in picture)
- Add Audio/Music: no - video only
- Play Pre-recorded Videos: yes - overlay can be a video. Up to 10 minutes, 200Mb max.
- Play Locally-stored Videos: yes (no limit)
- Text: Banners and comments can be added. There are two styles and you can set your brand colour. No option for font, size or scrolling effects
- PDF overlays: no
- Shortcut Keys: no
- Stream Deck Integration: no
- Remote Production: yes - directly through the web interface
- Scene Transitions: no (the default is a slide between layouts which can’t be altered)
- Automatic End Fade to Black: no
- Camera Picture Adjustment: no
- Camera Digital Zoom and Pan: no
Inputs/Outputs
- Multiple Webcams: no
- Multiple microphones: no
- Web Widgets: no
- NDI: no
- Virtual Webcam: no. But since the guest sees the live stream on their view, this is not required.
- Virtual Audio: not applicable
- Direct USB Connection for dSLR Cameras: no
- USB Tablet and Phone Screen Capture: no
- Blackmagic Support: no
- Video and Audio Monitoring/Mixer: no
Remote Guests
- Ability to Bring in Guests: yes. Built-in web interface.
- Number of Guests: 5 plus host (on free plan), 9 guests plus host (on paid plans)
- Guests Layout: StreamYard has a number layouts - single screen, split screen, gallery layout, screenshare layout, picture in picture (host and guests)
- Guest View: Guest can view the live stream, view private chat and the live comments
- Guest Greenroom: yes
- Private Chat for Guests: yes
About
- Founders: Geige Vandentrop & Dan Briggs
- Founded: 2018
Ecamm Live
Platform: Dedicated app. Mac only (guests use Skype via Macs, PCs, Android, iOS)
What is Ecamm Live?
Ecamm Live is a dedicated live streaming video app for Macs only. It’s incredibly cost-effective, especially when you consider all the features it has. Ecamm Live is easy to use and integrates with Facebook Live, YouTube Live, LinkedIn Live, Periscope, Twitch, Restream, Switchboard Live, and RTMP.
Listen to episode 18 of the Confident Live Marketing Podcast, where I interviewed Glen and Ken Aspeslagh - the co-founders of Ecamm Live.
Pricing
There are two subscription levels - Standard and Pro.
Standard is $20 per month (the equivalent of $16 per month if paying yearly) and Pro is $40 per month (the equivalent of $32 per month if paying yearly).
The Standard plan has everything you need to get started and will be fine for most people, but the Pro plan does give you some really cool features including 4K streaming, virtual webcam, widget overlays, live video monitoring to any display, audio monitor output, Facebook page crossposting, and more.
Ecamm Live has a free 14-day trial that allows you to try all of the features (including Pro-level features) with very few limitations. There is an Ecamm Live watermark during the trial.
Pros
Because Ecamm Live was developed solely for Mac and the founders and developers know the Mac ecosystem inside out, it’s the most streamlined and powerful live-streaming app for Mac I’ve tried. I’ve used other apps where my Mac’s fans have made it sound like my computer is about to lift off into space! But with Ecamm Live, it’s a breeze.
It allows you to bring in guests via the web using Interview mode really easily. You can highlight comments on your screen from Facebook Live, YouTube Live, LinkedIn Live, Periscope, and Twitch. And it even integrates with the Restream Chat API - meaning you can highlight comments from all the networks you are multicasting. You can record the video in a high-quality format, too - and the quality is top-notch. You can add countdown timers and have full control over the look and feel of the text. You can bring in pre-recorded video and the scene and layer management are really powerful. It’s so easy to create shows ahead of time, and you can even export and import your shows as templates. The Stream Deck plugin is pretty awesome, too.
Ecamm has some very advanced features. For example, the green screen feature is the best I’ve seen. It was built from the ground up and is of amazing quality. There’s a cool feature called “mask edges” for green screen that I’ve not seen elsewhere. If your green screen isn’t wide enough, Ecamm Live just extends your virtual background as if the green screen was there. It also supports video backgrounds too.
Ecamm Live has the ability to stream in different aspect ratios (widescreen, super-widescreen, square, and portrait), Facebook crossposting, 360 videos, continuous Facebook Live streams, virtual webcams, NDI, and more. But it’s the attention to detail and the intuitive user interface I love.
If you have a Canon DSLR or a supported camera like the Canon M50, you can plug it directly into your Mac via USB and Ecamm Live will use it without any extra hardware or software. This is a massive feature!
Finally, I’ve been really impressed with Ecamm Live’s customer service. Whenever I’ve had issues, I’ve had replies back really quickly. They also have a really helpful and active Facebook community that you can join for free.
Cons
If you’re a PC user, you’re out of luck. Ecamm is Mac-only.
Standard plan users have to rely upon Skype to bring in guests, but pro users can use Interview mode.
You can't change the transparency or rotate any layers in Ecamm Live, but this is unlikely to be an issue unless you're a very advanced user.
My thoughts
Without doubt, Ecamm Live is my favorite and top recommended live video streaming tool for Mac. It offers that sweet spot between power and ease of use. It’s been lovingly designed to get the most power out of Mac computers (which aren’t always the most powerful for live video streaming).
I’d love Ecamm Live to make it easier to bring in guests through the web, and to offer multicasting. But I am nitpicking!
Ecamm Live Features Summary
Video Features
- Preview & Live Windows: yes
- Live Video Resolution: 4K (maximum)
- Aspect Ratio: widescreen (16:9), super widescreen (2:1), portrait (9:16) & square (1:1)
- Ability to Record Live Video: yes (unlimited length)
- Green Screen / Chroma Key: yes (host and guests)
- Green screen mask edges: yes
- Fading controls: yes
- Bluescreen: yes
- Video background supported: yes
- Screenshare: yes (host and guests)
- Capturing Desktop Audio: yes
- Picture in Picture: yes. You can crop to rectangle, square and circle shapes and take out background with green screen.
- Ability to Stream and Record at the Same Time: yes (unlimited)
- ISO Recording: audio only
- Instant Replay: no
- Live Captions: no
- Stereo Audio: Yes
- Automatic Echo Cancellation: System audio, movie playback, and guests
Live Video Platforms
- Facebook Live YouTube Live LinkedIn Live Periscope Twitch RTMP Restream.io
Live Video Platform Specific Features
- Facebook Page Crossposting: yes
- Facebook Branded Content: yes
- Facebook Destinations: profile timeline, pages, groups
- Facebook Privacy: public, friends, only me
- Set Place/Location on Facebook Page: no
- 360 Facebook Live Streams: yes
- YouTube Destinations: Stream Now and Events
- YouTube Privacy: Public, unlisted, private
- Ability to Add, Edit and Delete Scheduled Live Videos: yes
- Ability to View Scheduled Live Video Broadcasts that Have Been Created With Another Tool and Stream to Them: yes
Multicasting
- Multicasting: no (unless you use Restream or Switchboard Live integration, or RTMP to a multicasting platform)
Comments
- Highlighting Comments: yes. But not when streaming via RTMP.
- Ability to post comments: yes (Facebook, YouTube, Periscope, Twitch)
- Integrates with Restream.io comments: yes
- Ability to favorite comments: yes
Layers & Scenes
- Multiple Layers: yes - unlimited layers of all types.
- Overlays: text, images/GIFs, videos, countdown timers, PDFs, and web widgets
- Overlay Control: image, video, and web widget overlays can be resized and cropped. Text and countdown timers are fully customizable - allowing you to select the font, size, colour and text effects.
- Layouts: yes (fixed layouts - solo, grid, split, picture in picture, up to 9 camera grid)
- Multiple Scenes: yes. You can create unlimited scenes and organize them in folders
- Add Audio/Music: yes
- Add Video: yes. No limits. Video can be set to loop, stop or go onto the next scene once it has finished.
- Text: Text and comments can be added. You can set the background color, font color, size, font type, shadow, etc. No scrolling effects.
- PDF overlays: yes (including full screen)
- Shortcut Keys: yes
- Stream Deck Integration: yes (via plugin)
- Remote Production: The producer needs to run the tool on their computer
- Scene Transitions: yes (cross-dissolve, white flash, swipe, cross zoom, light rays, ripple, copy machine)
- Automatic End Fade to Black: yes
- Camera Picture Adjustment: yes (brightness, temperature, tint, saturation, gamma, manual focus, color grading LUT [pro only], mirror, deinterlace)
- Camera Digital Zoom and Pan: yes
Inputs/Outputs
- Multiple cameras: yes
- Multiple microphones: yes
- Web Widgets: yes
- NDI: yes (input and output - NDI inputs just show up as cams automatically)
- Virtual Webcam: yes
- Virtual Audio: no (but possible with 3rd party software such as Loopback)
- Direct USB Connection for dSLR Cameras: yes
- USB Tablet and Phone Screen Capture: yes
- Blackmagic Support: yes
- Video and Audio Monitoring/Mixer: yes
Remote Guests
- Ability to Bring in Guests: yes via interview mode.
- Number of Guests: 5 plus host (via Skype)
- Guests Layout: Split screen (for 2 and 3 cameras), grid (for up to 9 cameras), picture in picture (for host and guests)
- Guest View: With the virtual webcam, you can switch your webcam in Skype to the video of the live stream
- Guest Greenroom: no
- Private Chat for Guests: no
About
- Founders: Ken Aspeslagh & Glen Aspeslagh
- Launched: April 2017
Use the code IAGFREE to get 1 month free
Restream Studio
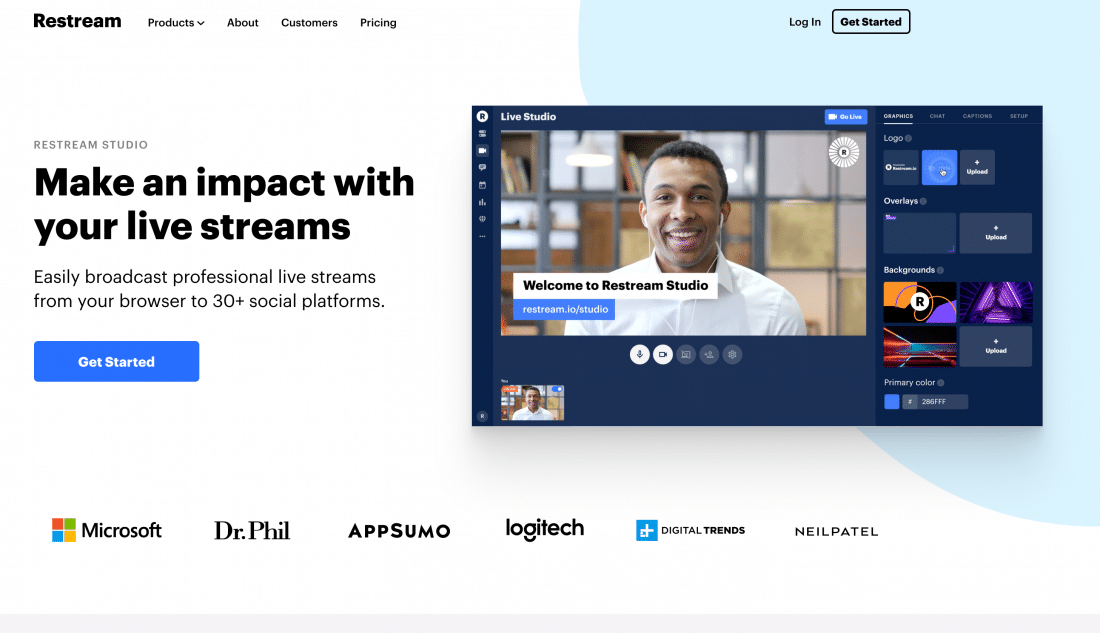
Platform: Web app (runs in the browser). Mac & PC.
What is Restream Studio?
Restream officially launched in 2015 as a multistreaming tool. Today it allows live broadcasts to multicast to 30 destinations and has an integrated chat tool (for comments), scheduler and analytics tool. In 2020, Restream launched a browser-based live streaming studio called Restream Studio. As well as allowing you to multicast to 30 destinations with integrated comments for many of those, you can have up to 10 people on screen, add overlays, graphics and more.
Please note, in this section, I am referring to Restream Studio, which is the browser live video tool part of Restream. You can also use third-party tools (such as Ecamm Live, OBS Studio, Wirecast and vMix) to stream to Restream which in turn will multistream to all your channels.
Listen to episode 50 of the Confident Live Marketing Podcast, where I interviewed the Head of Marketing at Restream, Victor Bous.
Pricing
Restream has 5 plans - Free, Standard and Professional (for individuals) and Premium and Business (for companies)
All plans give you the ability to stream to over 30 destinations, Restream Studio, comments, screen sharing, guests and analytics. The free plan has a limit of 6 people on screen for Restream Studio.
Also, note that Restream adds their own watermark to Studio, and appends "multistreaming with Restream.io." to live video descriptions for the free and standard plans. But you can remove this from the Professional ($49 per month) plan upwards. The professional plan and above, also give you full HD (1080p) in Studio, custom graphical overlays and more.
Pros
Restream Studio is quite a new web-based streaming tool, but it's still feature-packed. You can have up to 9 guests (10 including yourself) on your show at one time. And the ability to multicast to up to 30 destinations is amazing. Even more amazing is the ability to monitor and highlight the comments from the destinations that support them (for example LinkedIn Live, Facebook Live, YouTube, Periscope, Twitch, Mixer, DLive, VK and more).
You can create scheduled live videos with its events feature. This supports LinkedIn Live, YouTube Live and Facebook Live scheduling. It's the only web-based live video tool that supports stereo sound and playing a local video as source. There are more and more features coming, and I've been impressed with how quickly new features are being rolled out.
Cons
Restream Studio is still new, so there are still a few things lacking. But they've added so many new features recently. At the moment the number of layouts is fairly limited and there's no option for green screens.
Restream adds a watermark and branding to your broadcasts on the free and basic paid plans too. If you want to remove that, you'll need to upgrade to the Professional plan, which is more expensive.
My thoughts
I really love what Restream are doing with Restream Studio and it's quickly becoming the most powerful browser-based live video tool. And the way you can use other live video software with Restream is incredible. The multistreaming and chat features are invaluable, and the ability to bring in so many guests is powerful. If you want to remove the Restream branding, it's more expensive than other tools, but you get a lot for your money.
Restream Studio Features Summary
Video Features
- Preview & Live Windows: no
- Live Video Resolution: 1080p
- Aspect Ratio: widescreen - 16:9 only
- Ability to Record Live Video: yes (paid plans only. Standard & Professional - stored up to 15 days. Premium & Business Stored up to 30 Days)
- Green Screen / Chroma Key: yes
- Screenshare: yes (on all plans) - share desktop, application window or Chrome tab. Guests can share their screen on all plans including free.
- Capturing Desktop Audio: no (but audio can be captured from a Chrome tab).
- Picture in Picture: Yes. When switching to solo mode you can have the host or the guest as a picture-in-picture. With screen sharing, Restream Studio has a layout that displays your screen and you and your guests as smaller videos.
- Ability to Stream and Record at the Same Time: yes
- ISO Recording: no
- Instant Replay: no
- Live Captions: no
- Stereo Audio: yes
- Automatic Echo Cancellation: host and guest audio
Live Video Platforms
- Facebook Live YouTube Live LinkedIn Live Periscope Twitch RTMP
- VK Live, DLive, Dailymotion, Trovo, Mixcloud, kakaoTV, Naver TV, Nimo TV, Nonolive, V LIVE, GoodGame, Smashcast, Huya, Zhanqi.tv, Bilibili, AfreecaTV, Mobcrush, Major League Gaming, Douyu, LiveEdu, Vaugn Live, iNSTAGIB, Breakers.TV, Vapers.TV, Picarto, OK.ru, FC2 Live, Steam, TELE2, Wowza, Akamai
Live Video Platform Specific Features
- Facebook Page Crossposting: no
- Facebook Branded Content: no
- Facebook Destinations: profile timeline, pages, groups
- Facebook Privacy: public only
- Set Place/Location on Facebook Page: no
- Ability to create a Facebook Continuous Live Stream: no
- 360 Facebook Live Streams: no
- YouTube Destinations: events only
- YouTube Privacy: Public, unlisted, private
- Ability to Add, Edit and Delete Scheduled Live Videos: yes
- Ability to View Scheduled Live Video Broadcasts that Have Been Created With Another Tool and Stream to Them: no
Multicasting
- Multicasting: yes
Comments
- Highlighting Comments: yes (including LinkedIn Live)
- Ability to post comments: yes (Facebook, YouTube, Periscope, Twitch)
- Integrates with Restream.io comments: yes
- Ability to favorite comments: yes
Layers & Scenes
- Multiple Layers: One of each type
- Overlays: logo (fixed to top right), image/video overlay, background image
- Overlay Control: full screen - no options to crop, resize or adjust
- Multiple Scenes: no, but Restream Studio offers a selection of pre-built layouts. You can switch off/on overlays and text options.
- Layouts: yes (fixed layouts - solo, grid, split, picture in picture)
- Add Audio/Music: no - video only
- Add Video: yes - overlay can be a video. Up to 150Mb max.
- Play a Video Locally: yes
- Text: Banners and comments can be added. You can set your brand colour. No option for font, size or scrolling effects
- PDF overlays: no
- Shortcut Keys: yes (simple shortcuts include for M for mute, V for video, and S for settings)
- Stream Deck Integration: no
- Remote Production: yes - directly through the web interface
- Scene Transitions: Yes. The default is a slide between layouts, but this can be manually switched off.
- Automatic End Fade to Black: no
- Camera Picture Adjustment: no
- Camera Digital Zoom and Pan: no
Inputs/Outputs
- Multiple Webcams: no
- Multiple microphones: no
- Web Widgets: no
- NDI: no
- Virtual Webcam: no. But since the guest sees the live stream on their view, this is not required.
- Virtual Audio: not applicable
- Direct USB Connection for dSLR Cameras: no
- USB Tablet and Phone Screen Capture: no
- Blackmagic Support: no
- Video and Audio Monitoring/Mixer: no
Remote Guests
- Ability to Bring in Guests: yes. Built-in web interface.
- Number of Guests: 9 plus host
- Guests Layout: Restream Studio has a number layouts - single screen, split screen, gallery layout, screenshare layout, picture in picture (host and guests)
- Guest View: Guest can view the live stream, view private chat and the live comments
- Guest Greenroom: yes
- Private Chat for Guests: yes
About
- Founders: Andrew Surzynskyi and Alexander Khuda
- Founded: 2015
Get 1 month free with this link
BeLive
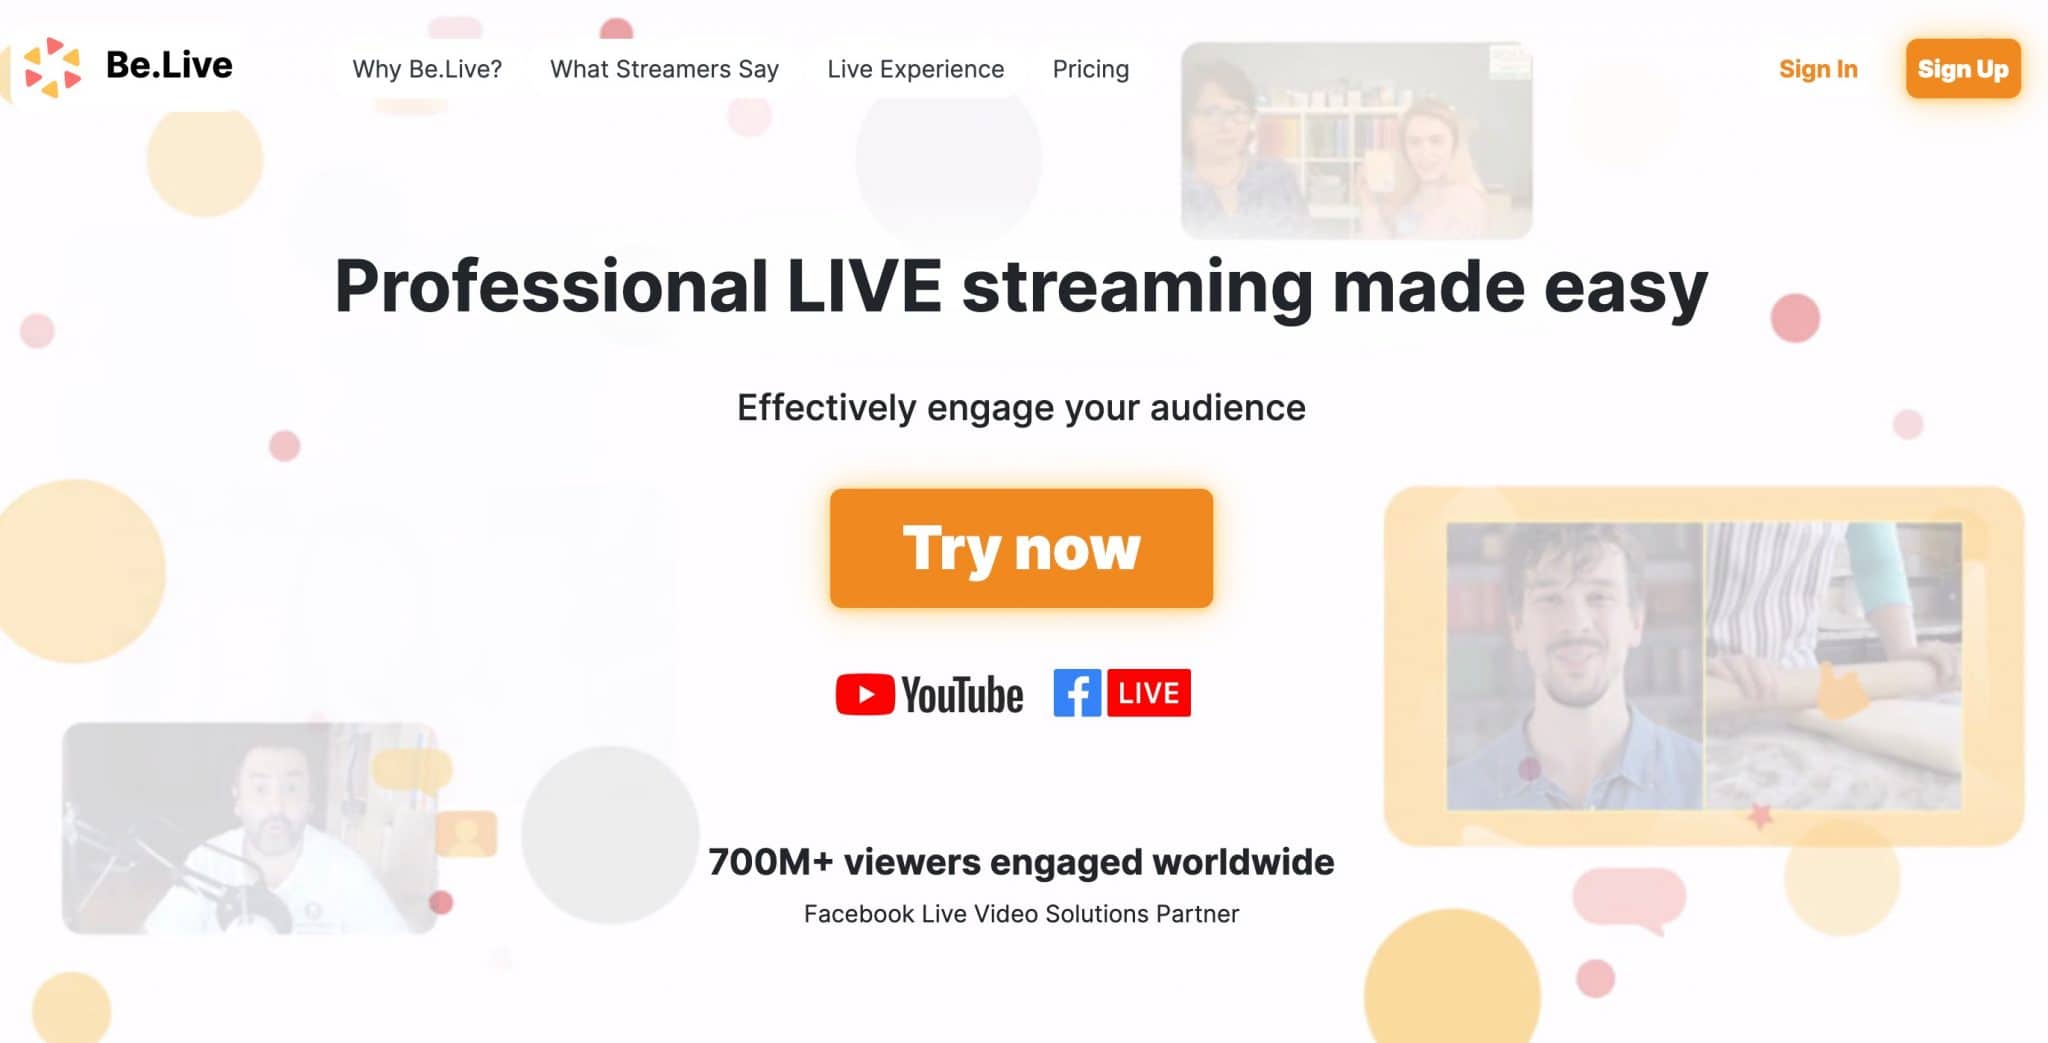
Platform: Web app (runs in the browser). Mac & PC.
What is BeLive?
BeLive really disrupted the Facebook Live space back in 2016 when it launched. It’s a web app and so it is really easy to use through your browser. It was also the first app to allow you to highlight Facebook Live comments on the screen and have multiple guests on the screen. Although it went through a period of slow innovation and a sudden venture with Twitch integration, BeLive has recently launched a new studio interface with loads of cool features. At the moment BeLive only integrates with Facebook Live and YouTube Live, but other networks are coming including the ability to multicast.
BeLive is the only tool with an inbuilt agenda. This is an area in the dashboard where you can add your own show notes. It allows you to use multiple cameras and has fabulous customer service and community.
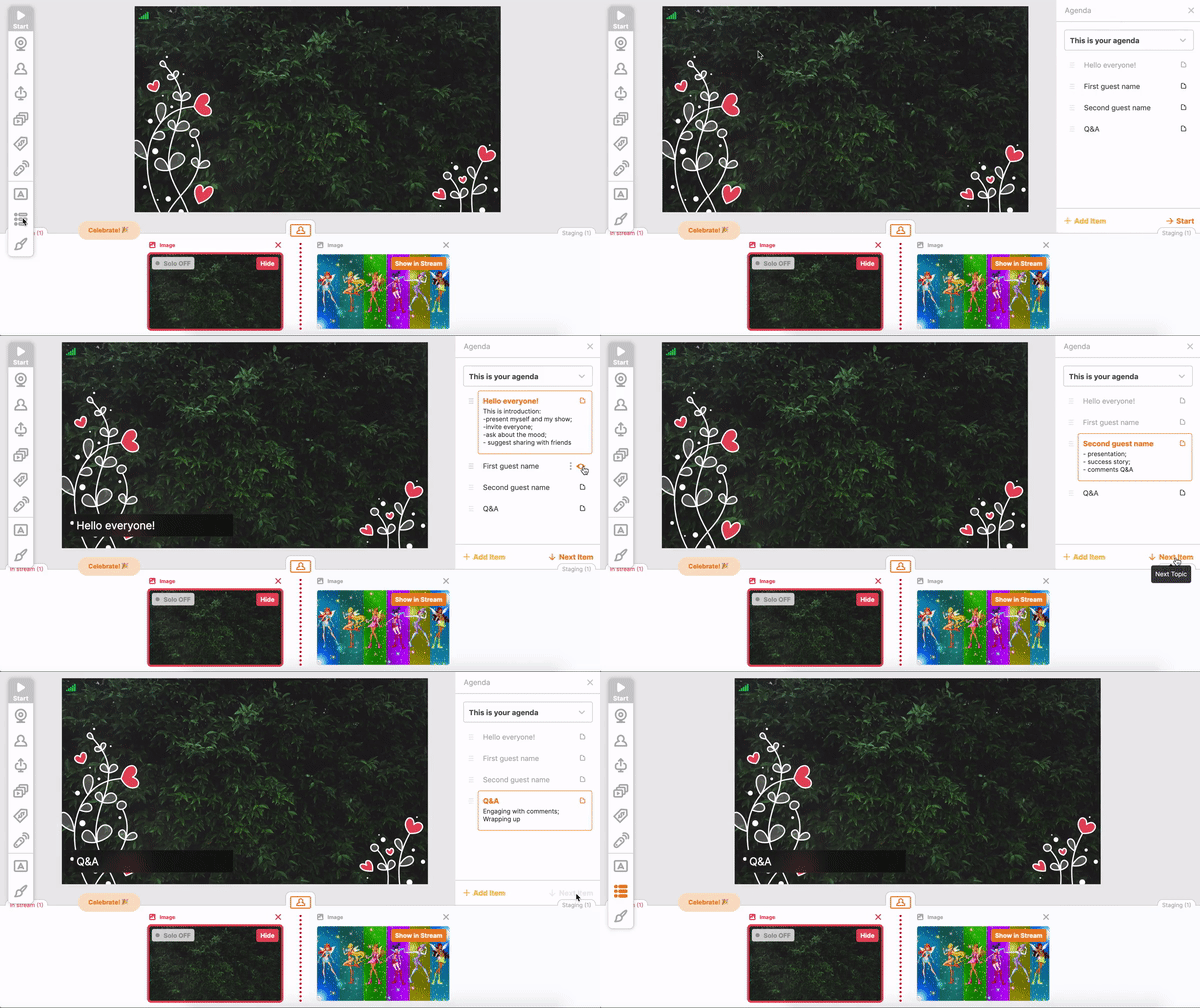
Listen to episode 38 of the Confident Live Marketing Podcast, where I interviewed one of the co-founders of BeLive, Daniel Mayer.
Pricing
BeLive offers 3 monthly plans - Free, Standard+, and Pro.
The Free plan limits you to 3 shows per month and offers up to 1 guest and a simple split screen layout.
The Standard+ plan allows you to stream unlimited shows per month, ability to add your own logo, have up to 3 guests, customize your background, custom overlays, multiple cameras, video sharing, 12 different screen layouts, and high quality recordings of your broadcasts. This costs $29.99 per month (the equivalent of $24.99 per month if paying yearly).
The Pro plan hasn’t been released as I write this article. But it will add an RTMP input, RTMP streaming, and multicasting. It will cost $44.99 per month (or the equivalent of $37.99 per month if paying yearly).
Pros
BeLive was one of the first tools on the scene after Facebook Live was launched. They’ve got a passionate and helpful community and their customer service is amazing. In my experience, tickets are responded to within minutes. It is easy to use and has some really cool features like the ability to create an agenda within the dashboard. It also supports multiple cameras, so you can switch between different camera angles.
Cons
Like StreamYard, BeLive focuses on making live streaming easy. Although there are lots of different types of layouts included, they don’t have the same level of customization of other tools. There’s no multicasting yet, and BeLive only integrates with Facebook Live and YouTube Live.
My thoughts
I loved BeLive when it came out with never seen before features. The community and customer service is amazing, too. I felt they kind of lost their way for a while when they created a separate tool for Twitch. But their new second generation studio is a definite step in the right direction. They are adding multicasting and more platforms soon and it’s still a really easy app to use. For an easy to use live video tool that focuses on engagement, BeLive is definitely worth checking out.
BeLive Features Summary
Video Features
- Preview & Live Windows: no
- Live Video Resolution: 720p maximum
- Aspect Ratio: widescreen - 16:9 only
- Ability to Record Live Video: yes (you’ll need to download from the BeLive dashboard within 30 days after which they are deleted)
- Green Screen / Chroma Key: no
- Screenshare: yes (on all plans) - share desktop, application window or Chrome tab. Guests can share their screen on paid plans
- Capturing Desktop Audio: no (but audio can be captured from a Chrome tab).
- Picture in Picture: Sort of. With screen sharing, BeLive has a layout that displays your screen and you and your guests as smaller videos on the left.
- Ability to Stream and Record at the Same Time: no
- ISO Recording: no
- Instant Replay: no
- Live Captions: no
- Automatic Echo Cancellation: no
Live Video Platforms
- Facebook Live YouTube Live
Live Video Platform Specific Features
- Facebook Page Crossposting: no
- Facebook Branded Content: no
- Facebook Destinations: profile timeline, pages, groups
- Facebook Privacy: public only
- Set Place/Location on Facebook Page: no
- Ability to create a Facebook Continuous Live Stream: no
- 360 Facebook Live Streams: no
- YouTube Destinations: events only
- YouTube Privacy: Public, unlisted, private
- Ability to Add, Edit and Delete Scheduled Live Videos: yes
- Ability to View Scheduled Live Video Broadcasts that Have Been Created With Another Tool and Stream to Them: no
Multicasting
- Multicasting: no
Comments
- Highlighting Comments: yes
- Ability to post comments: yes (Facebook, YouTube)
- Integrates with Restream.io comments: no
Layers & Scenes
- Multiple Layers: One of each type
- Overlays: logo (fixed to top right), image/video overlay, background image
- Overlay Control: full screen - no options to crop, resize or adjust
- Multiple Scenes: no, but BeLive offers a selection of pre-built layouts. You can switch off/on overlays and text options.
- Layouts: yes (fixed layouts - solo, grid, split, picture in picture)
- Add Audio/Music: no - video only
- Add Video: yes (mp4 only, no limit in length, 100 Mb max)
- Text: titles, crawlers and comments can be added. There is one style and you can set your brand and text colour. No option for font, size or scrolling effects
- PDF overlays: no
- Shortcut Keys: no
- Stream Deck Integration: no
- Remote Production: yes - directly through the web interface
- Scene Transitions: no (the default is a slide between layouts which can’t be altered)
- Automatic End Fade to Black: no
- Camera Picture Adjustment: no
- Camera Digital Zoom and Pan: no
Inputs/Outputs
- Multiple cameras: yes
- Multiple microphones: yes
- Web Widgets: no
- NDI: no
- Virtual Webcam: no. But since the guest sees the live stream on their view, this is not required.
- Virtual Audio: not applicable
- Direct USB Connection for dSLR Cameras: no
- USB Tablet and Phone Screen Capture: no
- Blackmagic Support: no
- Video and Audio Monitoring/Mixer: no
Remote Guests
- Ability to Bring in Guests: yes. Built-in web interface. But the guest is required to log in via Facebook or YouTube - so only suitable if they have either kind of account.
- Number of Guests: 3 plus host (on pro & standard+ plan), 1 plus host (on free plan)
- Guests Layout: BeLive has a number layouts - single screen, split screen, gallery layout, screenshare layout, picture in picture (host and guests)
- Guest View: Guest can view the live stream, view private chat and the live comments
- Guest Greenroom: yes
- Private Chat for Guests: yes
About
- Head Office: Haifa, Hefa, Israel
- Founders: Daniel Mayer & Tzafrir Rehan
- Founded: 2016
OBS Studio
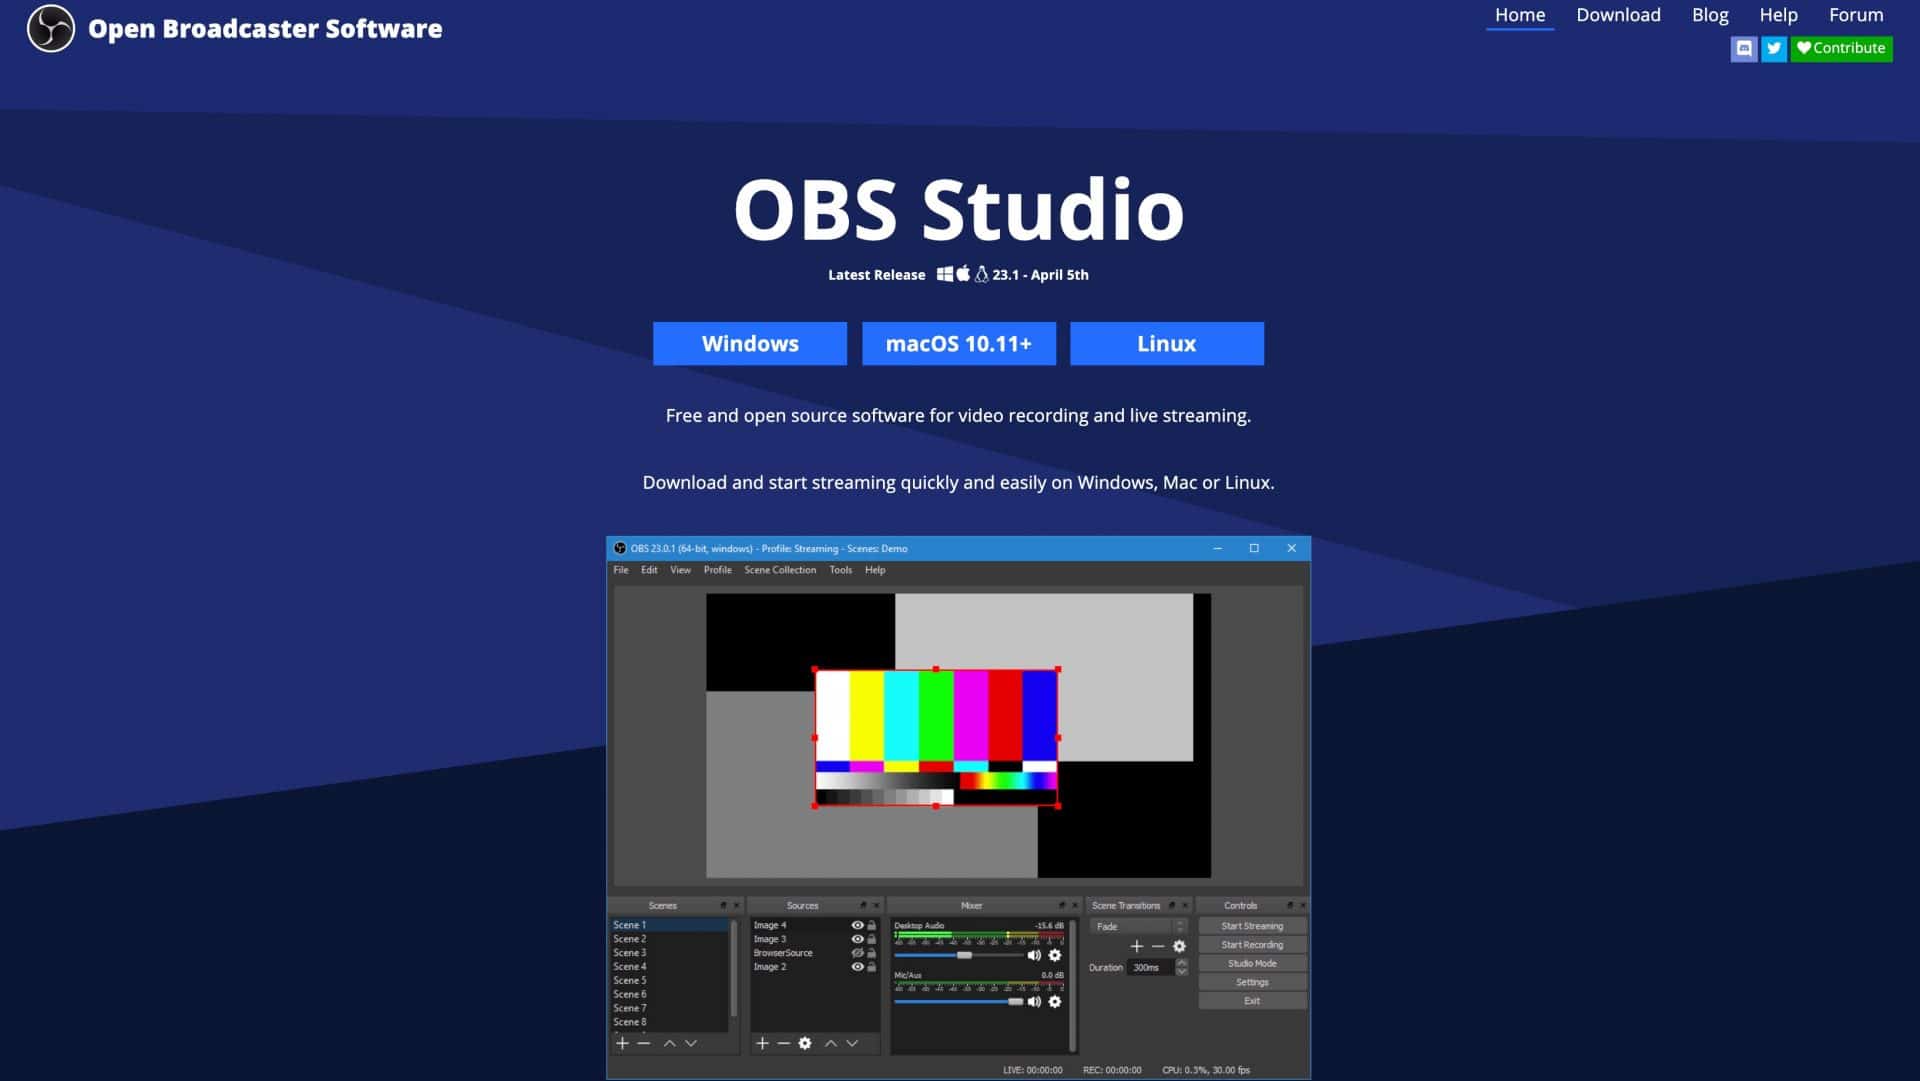
Platform: Dedicated app. PC, Mac, Linux
What is OBS Studio?
OBS Studio is an open-source and cross-platform live streaming tool for PCs (Windows or Linux) and Macs. It’s how I started my live streaming journey. It was the only free tool at the time that offered streaming to Facebook Live and other platforms. It’s a little clunky and difficult to use, but it’s also really powerful and customizable.
OBS is how I started my live streaming journey. And I wrote my article, How to Broadcast from your Computer to Facebook Live (which has had over 5 million page views) on how to broadcast using OBS Studio.
OBS Studio doesn’t integrate with Facebook or YouTube Live directly, so you need to fiddle around with stream keys and use RTMP. But once you get your head around that, OBS Studio is incredibly powerful. You can create multiple scenes - each with as many layers as you like. You can add your camera and microphone sources, videos, images and lots more. And you can easily crop, resize, rotate and adjust each layer as you like. It integrates fully with the Elgato Stream Deck family. It also allows you to record as well as streaming. You have full control over all the video encoding presets - which may or may not fill you with joy. The good news is you don’t need to fiddle too much to get it working, but you can fiddle to your heart’s content if you like.
Pricing
OBS Studio is free.
Pros
OBS Studio is free and works on Macs and PCs. It also has some very advanced features and a large user base. You don’t get paid support, but there’s a plethora of videos on YouTube and I’ve created a course to get you started on OBS Studio. And there are loads of plugins that allow you to customize OBS Studio even further. If you want a free tool with some advanced features and don’t mind fiddling, then check out OBS Studio.
Cons
There are some big missing features in OBS Studio that you might struggle without.
First of all, there’s no integrated remote guest feature. To bring in guests, you’ll have to jump through a few hoops and bring them in via Skype or Zoom, and capture their video in OBS Studio.
It doesn’t integrate with any platform APIs - so you can’t schedule live streams through OBS and will need to set up on the platforms and fiddle with stream keys. A big missing feature is the inability to view or highlight comments.
You can’t multicast in OBS Studio, although you can stream to a streaming platform such as Restream or Switchboard Live.
OBS Studio is very resource-intensive. You’ll need a fairly powerful computer to do anything more than simple streaming.
My Thoughts
OBS Studio definitely isn’t for beginners who aren’t into playing around with tech. But if you want a lot of flexibility and the ability to customize and want something free, OBS Studio is worth considering. But the difficulty of bringing in guests and the inability of viewing and highlighting comments on your streams is a big disadvantage.
OBS Studio Features Summary
Video Features
- Preview & Live Windows: yes
- Live Video Resolution: 4K (or higher if you have the hardware)
- Aspect Ratio: widescreen (16:9), portrait (9:16), square (1:1) or whatever you like (fully customizable)
- Ability to Record Live Video: yes (unlimited length)
- Green Screen / Chroma Key: yes
- Green screen mask edges: no
- Fading controls: yes
- Bluescreen: yes
- Video background supported: yes
- Screenshare: yes (host only)
- Capturing Desktop Audio: Windows only
- Picture in Picture: yes - fully customizable, but this needs to be set up manually by resizing each layer.
- Ability to Stream and Record at the Same Time: yes (unlimited)
- ISO Recording: no
- Live Captions: no
- Stereo Audio: Yes
- Automatic Echo Cancellation: no
Live Video Platforms
- RTMP
RTMP only, although OBS Studio has settings for all the major platforms including Facebook Live, YouTube Live, Periscope, etc. Because OBS Studio doesn’t connect to the platforms via the API, you’ll need to create the live broadcast on the platform first and then stream to it with RTMP.
Live Video Platform Specific Features
- You’ll need to set this up on the platform
Multicasting
- Multicasting: no (unless you RTMP to a multicasting platform)
Comments
- Highlighting Comments: no. You can’t view or highlight comments within OBS Studio. You could experiment with various web widgets which can display comments on your screen.
Layers & Scenes
- Multiple Layers: yes - unlimited layers of all types.
- Overlays: text, images, audio, videos, video capture and web widget
- Overlay Control: image, video and web widget overlays can be fully customized (resized, cropped, colour adjustments etc). Text and countdown timers are fully customizable - allowing you to select the font, size, colour and text effects.
- Layouts: No set layouts, but everything is customizable
- Multiple Scenes: yes. You can create unlimited scenes
- Add Audio/Music: yes
- Add Video: yes. No limits. Video can be set to loop or stop once it has finished.
- Text: Text layers can be added. You can set the background color, font color, size, font type, shadow etc. No scrolling effects.
- PDF overlays: no
- Shortcut Keys: yes
- Stream Deck Integration: yes
- Remote Production: The producer needs to run the tool on their computer
- Scene Transitions: yes (swipe, slide, stinger, fade to color, luma wipe, cut)
- Automatic End Fade to Black: no
- Camera Picture Adjustment: yes
- Camera Digital Zoom and Pan: yes
Inputs/Outputs
- Multiple cameras: yes
- Multiple microphones: yes
- Web Widgets: yes
- NDI: no (although it is available via 3rd party plugins)
- Virtual Webcam: no
- Virtual Audio: no (but possible with 3rd party software such as Loopback)
- Direct USB Connection for dSLR Cameras: no
- USB Tablet and Phone Screen Capture: no
- Blackmagic Support: no
- Video and Audio Monitoring/Mixer: yes
Remote Guests
- Ability to Bring in Guests: no. You’ll need to capture the video and audio of a video conferencing tool such as Skype or Zoom)
- Number of Guests: not applicable
- Guests Layout: not applicable
- Guest View: not applicable
- Guest Greenroom: not applicable
- Private Chat for Guests: not applicable
About
- Founder: Hugh "Jim" Bailey
- Founded: 2012
vMix
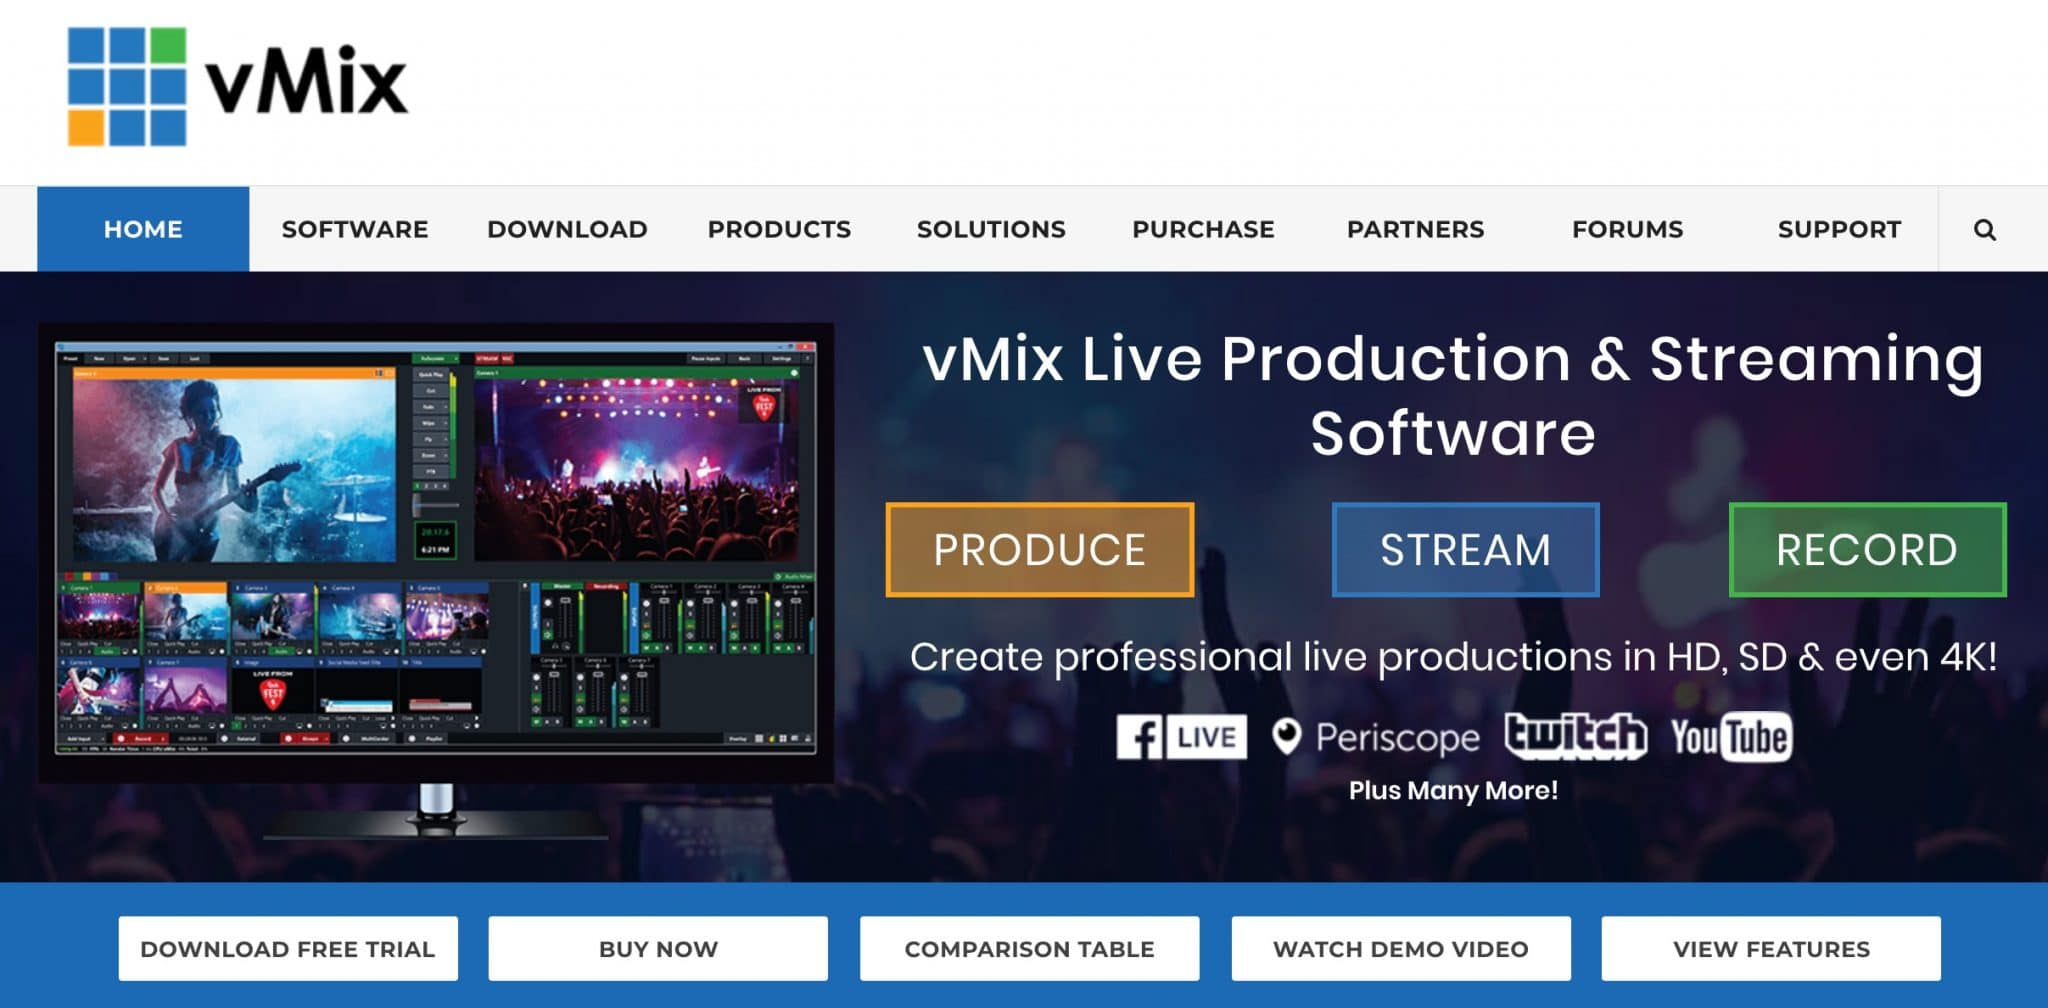
Platform: Dedicated app. PC only.
What is vMix?
vMix is a professional live streaming and production tool for Windows-based PCs.
Pricing
There are 6 versions of vMix ranging from free to $1200.
The free version allows you to stream in 720p (actually a max resolution of 768 x 576).
Basic HD costs $60 and allows you to stream in 1080p
The SD version costs $120 and has a max resolution of 768 x 576. It also gives you 4 overlays channels and a video list (a playlist of videos)
The HD version costs $350 adds full HD streaming and vMix call to bring in one remote guest.
The 4K version costs $700 gives you 4K streaming and allows you to record in two different formats at the same time, allows you to bring in 2 guests in vMix Call and has the instant replay feature.
The Pro version costs $1200 and allows you to bring in up to 8 guests in vMix Call and Instant Replay from up to 4 cameras.
Pros
For high-level professional streaming, many people prefer to use PCs. That’s because of the array of supported powerful graphics cards at a much more affordable price. vMix was built from the ground up for Windows-based PCs, and supports multiple graphics cards. So it allows you to do very powerful things like multicasting, recording and ISO recording effortlessly. It also allows you to customize just about everything.
vMix has a feature called vMix Call that gives an easy way of bringing in remote guests to your show. For comments, I love their vMix Social feature. It allows you to bring in comments from multiple platforms. You don’t even need to be streaming directly to those platforms. You just tell vMix where the live streams are, and it will grab the comments. You can even have a moderator log in to the web interface and control them from there.
vMix allows you to multicast and has ISO recording so that you can save clean feeds from all your inputs.
Cons
Because vMix is Windows only, Mac users will be disappointed. It’s also very difficult to use at first as it has a pretty steep learning curve. It’s a little clunky in places, but the UI has improved over the years.
I was surprised that not all destinations have proper API connections. For example, although you can create a scheduled broadcast on Facebook Live on vMix, this is not the case for YouTube Live. You need to create the broadcast on YouTube and enter the stream key into vMix. There’s still no sign of LinkedIn Live integration yet.
For some features such as multicasting and ISO recording, vMix requires a powerful computer.
My thoughts
I’ve not had the chance to play with vMix as much as I would like, since my main computer is a Mac, and my PC isn’t overly powerful. But for those people who want to create really professional live streams with lots of customization, multicast, highlight comments from all your platforms and ISO recording, vMix is a big contender. Yes, there is a very steep learning curve and it can be clunky in places, but for professional live streamers who have a PC and want full control, vMix is a great solution.
vMix Features Summary
Video Features
- Preview & Live Windows: yes
- Live Video Resolution: 4K (maximum) - different versions of vMix have different max resolutions.
- Aspect Ratio: widescreen (16:9), portrait (9:16), square (1:1) or whatever you like (fully customizable)
- Ability to Record Live Video: yes (unlimited length). vMix 4K and vMix Pro allow you to run 2 recordings simultaneously.
- Green Screen / Chroma Key: yes
- Green screen mask edges: no
- Fading controls: yes
- Bluescreen: yes (and any other color)
- Video background supported: yes
- Screenshare: yes (host only)
- Capturing Desktop Audio: yes
- Picture in Picture: yes - fully customizable, but this needs to be set up manually by resizing each layer.
- Ability to Stream and Record at the Same Time: yes (unlimited)
- ISO Recording: yes (4K and pro versions only). This feature is called vMix MultiCorder.
- Live Captions: no
- Instant Replay: yes (on 4K and Pro versions only)
- Stereo Audio: yes
- Automatic Echo Cancellation: yes (EQ, noise gate etc)
Live Video Platforms
- Facebook Live YouTube Live Periscope RTMP
- Note YouTube Live is Stream Now Only (see below)
- Others (including Azure Media Services, Akamai, BoxCast, LiveStream, Microsoft Stream, Vimeo and Wowza Streaming Engine)
Live Video Platform Specific Features
- Facebook Page Crossposting: no
- Facebook Branded Content: no
- Facebook Destinations: profile timeline, pages, groups
- Facebook Privacy: public, friends, only me
- Set Place/Location on Facebook Page: no
- 360 Facebook Live Streams: yes
- Ability to create a Facebook Continuous Live Stream: yes
- YouTube Destinations: Stream Now only (YouTube Events need to be created on YouTube and then RTMP to it from vMix)
- YouTube Privacy: Public only
- Ability to Add, Edit and Delete Scheduled Live Videos: yes (Facebook only)
- Ability to View Scheduled Live Video Broadcasts that Have Been Created With Another Tool and Stream to Them: yes (Facebook only)
Multicasting
- Multicasting: yes. You can multicast to up to 3 destinations directly from a computer (requires powerful computer and a lot of internet bandwidth).
Comments
- Highlighting Comments: yes (via separate vMix social app). Brings in comments from Facebook Live (multiple live videos) and YouTube Live. Also brings in Tweets from Twitter based on hashtags.
- Ability to post comments: yes (Facebook, YouTube)
- Integrates with Restream.io comments: no
Layers & Scenes
- Multiple Layers: yes - unlimited layers of all types.
- Overlays: text, images, audio, videos, video capture, web widget, scoreboard, Clock, Image carousel, solid colour
- Overlay Control: image, video and web widget overlays can be fully customized (resized, cropped, colour adjustments, rotated, opacity etc). Text layers fully customizable - allowing you to select the font, size, colour and text effects including text animations.
- Layouts: yes (fully customizable)
- Multiple Scenes: yes. You can create unlimited scenes (known as “shots” in Wirecast). And even shots can be layered on top of each other
- Add Audio/Music: yes
- Add Video: yes. No limits. Video can be set to loop or stop once it has finished., and selection of video can be selected
- Text: Text layers can be added. You can set the background color, font color, size, font type, shadow etc. No scrolling effects.
- PDF overlays: no
- Shortcut Keys: yes
- Stream Deck Integration: yes (via plugin)
- Remote Production: The producer needs to run the tool on their computer. But a remote moderator can view and select comments through a vMix Social web interface.
- Scene Transitions: yes (fade, zoom, wipe, slide, fly, cross zoom, fly rotate, cube, cube zoom, vertical wipe, vertical slide, merge, stinger)
- Automatic End Fade to Black: no
- Camera Picture Adjustment: yes
- Camera Digital Zoom and Pan: yes
Inputs/Outputs
- Multiple cameras: yes
- Multiple microphones: yes
- Web Widgets: yes
- NDI: yes (Input and output)
- Virtual Webcam: yes
- Virtual Audio: yes
- Direct USB Connection for dSLR Cameras: no
- USB Tablet and Phone Screen Capture: no
- Blackmagic Support: yes
- Video and Audio Monitoring/Mixer: yes
Remote Guests
- Ability to Bring in Guests: yes (via vMix Call).
- Number of Guests: 2 (including host on vMix HD), 3 (including host on vMix 4K) and 9 (including host on vMix Pro)
- Guests Layout: Fully customizable and selection of layouts - Split screen, grid, picture in picture (for host and guests)
- Guest View: View show output and fully customizable with any view sent to each guest.
- Guest Greenroom: yes
- Private Chat for Guests: yes
About
- Head Office: Burleigh Waters, Australia
- Founders: Martin Sinclair
- Founded: 2005
Wirecast
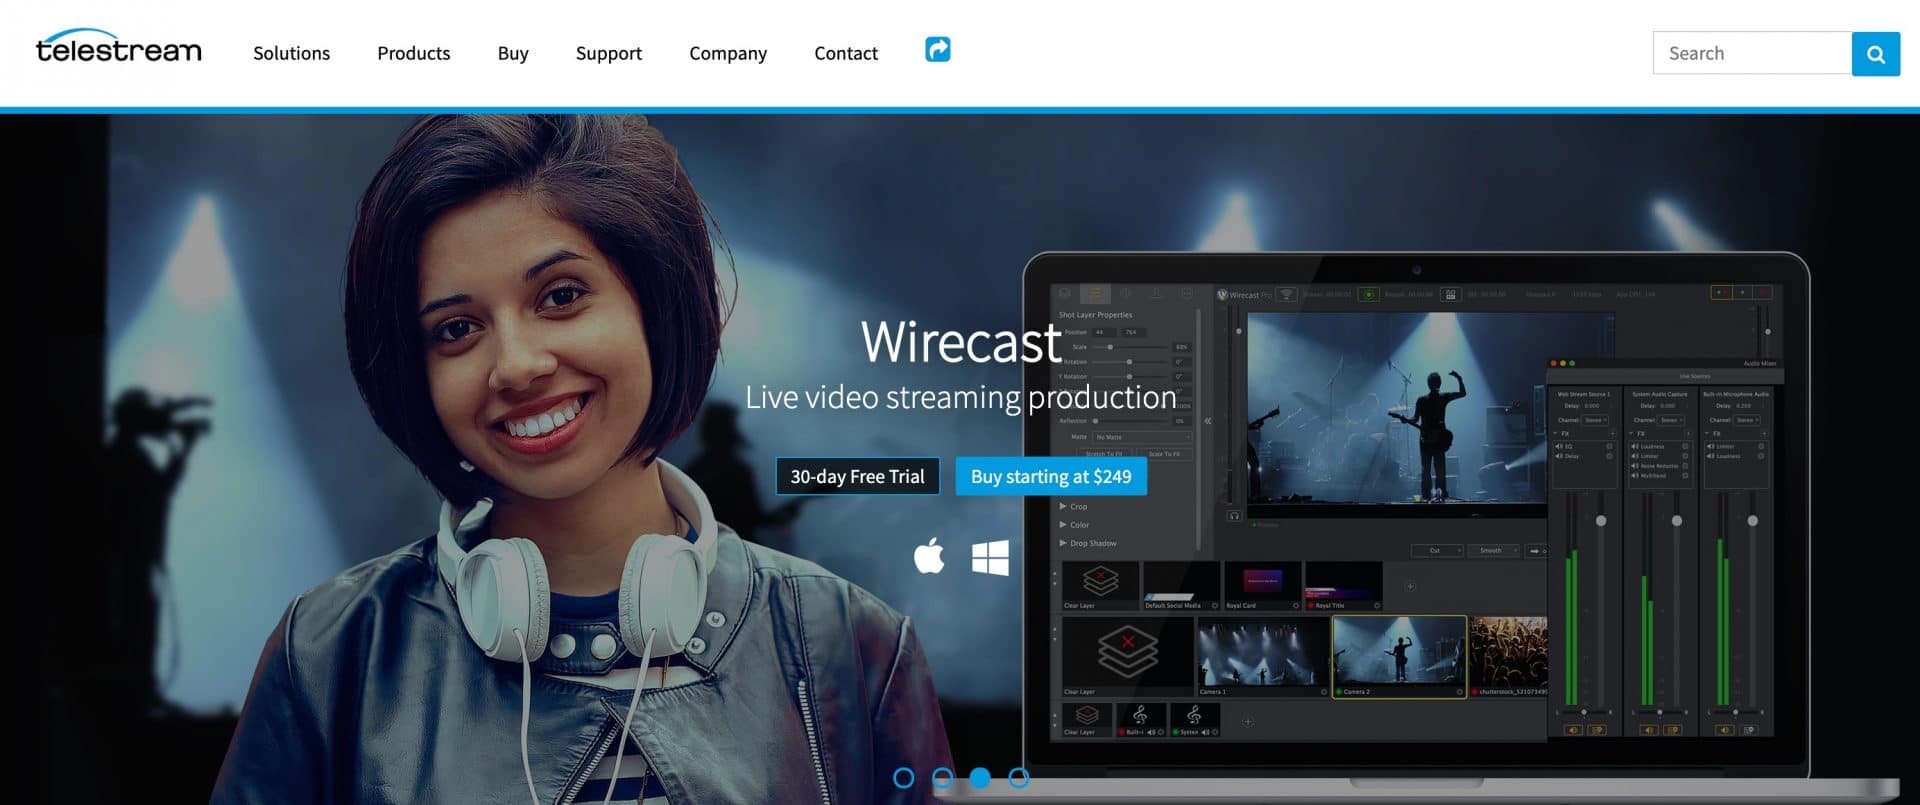
Platform: Dedicated app. PC and Mac.
What is Wirecast?
Wirecast is a professional live video streaming and production tool from Telestream. It runs on Macs and Windows-based PCs. It focuses on producing professional live videos and has some advanced features - so it does have a bit of a learning curve. For more information on How to Stream to Facebook Live from Wirecast, check out my article.
Pricing
There are 2 Wirecast products - Wirecast Studio ($599), and Wirecast Pro ($799). In March 2020, Telestream discontinued their budget version, Wirecast One, which used to cost $249. They also increased the Studio product by $150 and Pro by $100.
But, unlike most other tools in this list - these are no subscriptions. You own the tool forever once you’ve paid. However, it’s worth paying to upgrade to later versions because things change quickly in the world of social live video.
Wirecast One is no more but was a very basic product. You could stream in 4K, but you were limited to one camera (or source) and you couldn't bring in any remote guests.
Wirecast Studio has most of the main features of Wirecast including unlimited sources, bringing in guests (up to 2), remote desktop presenter, and more.
Wirecast Pro adds more advanced features including the ability to bring in more remote guests (up to 7), instant replay, NDI output, and being able to send multiple streams with different audio tracks or languages.
Pros
Wirecast is incredibly powerful and pretty robust. It gives an almost overwhelming array of features. You don’t just get one set of scenes with their layers - you can even layer up to 5 scenes on top of each other. Like OBS Studio, all the layers are customizable, but Wirecast allows even more such as 3D rotation, animated text, 3D layouts, and virtual sets.
It’s really flexible. If your computer can handle it, Wirecast can multicast to lots of different platforms. And it can record your stream to your computer - even in multiple formats simultaneously. Wirecast Pro has an ISO feature that allows you to record each source separately - which is great for repurposing. But this also allows you to replay a previous section of your live stream as an instant replay.
Cons
Wirecast’s user interface is surprisingly outdated and clunky, and it’s not as intuitive as it should be. It’s aimed at professional live streamers, which makes it difficult to squeeze in so many advanced features in an easy-to-use way. I hope that Telestream gives Wirecast a radical overhaul of the user interface in the near future.
There’s a steep learning curve when you start using Wirecast. It’s great that it works on both PCs and Macs - but I think it lacks some of the power that other apps designed for one platform have.
One big gaping hole in its feature-set is its inability to view and highlight comments from Facebook Live, YouTube Live, and other platforms. It does integrate well with 3rd party software such as NewBlue Titler Live, but that software has a steep learning curve as well and is going to be very difficult to manage both apps at the same time if you are producing as well as hosting. Not to mention expensive.
Wirecast has a feature called Rendezvous for bringing in guests. It’s okay, and it’s certainly improved over the years, but it’s still very basic, and has quite a few limitations.
It’s also important to say that Wirecast is a powerful tool and requires a powerful computer to do most of the work.
From my experience, I’ve been disappointed by the level of support. It’s fairly slow, and in the past I’ve been asked to send over diagnostics and then have to reinstall Wirecast or build my shows in Wirecast again because the templates became corrupted. Hopefully, their support will improve, and you can pay for priority support that may be better.
My Thoughts
I’ve been using Wirecast for years - especially when I want to produce live videos that require more customization. I love some of the more advanced features - the level of customization on the layers, ISO recording, multicasting and more.
For professional live streams from both Macs and PCs, Wirecast is the tool you should consider. It’s very robust and it will do pretty much anything you thrust at it.
But I do get frustrated by its clunkiness and big missing features like comments.
I know I’ve been a little harsh with the cons of Wirecast. That’s because I feel it has so much potential, but needs a lot tender love and care - and potentially an overhaul to make it into the live streaming tool it should be. It’s a tool I have a lot of love for - I just think it’s been a little neglected.
But for a robust and professional live streaming tool for Macs and PCs, Wirecast is a great tool to check out.
Wirecast Features Summary
Video Features
- Preview & Live Windows: yes
- Live Video Resolution: 4K (maximum)
- Aspect Ratio: widescreen (16:9), portrait (9:16), square (1:1) or whatever you like (fully customizable)
- Ability to Record Live Video: yes (unlimited length). No limit to how many recordings you can run simultaneously.
- Green Screen / Chroma Key: yes
- Green screen mask edges: no
- Fading controls: yes
- Bluescreen: yes
- Video background supported: yes
- Screenshare: yes (host only)
- Capturing Desktop Audio: yes (Mac and PC)
- Picture in Picture: yes - fully customizable, but this needs to be set up manually by resizing each layer.
- Ability to Stream and Record at the Same Time: yes (unlimited)
- ISO Recording: yes (Pro version only)
- Live Captions: yes (via Wirecast Live Captions)
- Stereo Audio: Yes
- Automatic Echo Cancellation: no
Live Video Platforms
- Facebook Live YouTube Live Periscope Twitch RTMP Restream.io
- Others (including Azure Media Services, Akamai, BoxCast, LiveStream, Microsoft Stream, Vimeo and Wowza Streaming Engine)
Live Video Platform Specific Features
- Facebook Page Crossposting: yes
- Facebook Branded Content: yes
- Facebook Destinations: profile timeline, pages, groups
- Facebook Privacy: public, friends, only me
- Set Place/Location on Facebook Page: yes
- Ability to create a Facebook Continuous Live Stream: yes
- 360 Facebook Live Streams: no
- YouTube Destinations: Stream Now and events
- YouTube Privacy: Public, unlisted, private
- Ability to Add, Edit and Delete Scheduled Live Videos: yes
- Ability to View Scheduled Live Video Broadcasts that Have Been Created With Another Tool and Stream to Them: yes
Multicasting
- Multicasting: yes. You can multicast directly from your computer. Requires a powerful computer - PC is best - and a lot of internet bandwidth. Or use Telestream’s multicasting service - Telestream Restream.
Comments
- Highlighting Comments: no. Wirecast does not display comments from the platforms you are streaming to. But it does fully integrate with 3rd party apps such as Titler Live that gives this functionality. Wirecast Studio includes a free version of Titler Live Express and Wirecast Pro includes a free version of Titler Live Present - these allow you to add Facebook Live comments. For YouTube Live and Twitter you can upgrade to Titler Live Social for an extra $299.
Layers & Scenes
- Multiple Layers: yes - unlimited layers of all types.
- Overlays: text, images, audio, videos, video capture, web widget, scoreboard, Clock, Image carousel, solid colour
- Overlay Control: image, video and web widget overlays can be fully customized (resized, cropped, colour adjustments, rotated, opacity etc). Text layers fully customizable - allowing you to select the font, size, colour and text effects including text animations.
- Layouts: yes (fullscreen, side by side, two together, stacked, angled in, PiP lower right/left, 3 panes, virtual sets)
- Multiple Scenes: yes. You can create unlimited scenes (known as “shots” in Wirecast). And even shots can be layered on top of each other
- Add Audio/Music: yes
- Add Video: yes. No limits. Video can be set to loop or stop once it has finished., and selection of video can be selected
- Text: Text layers can be added. You can set the background color, font color, size, font type, shadow etc. No scrolling effects.
- PDF overlays: no
- Shortcut Keys: yes
- Stream Deck Integration: yes (via plugin)
- Remote Production: The producer needs to run the tool on their computer
- Scene Transitions: yes (cut, 3D plane, bands, circle wipe, clock wipe, cross blur, cross dissolve, crosshair, curtain drop wipe, fade to black, fade to white, flip over, fly over, grid wipe, griz zoom, push, radial wipe, RGD channels, swap, vacuum, wave wipe, windshield wipe)
- Automatic End Fade to Black: no
- Camera Picture Adjustment: yes
- Camera Digital Zoom and Pan: yes
Inputs/Outputs
- Multiple cameras: yes
- Multiple microphones: yes
- Web Widgets: yes
- NDI: yes (Input and output)
- Virtual Webcam: yes (but does not integrate with Rendezvous so guests can’t view live stream)
- Virtual Audio: yes
- Direct USB Connection for dSLR Cameras: no
- USB Tablet and Phone Screen Capture: yes
- Blackmagic Support: yes
- Video and Audio Monitoring/Mixer: yes
Remote Guests
- Ability to Bring in Guests: yes (via Rendezvous web service)
- Number of Guests: 3 (including host on Wirecast Studio) & 8 (including host on Wirecast Pro)
- Guests Layout: Fully customizable and selection of layouts - Split screen, grid, picture in picture (for host and guests)
- Guest View: View host only
- Guest Greenroom: no
- Private Chat for Guests: not applicable
About
- Head Office: Nevada City, California, United States
- Founded: 2004
Switcher Studio
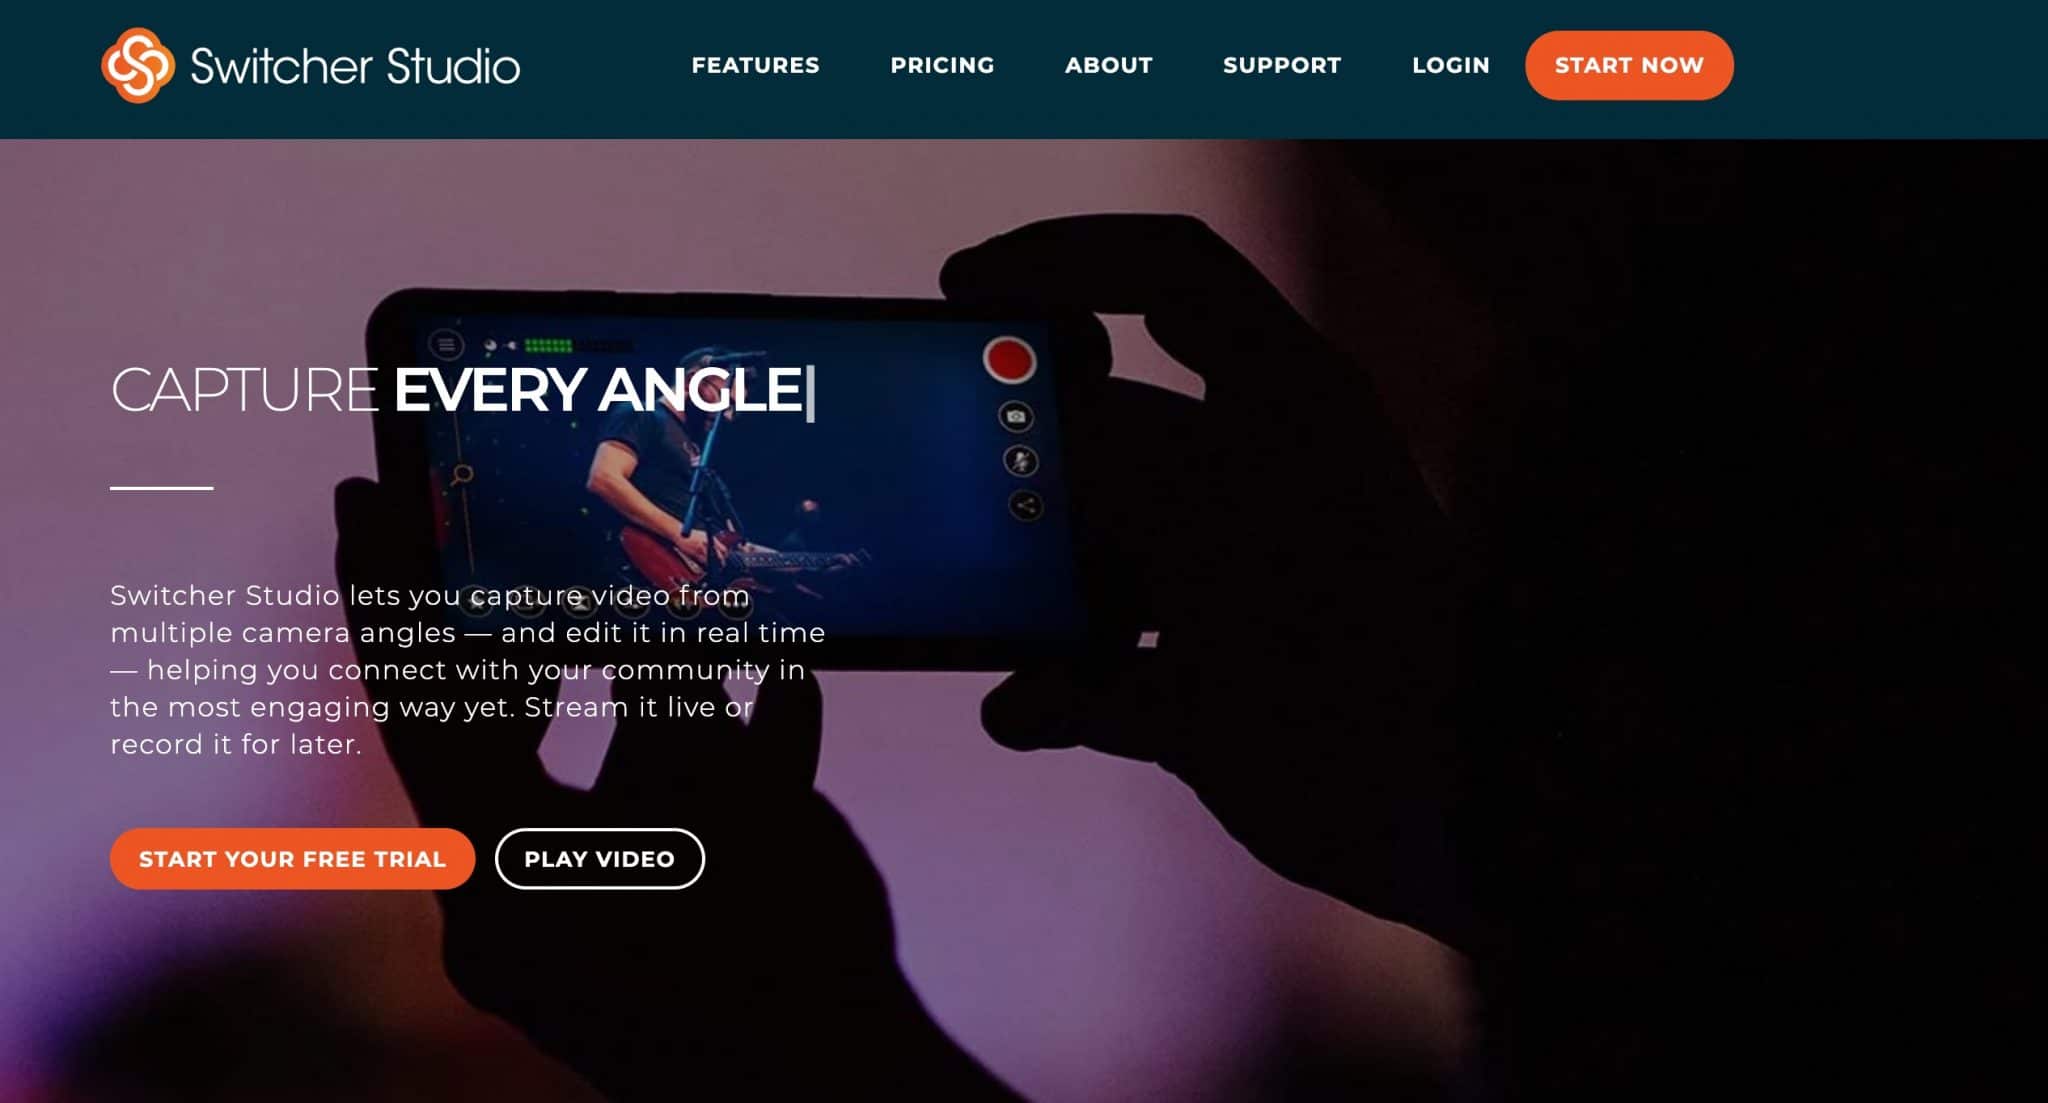
Platform: iOS (for Switcher). iOS and Mac for cameras. iOS, Mac & PC (for screen sharing and guests), iOS, Android, Mac, PC (for guests)
What is Switcher Studio?
Switcher Studio is a very different live video streaming tool to the others in this list. It’s better to think of it as a mobile video studio production studio. The main “switcher” runs on an iOS device, which could be an iPhone or, better still, an iPad. This allows you to control all your sources and assets and switch between them. You can use that iPhone or iPad’s camera and connect up to 9 iOS devices to use their cameras too. If you have any old iPhones or iPads around your house - you can use any of these as extra cameras. They will need to run the latest version of iOS though - see here.
Listen to episode 28 of the Confident Live Marketing Podcast, where I interviewed the VP of Sales and Business Development at Switcher Studio, Marc Gawith
Pricing
Switcher Studio offers a 2-week free trial.
The Essentials plan is $39 per month (or $374 per year - the equivalent of $31 per month if paying annually). It integrates with YouTube, Facebook, and LinkedIn Live only, now has added RTMP. You can add up to 20 assets (images and videos for graphics and overlays) and you can add up to one guest. You can’t add comments on to the screen, schedule posts, or enable cross-posting.
The Standard plan unlocks some of those cool features. It costs $75 per month (or $588 per year - the equivalent of $49 per month if paying annually). It adds RTMP and crossposting and allows you to add up to 100 assets. You can add up to 2 guests to your broadcasts.
The Plus is really for serious professional live streamers and costs $350 per month (or $3,360 per year - the equivalent of $280 per month if paying annually). It adds up to 4 guests. It allows you to add up to 500 assets. It’s great for teams, because it allows up to 3 users to access the account. Extra users cost $30 per user per month. As well as priority support, the Plus plan allows you to say that your live videos contain branded content. Platforms such as YouTube and Facebook allow this, and any broadcasts where you’ve selected “branded content” will display that by the video.
Pros
There are so many things to love about Switcher Studio. It’s been beautifully put together. Because it’s built for mobile, it’s perfect for on-location live streams, or if you are out and about. The ability to record each camera separately (ISO) is a feature that usually requires a very powerful computer and with the top versions of Wirecast and vMix. This feature is so useful for repurposing your videos for later - meaning you get a clean video of each of your camera sources.
Once you get your head around the mobile-only switching, it’s very easy to use. You can switch between scenes and create beautiful layouts easily. And the animations are gorgeous. Lastly, Switcher Studio was one of the first tools to integrate with LinkedIn Live - so if LinkedIn Live is important to you, it’s worth checking out Switcher Studio.
Cons
For some people, the mobile-first Switcher Studio setup will take much time to get used to. If you’re used to managing images, videos and cameras from your computer, the mobile setup will be frustrating - at least at first.
If you are an Android user, you won’t be able to use Switcher Studio - although you can use an Android device as a guest on video chat. Also, the main switching device needs to be a modern iOS device with the latest version of iOS installed. My old iPad, 3rd generation, just won’t work.
All your devices need to be on the same WiFi network. It is technically possible to use Switcher Studio with a wired connection, but it requires a complicated setup with lightning to USB and USB to ethernet adapters. And so, you rely on WiFi for your live streams, which can be unreliable unless you have a fantastic signal.
Because the switcher and cameras are iOS devices, you’ll need to invest in microphones that work with those devices. Devices you use with your computer, including USB microphones and webcams, may not work with Switcher Studio, and you won’t be able to use a DSLR camera with an HDMI adapter. If you are used to a computer set-up, you’ll need accessories that work with either iPhones or iPads.
My thoughts
For mobile live video studio setups, I always recommend Switcher Studio. It’s the most powerful tool that works on the move. And I love some of the features such as ISO recording, the beautiful layouts and animations, and LinkedIn Live integration.
I know some people run their whole business from their phone or tablet. But I prefer to work from my computer. iOS devices don’t have proper file systems, and getting files in and out of my iPhone is more difficult than it needs to be. That’s why I personally don’t use Switcher Studio as my main live video tool. But for mobile live streams, I love Switcher Studio and I love their attention to detail.
Switcher Studio Features Summary
Video Features
- Preview & Live Windows: live view only
- Live Video Resolution: 1080p
- Aspect Ratio: widescreen
- Ability to Record Live Video: yes
- Green Screen / Chroma Key: no
- Screenshare: yes (host only)
- Capturing Desktop Audio: yes
- Picture in Picture: yes
- Ability to Stream and Record at the Same Time: yes
- ISO Recording: yes
- Instant Replay: no
- Live Captions: no
- Automatic Echo Cancellation: no
Live Video Platforms
- Facebook Live YouTube Live LinkedIn Live RTMP
Live Video Platform Specific Features
- Facebook Page Crossposting: yes (standard and plus plans only)
- Facebook Branded Content: yes (on plus plan only)
- Facebook Destinations: profile timeline, pages, groups
- Facebook Privacy: public only
- Set Place/Location on Facebook Page: no
- Ability to create a Facebook Continuous Live Stream: no
- 360 Facebook Live Streams: no
- YouTube Destinations: events only
- YouTube Privacy: Public, unlisted, private
- Ability to Add, Edit and Delete Scheduled Live Videos: yes
- Ability to View Scheduled Live Video Broadcasts that Have Been Created With Another Tool and Stream to Them: no
Multicasting
- Multicasting: no
Comments
- Highlighting Comments: yes (standard and plus plans only)
Layers & Scenes
- Multiple Layers: yes - images, lower thirds, text and multi-view.
- Overlays: Titles, lower thirds, Video, images
- Overlay Control: full screen, resize, move
- Layouts: yes (solo, dashboard/grid, split screen, flap, slots, picture in picture)
- Multiple Scenes: yes
- Add Audio/Music: no
- Add Video: yes
- Text: Titles, lower thirds, social overlays, broadcast notifications. Different templates, size, color, font, background
- PDF overlays: no
- Shortcut Keys: no
- Stream Deck Integration: no
- Remote Production: no
- Scene Transitions: yes (cut, cross disolve, wipe, cube, twist)
- Automatic End Fade to Black: no
- Camera Picture Adjustment: yes
- Camera Digital Zoom and Pan: yes
Inputs/Outputs
- Multiple cameras: yes (via different iOS devices)
- Multiple microphones: yes
- Web Widgets: no
- NDI: no
- Direct USB Connection for dSLR Cameras: no
- USB Tablet and Phone Screen Capture: no
- Blackmagic Support: no
- Video and Audio Monitoring/Mixer: yes
Remote Guests
- Ability to Bring in Guests: yes (via web, iOS or Android devices). Up to 5 hours per month on Essentials Plan, up to 30 hours per month on Standard plan and up to 100 hours per month on Plus plan. The host needs to log in on to the Switcher Studio dashboard on a separate device to start the video chat.
- Number of Guests: 3 plus host (on plus plan), 2 plus host (on standard plan), 1 plus host (on essentials plan)
- Guests Layout: yes (solo, dashboard/grid, split screen, flap, slots, picture in picture)
- Guest View: View host’s camera and their own (picture in picture)
- Guest Greenroom: no
- Private Chat for Guests: no
- Virtual Webcam: no
- Virtual Audio: no
About
- Head Office: Louisville, Kentucky, United States
- Founders: Nick Mattingly & Gabe Mondada
- Founded: 2014
Zoom
Platform: Video Conferencing Tool. Dedicated App. Mac, PC, Android, iOS
What is Zoom?
Zoom is primarily a video conferencing and webinar tool. You can host virtual video meetings from 2 people up to 500 and webinars with up to 10,000 participants. Recently it added a live streaming feature that allows you to live stream your meetings to Facebook Live and YouTube Live.
Pricing
The live streaming feature in Zoom is only available on the Pro plan upwards. This costs $15 per month.
Pros
Zoom is an incredibly powerful and robust video conferencing tool. It’s not built primarily for live streaming, but it allows you to live stream your meetings very easily. It has some cool features such as virtual backgrounds that will work whether you have a green screen or not. If you want to bring in a lot of guests cost-effectively, Zoom is probably one of your best options as it allows up to 100 participants with all plans, with up to 500 with the large meeting add-on.
Cons
Zoom isn’t focused on being a live video streaming tool, so it doesn’t have the same level of features as many of the other tools in this list. You can’t add any of your own branding, graphics, or colors. And Zoom slaps its own logo on the livestreams, which I find annoying. Zoom’s live streaming features are very, very basic.
My thoughts
Zoom isn’t really a live streaming tool, even though it has this feature. As far as live streaming is concerned, it’s very basic. But for live streaming a meeting to a Facebook Group or to your YouTube channel it works really well and is so easy to set up. That is if you don’t mind Zoom adding their own branding to your live videos.
Zoom Features Summary
Video Features
- Preview & Live Windows: no
- Live Video Resolution: 720p
- Aspect Ratio: widescreen (16:9)
- Ability to Record Live Video: yes (unlimited length)
- Green Screen / Chroma Key: yes (host and guests) - even works without a screen
- Green screen mask edges: no
- Fading controls: no
- Bluescreen: no
- Video background supported: yes
- Screenshare: yes (host and guest)
- Capturing Desktop Audio: yes
- Picture in Picture: Basic - while you share your screen, you and your guests will appear at the top of the screen
- ISO Recording: no
- Live Captions: no
- Instant Replay: no
- Automatic Echo Cancellation: yes
Live Video Platforms
- Facebook Live Facebook Workplace Live YouTube Live RTMP
Live Video Platform Specific Features
- Facebook Page Crossposting: no
- Facebook Branded Content: no
- Facebook Destinations: profile timeline, pages, groups
- Facebook Privacy: public, friends, only me
- Set Place/Location on Facebook Page: no
- Ability to create a Facebook Continuous Live Stream: no
- 360 Facebook Live Streams: no
- YouTube Destinations: events only
- YouTube Privacy: Public, unlisted, private
- Ability to Add, Edit and Delete Scheduled Live Videos: no
- Ability to View Scheduled Live Video Broadcasts that Have Been Created With Another Tool and Stream to Them: no
Multicasting
- Multicasting: no (unless you RTMP to a multicasting platform)
Comments
- Highlighting Comments: no
Layers & Scenes
- Multiple Layers: no
- Overlays: none
- Overlay Control: none
- Layouts: Yes (switch between gallery and solo view)
- Multiple Scenes: no
- Add Audio/Music: no
- Add Video: no
- Text: no
- PDF overlays: no
- Shortcut Keys: no
- Stream Deck Integration: no
- Remote Production: yes
- Scene Transitions: no
- Automatic End Fade to Black: no
- Camera Picture Adjustment: yes
- Camera Digital Zoom and Pan: no
Inputs/Outputs
- Multiple cameras: no
- Multiple microphones: no
- Web Widgets: no
- NDI: no
- Virtual Webcam: no
- Virtual Audio: no
- Direct USB Connection for dSLR Cameras: no
- USB Tablet and Phone Screen Capture: no
- Blackmagic Support: no
- Video and Audio Monitoring/Mixer: no
Remote Guests
- Ability to Bring in Guests: yes
- Number of Guests: 1,000 (including host)
- Guests Layout: Grid view or solo view
- Guest View: The guest can see the meeting view
- Guest Greenroom: yes
- Private Chat for Guests: yes
About
- Head Office: San Jose, California, United States
- Founder: Eric Yuan
- Founded: 2011
Other Tools
I’ve mentioned 8 of the most popular live video streaming tools in this article. But there are many other tools which I would have loved to have mentioned.
Here’s a quick summary of some other tools…
Wave.Video
More info coming soon!
evmux
More info coming soon!
Melon
More info coming soon!
Streamlabs Desktop
Used to be called Streamlabs OBS (or SLOBS for short), Streamlabs Desktop is a souped-up version of OBS Studio. It used to be for PC only, but in May 2020, there is now a Mac version!
Crowdcast
Is a web-based video conferencing, webinar and chat platform. It has a lot of similarities with Zoom but is purely web-based. You can stream to most platforms out there by using its RTMP feature.
XSplit
XSplit is a PC only and has two versions - XSplit Broadcaster and XSplit Gamecaster. It has free and paid options with customer support. You’ll need some knowledge of encoding presets.
Lightstream
Lightstream is an advanced live streaming tool that works through the browser. Although a big missing feature is that you can’t highlight comments. You also can't schedule broadcasts within the tool unless you set up in Facebook or YouTube and set up the stream via RTMP. But it has lots of advanced features such as scene switching, remote guests and multiple cameras. Lightstream is free for most of the features, and $25 per month for the Creator Plan $59 for their Professional plan.
Socialive
Socialive is an enterprise tool that is both a dedicated tool and a web app. It works on PCs and Macs. It has a lot of advanced features and was one of the first tools that integrated with LinkedIn Live.
mimoLive
mimoLive is a live video production software for Mac only. It’s a dedicated app that is aimed at broadcasting professional live streams. It has advanced features like green screen, SDI & NDI support and more.
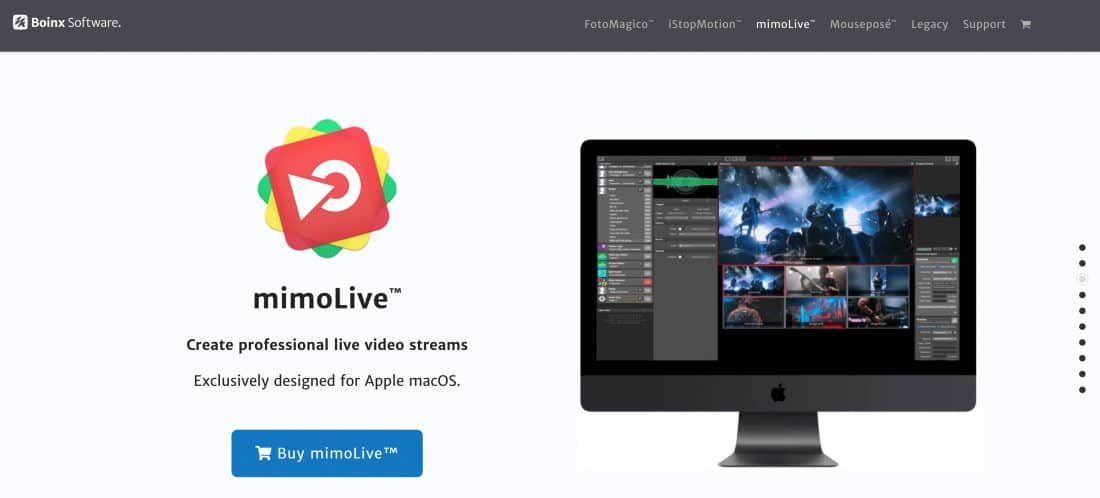
Stage Ten
Stage Ten is an advanced live streaming tool that works through the browser. It has free and paid plans and supports screen share, lower thirds, overlays, multicasting and more.
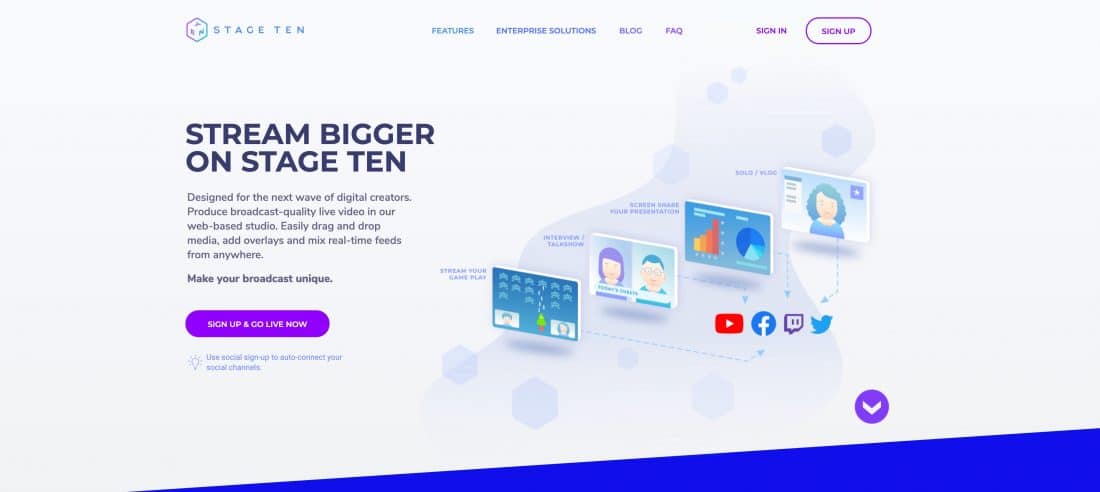
Live Video Services
Where do you want to broadcast live to?
There are dozens of live video streaming services. In this article, I am focusing on the main social platforms Facebook Live, Twitter, YouTube, LinkedIn Live, and Instagram. Note that Twitter is sadly closing down Periscope, but the ability to live stream through Twitter will be available.
But there are other platforms such as Twitch, Mixer, UStream and the Russian network - VK Live.
Each network has its own quirks and formats, so I’ll briefly go through each one.
Facebook Live
There are different live destinations within Facebook - profile, groups, pages, and events.
Facebook Live allows you to broadcast to all these destinations from their mobile app. They also have a very simple web version that allows you to broadcast with your webcam through your browser. There is a Facebook Live API that gives third-party tools the facility to broadcast to these destinations. And you can also broadcast directly to these destinations using RTMP with a stream key and URL.
When you broadcast to your profile, you can select different privacy options, including: public, friends, and “only me”. This is useful if you want to do a test broadcast or want to restrict the audience that you are broadcasting.
Facebook has a few other options. You can select “cross-posting” when broadcasting to your page. This automates the process of posting your broadcast to multiple pre-approved Facebook pages. You don't need to be the admin of these pages, but you will need to get permission prior to cross-posting. It's also important to know that you'll only see comments come through from the main page you've broadcasted to and not the others you're creating a copy on.
You can also set up polls and quizzes ahead of time to create more engagement in the broadcast.
You can schedule a live video to your profile, group, page, or event. This allows you to promote it ahead of time, and your audience can comment on the post before the live video goes live. However, you can’t schedule a Facebook Live video from your phone. The only way to schedule a Facebook Live is via a 3rd party tool. You can create a scheduled Facebook Live for your page in publishing tools or Creator Studio on the web - but you’ll need a third-party tool to broadcast to it.
Although it’s possible to stream to Facebook Live in full HD (1080p), still very few pages actually output in full HD yet. As far as I know, Facebook is rolling it out very slowly. And, although Facebook allows you to download the replay video afterwards, it’s very low resolution - something like 480p. That’s why it’s important to choose a tool that saves your videos in a good resolution if you want to repurpose it later.
If you want to be really fancy and have the right hardware, you can also produce 360 live videos for a fully immersive experience.
On Android devices, you can select an audio-only broadcast.
The Facebook API allows third-party tools to access the comments from your live videos. However, for private groups, individual commenters will need to give their permission for their name and profile photo to be used. Most tools will give you a special link to give to your group members to make this easier.
Finally, you can broadcast a single live broadcast for up to 8 hours. After which it will switch into a regular pre-recorded video. It used to be possible to broadcast a “continuous” or "ambient" live video. With that feature, there was technically no limit to the length of a continuous broadcast. But Facebook quietly removed that feature.
Facebook Live Specs:
- Length: 4hrs (via a mobile device), 8 hours (via 3rd party tool or the API) or unlimited (for a continuous broadcast)
- Resolution: 720p (1280 x 720), although some pages have 1080p enabled
- Aspect Ratio: 16:9 (widescreen), 9:16 (portrait) 1:1 (square)
- Frame rate: 30fps (maximum)
- Bitrate (video): 4mbps (maximum)
- Bitrate (audio): 256 Kbps (maximum)
- Key frame: 2 seconds
- Video codec: H264
- Audio codec: AAC
- Audio sample rate: 48kHz
- Channel layout: Stereo
- Maximum characters in Titles: 255 characters
- Maximum characters in description: 63,206 characters
- Minimum date to schedule a broadcast in advance: 10 minutes
- Maximum date to schedule a broadcast in advance: 1 week
Twitter Live

Twitter officially closed down their live streaming tool, Periscope, in March 2021. Read more about this announcement here. But Twitter Live has replaced Periscope, and it allows you to broadcast directly to Twitter. Periscope started off as iOS only, and then added Android, and eventually allowed you to broadcast to Periscope via third-party tools.
On the mobile app, you can select an audio-only broadcast and select whether you want your broadcast to be public or choose the specific people who will see your broadcast.
Periscope Specs:
- Length: Unlimited (for unscheduled broadcasts) and 6 hours (for scheduled broadcasts)
- Resolution: 720p (1280x720)
- Aspect Ratio: 16:9 (widescreen)
- Frame rate: 30fps (maximum)
- Bitrate (video): 2.5mbps (recommended), 4mbps (maximum)
- Bitrate (audio): 128 Kbps (maximum)
- Key frame: 3 seconds
- Video codec: H264
- Audio codec: AAC
- Audio sample rate: 48kHz
- Maximum characters in titles: 120 characters
YouTube Live
YouTube used to have two kinds of live broadcasts. Your live room is otherwise known as “Stream Now”, and YouTube events. But YouTube removed "Stream Now" - so it's just simple live events now.
With YouTube events, you create live videos either straight away or scheduled.
There are 3 privacy settings for YouTube Live (as there are for regular videos, too) - public, unlisted, and private.
YouTube allows you to broadcast in up to 4K resolution with 60 frames per second. It’s got the highest quality of all the platforms in this list. But you’ll need a beast of a computer and an internet connection to do that!
YouTube offers 360 Live Video, too. For more information see here.
YouTube Live Specs:
- Length: 12 Hours (maximum) or unlimited for a continuous (unarchived) stream
- Aspect Ratio: 16:9 only (at the moment you can't do square or portrait videos)
- Resolution: Up to 4K/2160p (3840x2160p)
- Frame rate: 60 fps (maximum)
- Key frame: 2 seconds (recommended) Do not exceed 4 seconds
- Bitrate (video): 20–51 Mbps
- Audio codec: AAC or MP3
- Bitrate encoding: CBR
- Pixel aspect ratio: Square
- Audio sample rate: 44.1 KHz
- Audio bitrate: 128 Kbps
- Channel layout: Stereo
- Protocol: RTMP or RTMPS
- Maximum characters in titles: 100 characters
- Maximum characters in description: 5,000 characters
- Minimum date to schedule a broadcast in advance: none
- Maximum date to schedule a broadcast in advance: 3 years
LinkedIn Live

LinkedIn Live used to be in a closed beta, but now it is open to all. You can read more in my article on How to Broadcast to LinkedIn Live.
Currently, you have to use a third-party tool to broadcast to LinkedIn Live. The official mobile and web apps don’t allow you to stream to this platform. Only certain third-party live streaming tools can connect with the LinkedIn Live API. This includes Ecamm Live, Restream, Wirecast and StreamYard. There used to be no option to stream directly via RTMP, however, LinkedIn added the ability to stream to LinkedIn Live via RTMP in March 2021. More information on LinkedIn RTMP can be found here and if you have access to LinkedIn Live you can set it up via your live LinkedIn Live dashboard.
The LinkedIn Live API used to not support comments, but it's now possible to via and highlight LinkedIn Live comments in certain tools. LinkedIn Live also supports live captions.
You'll soon be able to schedule a LinkedIn Live broadcast - I've been testing it in a closed beta. You can't create a private or test broadcast either. So, when you hit that “Go Live” button in LinkedIn, you are live, baby!
LinkedIn Live Specs:
- Length: 4 Hours (maximum)
- Aspect Ratio: 16:9 only (at the moment you can't do square or portrait videos)
- Resolution: 1080p (maximum)
- Frame Rate: 30 fps (maximum)
- Key frame: every 2 seconds (60 frames)
- Bitrate (video): 6mbps (maximum)
- Bitrate (audio): 128kbps and 48khz sample rate
- Encoding: H264 video, AAC audio
- Protocol: RTMP or RTMPS (secure RTMPS is preferred)
- Maximum characters in description: 1,300 characters (personal profiles), 700 (company profiles)
Instagram Live

Instagram is the odd one out here in that it’s mobile-only.
The only way to broadcast to Instagram Live is via the official Instagram mobile app. Yes, there are services out there that allow you to broadcast to Instagram Live from desktop. Avoid! They have reverse-engineered the API and are going against Instagram’s terms and conditions. You could have your Instagram account suspended. You have been warned!
So, no third-party tools in this list integrate with Instagram Live. The only way to go live to Instagram is via the official Instagram mobile app. You can’t schedule an Instagram Live broadcast either.
But, I’m actually ok with all of this.
Treat Instagram Live as a different kind of broadcast - a more raw and rough and ready one.
Once you’ve finished broadcasting your Instagram Live, it disappears forever. Unless you select the option to share it to your story, in which case, it’s viewable for the next 24 hours. You can also save it to your camera roll, which makes it possible to repurpose for later.
Your viewers can comment on the video while it is live, but they can’t comment on the replay. If viewers want to, they can send you a direct message.
Instagram Live broadcasts can have a maximum length of 60 minutes.
Gear: What Do You Need?
This article is all about the tools you need to broadcast live. For most of the tools, that will require a computer. Or if you're using a native or 3rd-party smartphone app, then you'll need a modern smartphone.
I'm a great believer in bootstrapping your live video studio over time. Start with the important stuff first - a decent computer that will allow you to live stream with ease. Everything else is the "icing on the cake" - microphones, cameras, live switchers, green screens, lights and more.
Here are a few things to get you started:
Live Video Streaming Features
It’s now time to do a deep dive into all the main features that you might want to have in a live video tool. Then I’ll go through each tool and give my thoughts and share their features.
Some features are more advanced and are only going to be of interest to more advanced and professional users.
These are marked ADVANCED and you can skip over them if you like.
Video & Audio Features
Preview & Live Windows: Preview, Live & Dual View ADVANCED
All live video tools will give you a live window. This displays the video that is being streamed to your network(s).
But some tools also give you a preview (or staging) window, too. The advantage of this is to preview a scene (or view) before you push it live. It also allows you to adjust the way a scene looks before you push it live. Tools that have the preview window feature tend to offer a dual view as well - so you’ll see the preview window on the left and the live video on the right. Examples of this are OBS Studio and Wirecast.
Some tools such as BeLive have a more basic staging feature - where you can view your webcams and guests before you push them live - but don’t allow you to set up text and graphics layers on them. And some tools don’t have a preview window at all.
I’ve never really used preview windows, but that’s because I tend to produce my live shows as well as host them. Having a preview window usually means one extra step to change scenes. You select the scene and then push it live. However, if you are producing the show, a preview window can be really useful if you want to make a change without it being seen live.
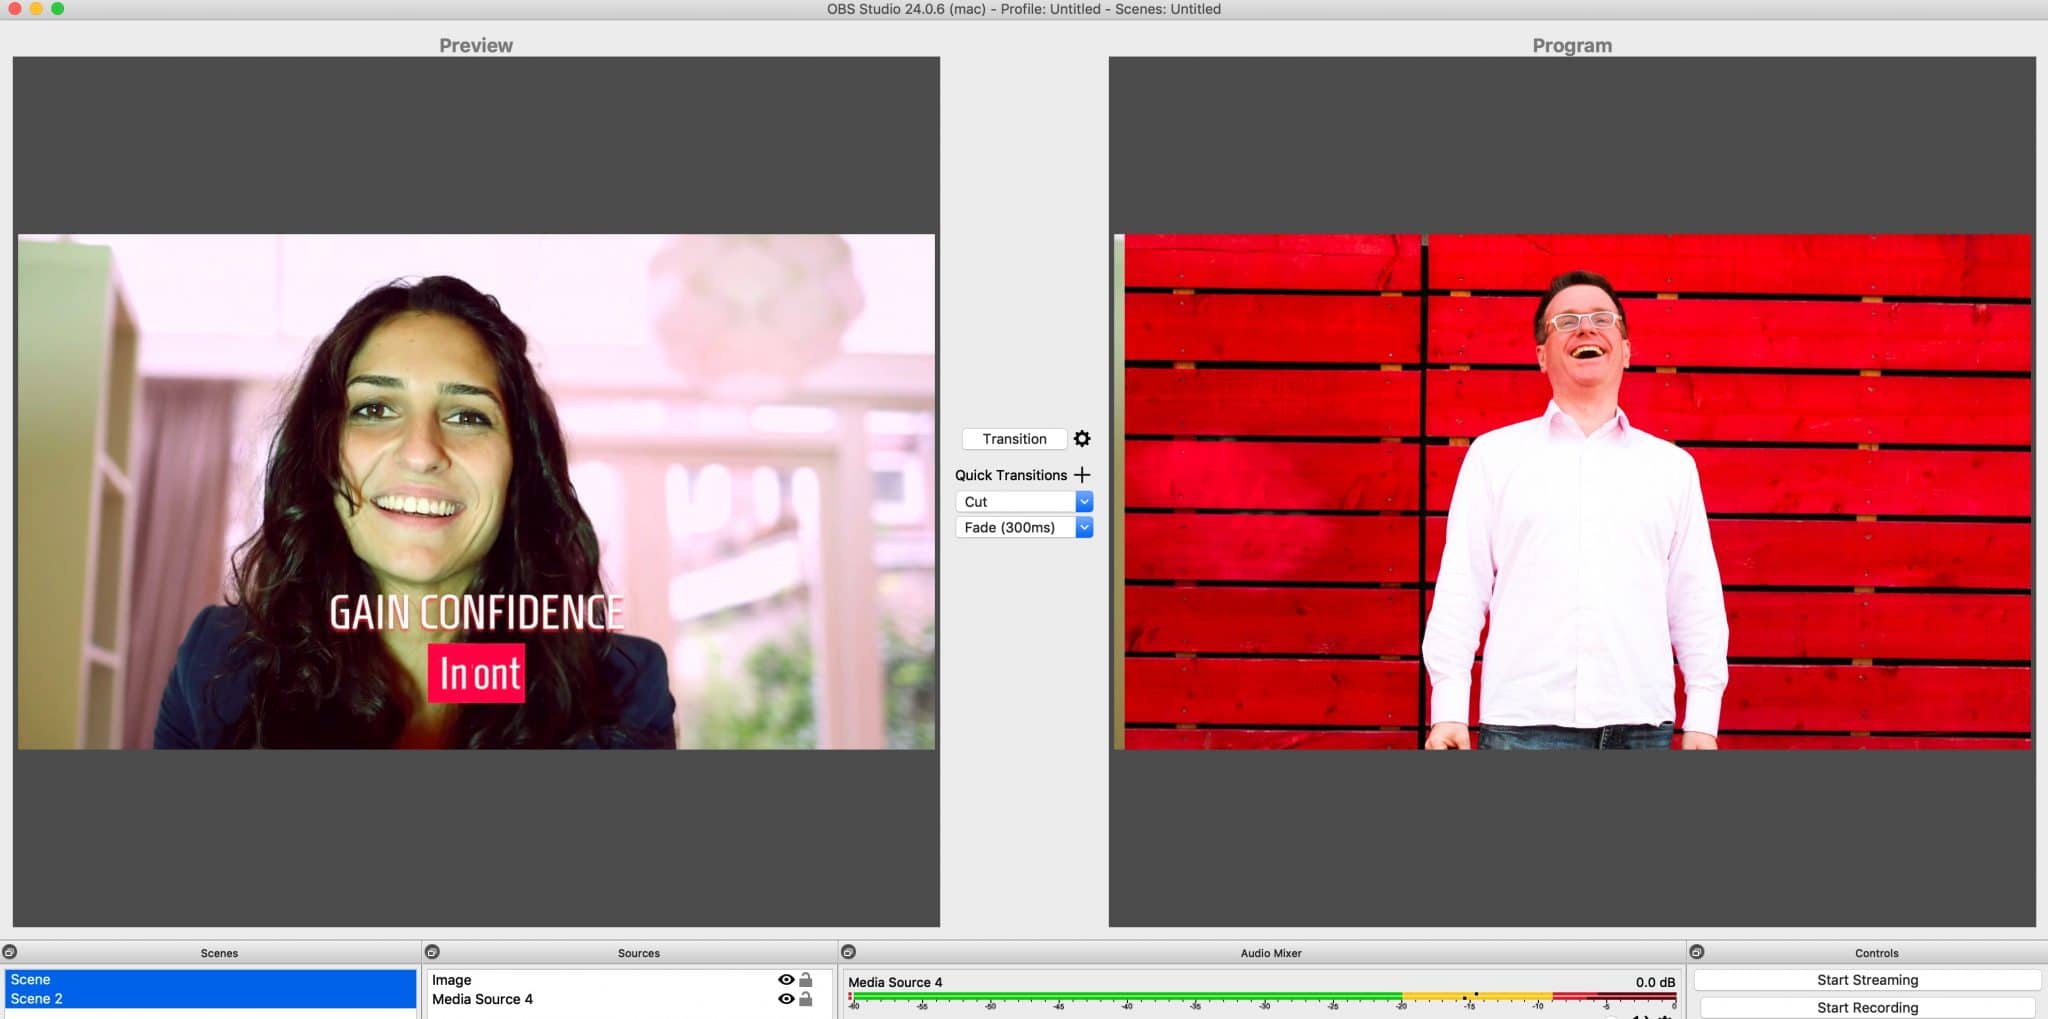
Live Video Resolution
What resolution do you want to stream in? There are actually loads of different formats. I’m not going to go into all of them now. There’s a great article from Boxcast that goes into more detail on the different live streaming definitions.
The number in the resolution numbers is how many horizontal lines in the picture. The “p” stands for “progressive” which means all horizontal lines appear at once.
Here are the usual resolutions:
- Standard definition - up to 480p
- Standard High definition - up to 720p
- Full High Definition - up to 1080p
- Ultra High Definition / 4K - 3840 x 2160 or 4096 x 2160
As well as the resolution, you might want to think about the frame rate you want to stream in. This is the number of times the picture (or frame) changes every second. The standard is 30 frames per second. But some platforms can stream in up to 60 frames per second.
Please note that the higher the resolution and the frame rate, the more powerful your computer needs to be - and the higher your internet bandwidth needs to be.
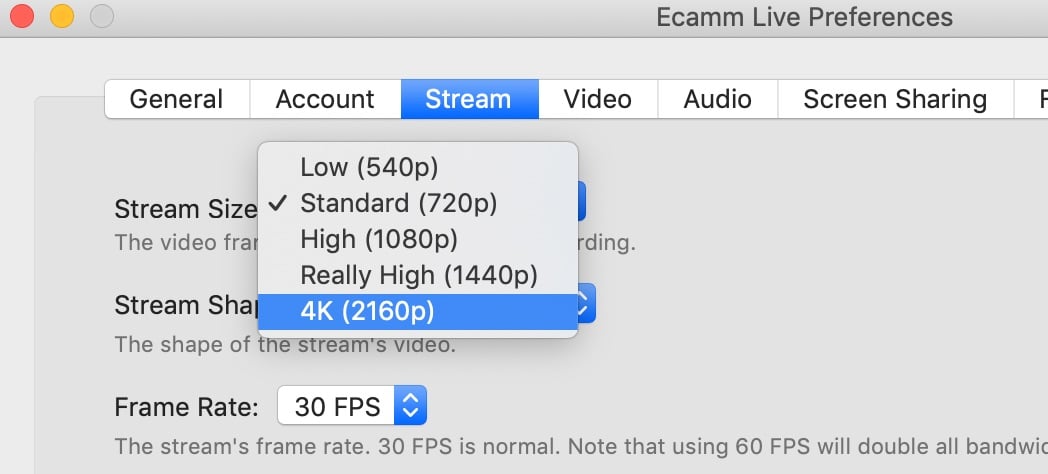
Aspect Ratio
This is a posh way of talking about the shape of your video. There are loads of different aspect ratios, but the main ones for live streaming video are:
- Widescreen - 16:9
- Super widescreen - 2:1
- Portrait - 9:16
- Square - 1:1
All tools and live video platforms support streaming in Widescreen (16:9). Not all live video platforms allow the other aspect ratios - and the same with the tools. Ecamm Live is the only one to support Super widescreen. Although Wirecast, OBS Studio and vMix can basically give you whatever aspect ratio you like as long as the destination supports it.
Ability to Record Live Video
Some live video tools allow you to record your video as well as live streaming it. This is useful if you want to repurpose it later - for example create shorter highlight videos for YouTube, Instagram, and Twitter. Some tools will save it on their end (such as StreamYard, Restream and BeLive). Dedicated tools will record it directly to your computer (such as Ecamm Live, OBS Studio, Wirecast, and vMix). These will require your computer to be a bit more powerful but tend to give a better quality recording.
Cloud-based live video tools like StreamYard and Restream will give you a limited amount of space to store your recordings. Some tools will delete your recordings after a certain length of time, and some will allow you to store them indefinitely. Some tools allow you to purchase more space.
Repurposing your live video allows you to create lots of different types of content quickly and easily so that you can reach a wider audience. To find out more read this article on How to Repurpose Your Live Videos. And you can listen to this episode of the Confident Live Marketing Podcast where I interviewed the Content Repurposing Queen, Amy Woods on How to Repurpose your Live Videos to Explode Your Business.
Green Screen / Chroma Key ADVANCED
This is an advanced feature that allows you to have a virtual background. You could swap out your background for a brick wall or even make it look like you are flying through space. In most cases, you’ll need to have a green screen behind you (or a blue screen). The tool will swap out the green pixels for the virtual background. Some tools will only allow you to have a static background. Others, such as Ecamm Live and Wirecast, also allow you to have a video background.
I don’t recommend using a green screen if you’re just starting out. Good lighting is so important - otherwise, it can look really fake.
Some tools make it easier than others, but generally, they’ll offer a fading slider - so you can adjust the levels. Some also allow you to use a blue screen - important if you like wearing green clothes!
Ecamm Live has a really neat feature called “mask edges”. This is great if your green screen isn’t very wide. With this setting switched on, it will stretch the virtual background right to the edges of your screen, even if your green screen doesn’t.
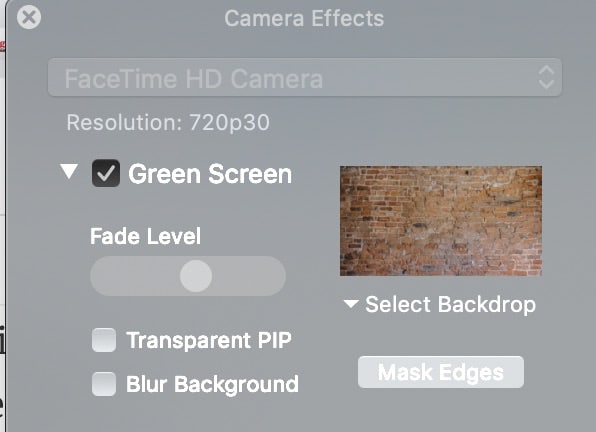
Screenshare
If you do a lot of “how to” videos where you demonstrate how to do something on your computer, you’ll want to share your screen. All of the tools in this article have this feature. If you want your guest to be able to share their screen, check whether the tool allows this.
You’ll be able to share the screen of your primary monitor or if the display of any other monitor you might be using. Most tools also allow you to share the display of the window of an individual app running on your computer.
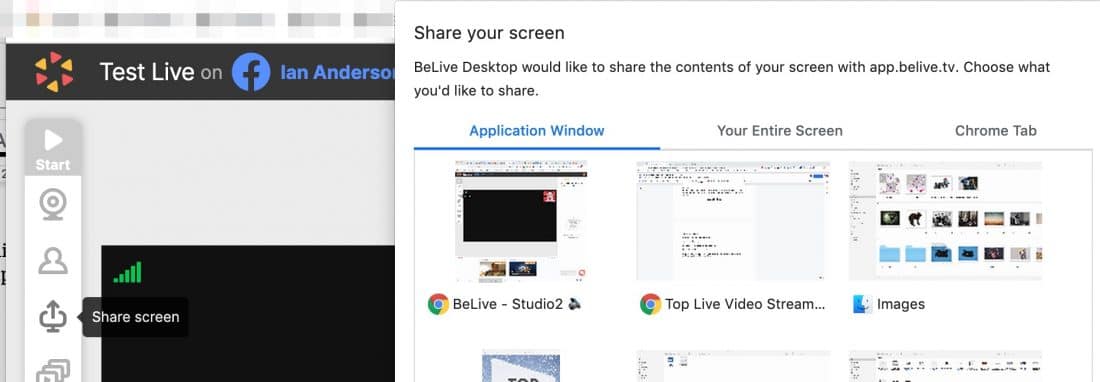
Capturing Desktop Audio
Not all tools will capture the audio of your computer, so do check that. Macs often will need a special driver to capture audio, which may or may not be provided by the tool.
Picture in Picture
When you are doing a screen share or displaying a video, you may also want to display your webcam (and/or your guest’s webcam) as a small thumbnail in a corner of the screen. This is great because most people like to see you speak while you are demonstrating something.
Many tools will allow you to have your camera as this smaller “picture in picture” view. Some tools give you one or two options on how this looks (such as StreamYard and BeLive) and some give you full control over how it looks (such as Ecamm Live, OBS Studio, Wirecast, etc). Some tools allow you resize, crop, rotate and do other things to your picture in picture (such as making it appear in a circle).
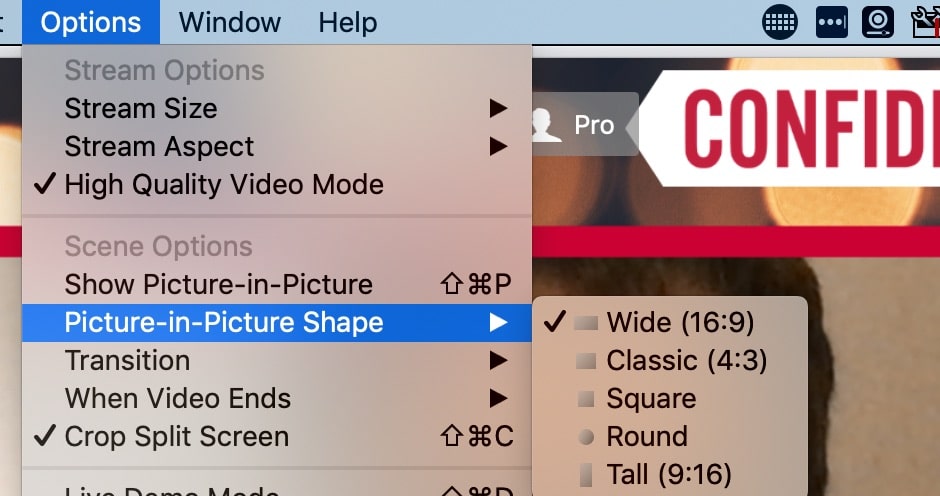

ISO Video Recording ADVANCED
More advanced tools (such as the pro versions of Wirecast and vMix) allow you to record each source separately. For example, you could get the tool to record your cameras and your guest’s cameras separately. This is great for repurposing, as you’ll get raw recordings without any graphics or overlays.
ISO recording is only going to work on a very powerful computer. A PC with an SSD hard disk, at least a quad-core i7 processor and a dedicated graphics card with at least 1Gb of memory is recommended. It’s an advanced feature and a very resource-heavy process.

ISO Audio Recording ADVANCED
More tools (such as the pro version of Ecamm Live) gives you the option of recording each audio source in separate files. For example, your audio (as host) will be in a separate file to your guest's audio (and music, sound effects and more). This is perfect if you want to repurpose your live show into a podcast.
Instant Replay ADVANCED
Some tools will allow you to play a previous part of one of your cameras as a replay. You can even run it at a slower speed. This is great for sports events when you want to replay an important section. This works by replaying part of an ISO recording. This is an advanced feature that will require a powerful computer.
Live Captions ADVANCED
I’ve seen many statistics that show that a high percentage of people watch videos with the volume muted. For example, the Verizon Media 1st Party Video Content Data Analysis put the percentage of users at 83% in 2018. Adding captions to pre-recorded videos helps those with hearing issues consume your content. Many studies have shown that captions increase the number of views to your videos. That’s because some people will watch the video silently in their feed before deciding on whether it’s worth watching the video. And some people aren’t in the position to watch your videos with the sound up - they might be in a public situation such as travelling on public transport for example.
Adding captions to live video, however, is difficult. You’ll need very accurate transcription software, and it needs to be coded in a way that Facebook Live and YouTube Live can understand. This is the CEA-608 Standard. As this is an advanced feature, most live video streaming tools don’t offer this.
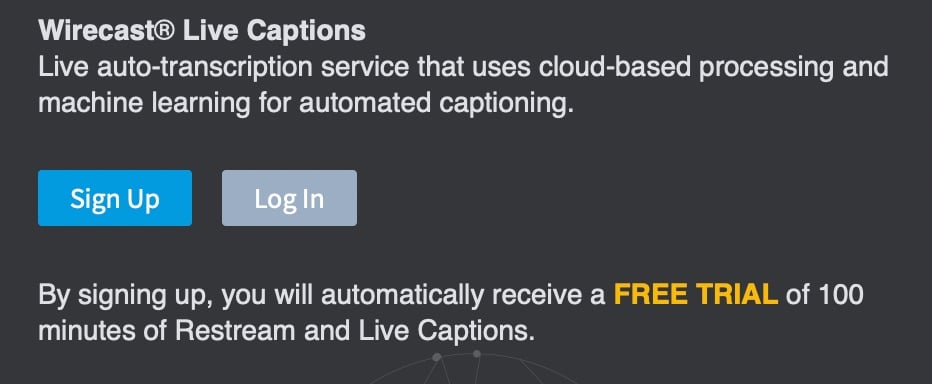
Stereo Audio
Does the tool support stereo or is it just mono?
Automatic echo cancellation
You’ll greatly reduce the likelihood of any echo if you and your guest wear headphones. But if the live video tool has in-built automatic echo cancellation, this makes things a lot easier.
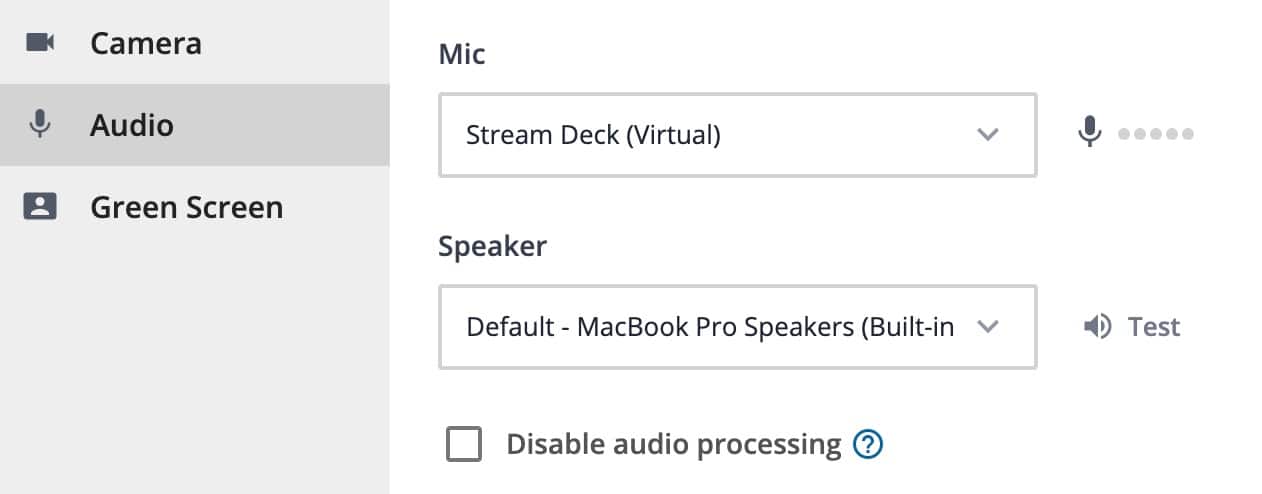
Live Video Platform Specific Features
Most live video tools in this article will allow you to create a scheduled video directly. Also, there are some cool platform-specific features you may want to investigate.
Facebook Page Crossposting ADVANCED
If you are broadcasting to your Facebook page, you can also cross-post to other pages that have given their permission. This makes it appear that you are streaming to all those pages at the same time. Some tools allow you to select the pages you are cross-posting to when you create or edit the scheduled live video. To choose which pages you want to cross-post to, click on crossposting in your page's settings.

Facebook Branded Content ADVANCED
For professional live broadcasts, where you are partnering with another brand, you’ll want to announce that the live stream has branded content and select the page you are partnering with. This allows you to comply with FTC guidelines. Only a few tools allow you to do this directly. If they don’t, you can always edit this using Publishing Tools or Creator Studio.


Facebook Destinations
When broadcasting to Facebook, you should be able to choose whether you are streaming to your personal profile timeline or one of your pages or groups.
Facebook Privacy
If you are streaming to your personal profile, you can select whether the live video will be public, viewable only to your friends, or “only me” - where no one will see it. Some tools allow you to select the privacy of personal streams, and some are public only.
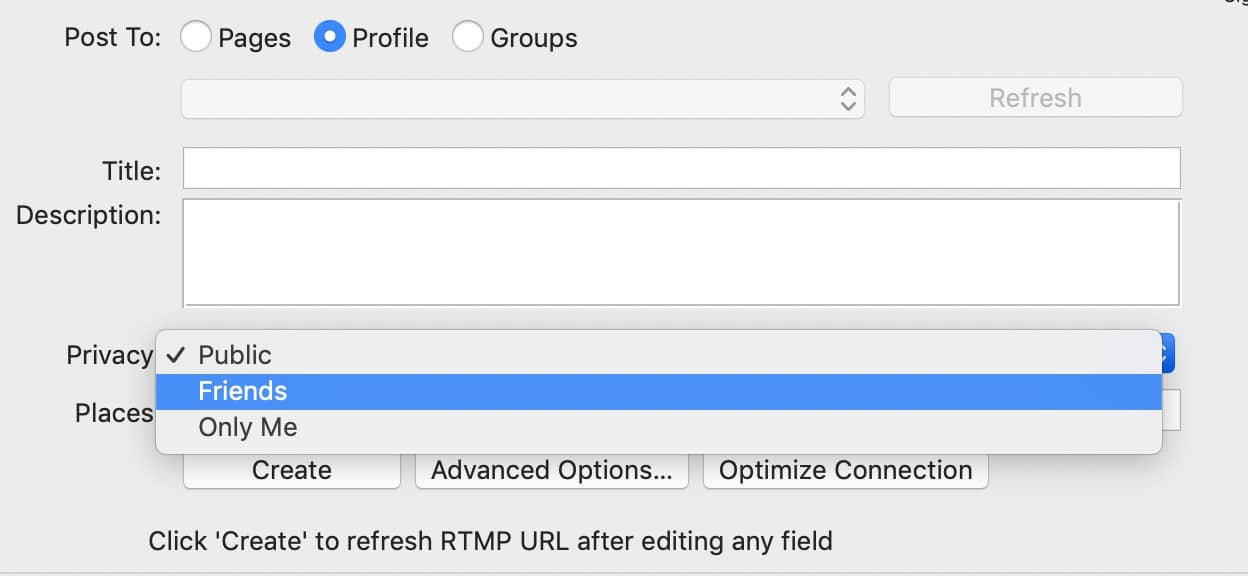

Set Place/Location on Facebook page
Some tools will allow you to flag which location you are broadcasting from. If not, you can always edit this in Publishing Tools or Creator Studio

Ability to Create a Facebook Continuous Live Stream ADVANCED
PLEASE NOTE: Facebook quietly removed the option to produce a continuous live stream. This option is no longer available.
A special type of live stream on Facebook (which I mentioned earlier) is a Continuous Live Stream (or ambient live stream). This type of live stream has no maximum length, but there will be no replay. A few live video tools allow you to broadcast a continuous live stream.
360 Facebook Live Streams ADVANCED
Some tools allow you to broadcast a 360 video. Please note, you’ll need special hardware to do this.
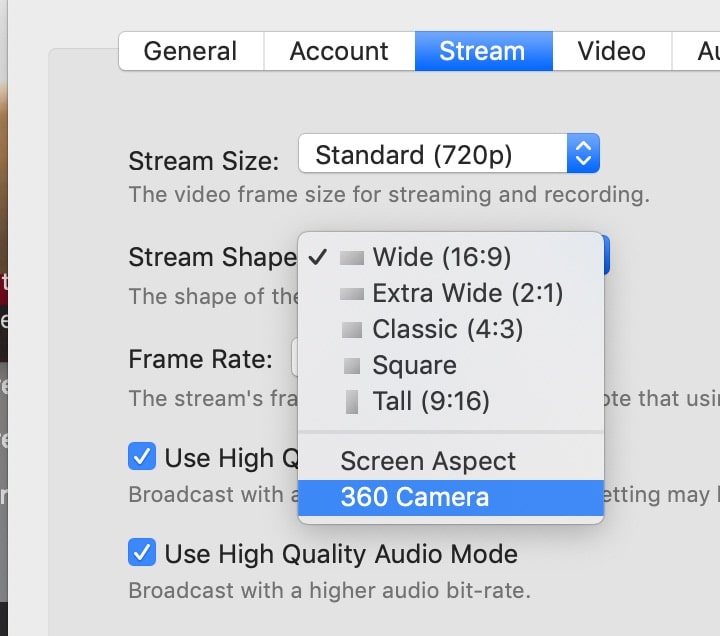
YouTube Destinations
As I mentioned earlier, there are two different types of YouTube Live broadcasts. Events and “Stream Now” ones. Most tools allow you to create events, and some will also allow you to create the “Stream Now” ones.
YouTube Privacy
When broadcasting to YouTube Live, you’ll be able to set the privacy to Public (where everyone can view it), unlisted (only people with the special link can see it), or private (only people who have been invited can see it.)
LinkedIn Live Targeting
When broadcasting to your LinkedIn company page, the API allows you to target specific audiences based on location and language. This is only available for company pages (not personal profiles), and you need at least 300 followers.
Ability to Add, Edit and Delete Scheduled Live Videos
Some tools will allow you to create the scheduled live broadcast on Facebook or YouTube. You’ll be able to add the title and post description in the tool, add a thumbnail, and other options like the date and time of the broadcast. Some tools will also allow you to edit or delete them afterwards. Most tools allow you to create a scheduled live broadcast, but some only allow you to go live straight away.
Ability to View Scheduled Live Video Broadcasts that Have Been Created With Another Tool and Stream to Them
Tools such as Ecamm Live and Wirecast will display forthcoming scheduled broadcasts for each network. That means you can stream to them from that tool no matter what tool they were scheduled with. For example, you might create the scheduled video in Facebook’s Creator Studio or on StreamYard, but you’ll be able to broadcast to it from Wirecast or Ecamm Live. This is particularly useful to have the tool as a backup if you’re not able to use your primary tool. Some tools will only allow you to broadcast to scheduled live videos that were created by that tool.
Multicasting
Multicasting ADVANCED
Some tools allow you to broadcast to more than one platform at the same time. Facebook used to disallow tools to broadcast to Facebook and another platform, but thankfully they’re okay with that now.
Some tools (such as Restream and StreamYard) do the multicasting on their servers. The advantage with that is that your computer and internet connection only needs to handle one stream - and the tool handles the rest on their server.
Other tools (such as Wirecast and vMix) also give you the option to stream to more than one platform directly from your computer. This requires a powerful computer and a lot of internet bandwidth!
If the tool doesn’t have multicasting built-in, you can always stream to a multicasting service such as Restream or Switchboard Live.
But it is important to remember comments. When you stream to more than one platform at the same time, some tools won’t allow you to view and highlight comments from all those different networks.
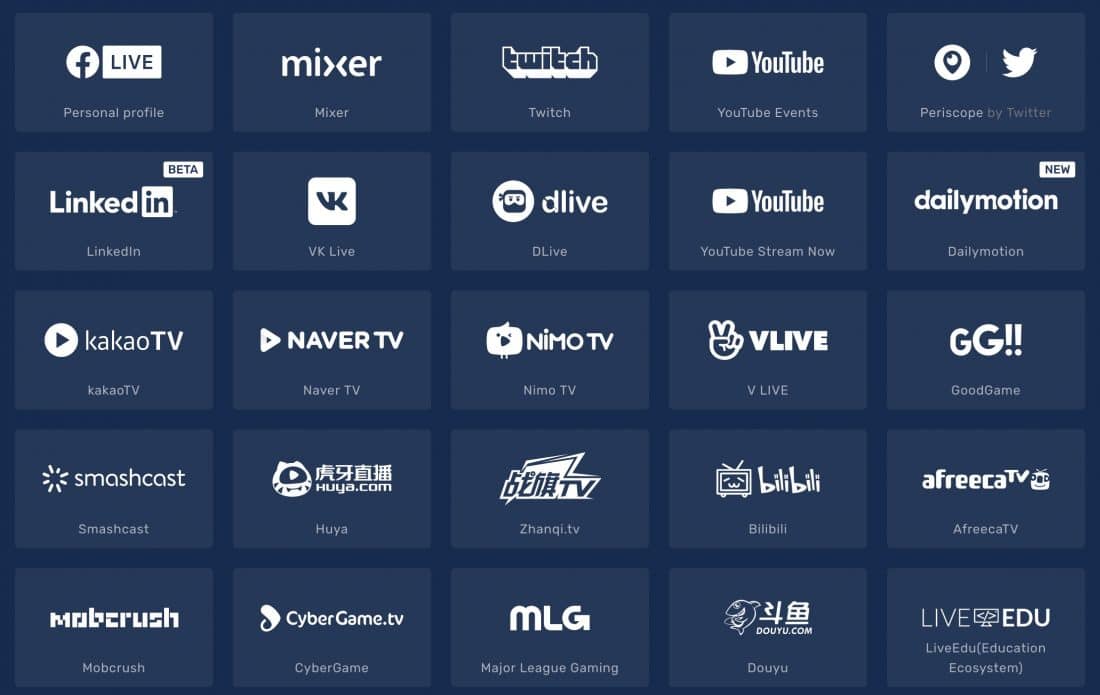
Comments
Being able to view comments from your live video audiences is really important. Engaging with people who leave comments is one of the most powerful features of live video. Most, but not all live video tools will display the comments from the live video platform you are streaming to. Most will also allow you to select a comment and bring it up on the video - with the commentator's name and photo.
LinkedIn Live has recently released the ability for some tools to monitor the comments. Facebook, YouTube, Periscope, and the multicasting service Restream have this feature.
Some tools (such as Ecamm Live) integrate with the Restream.io comments API, which means you can view all the destinations you are multicasting from Restream to. And some tools also have the ability to post and reply to comments.
It's useful to be able to manage and reply to your comments in a social media management tool. Agorapulse is one of the only tools to integrate with LinkedIn Live comments - see the pros and cons of Agorapulse in my article here. Other social media management tools will allow you to manage Facebook Live comments
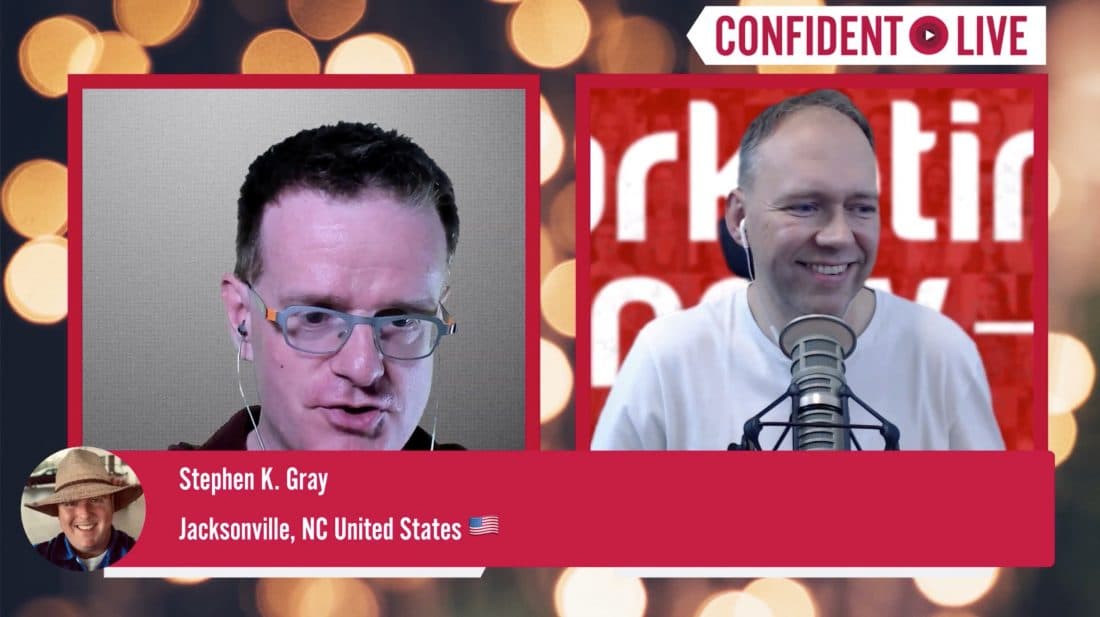
Layers & Scenes
Multiple Layers
When you are live streaming, you’ll most likely want to display your main camera. But you may want to add other layers - such as your guest’s webcam and your logo. You might want to add lower-third text to display your name, an overlay image to add some branding, and more.
Some tools make this really simple, but without the ability to customize the layers. This is useful if you’re producing your live video as well as hosting it. However, some tools give you a few more options to customize without making it too difficult. Some tools allow you to have lots of layers and give you full control over the look and feel.
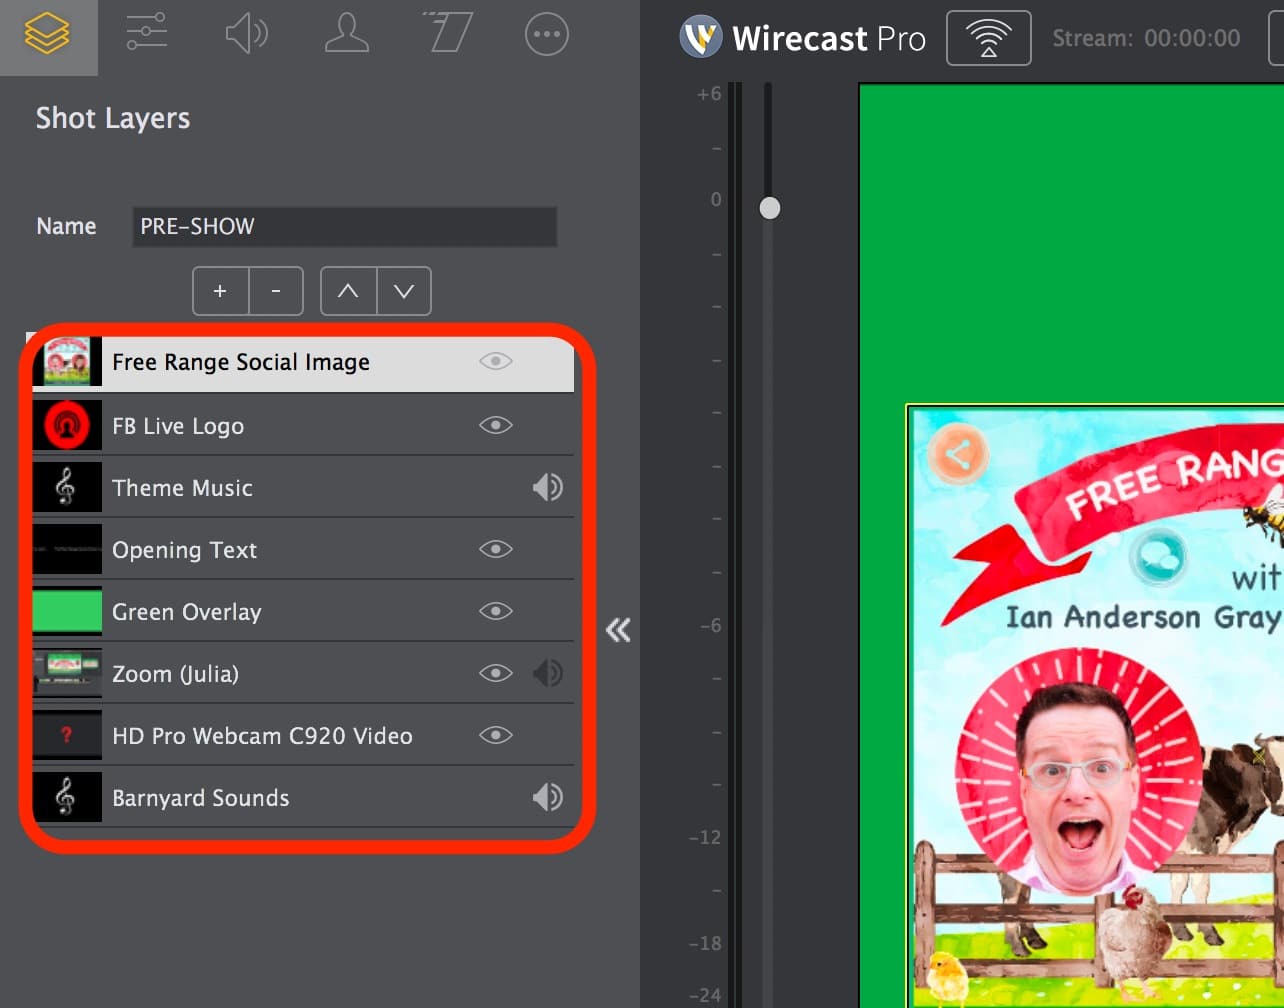
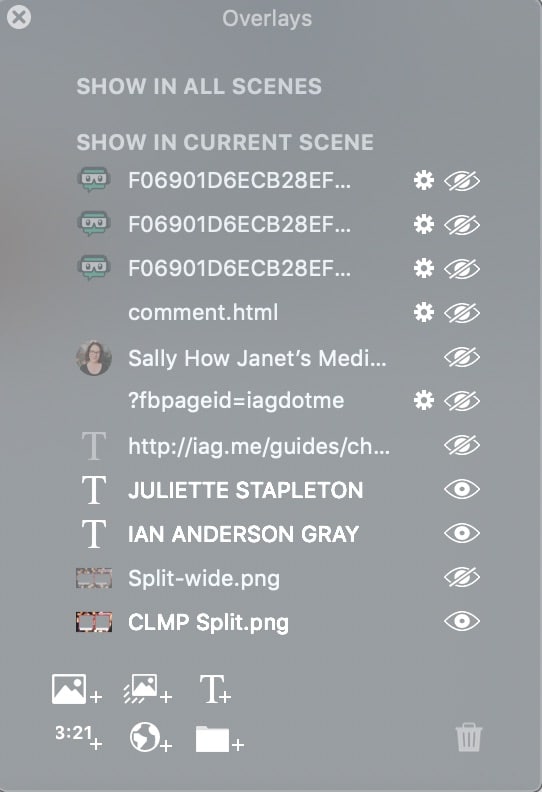
Overlays
Most tools allow you to add different types of overlays. These can include text, countdown timers, images, animated GIFs, pre-recorded videos, other video sources (such as other cameras and your guest’s camera), audio files, web widgets, and more.
Layouts
More advanced tools like OBS Studio, Wirecast and vMix allow you to customize the layouts of your sources and overlays completely. Some tools like StreamYard and BeLive only offer you simple pre-built templates, such as split screen and solo views. And some offer templates and full customization.
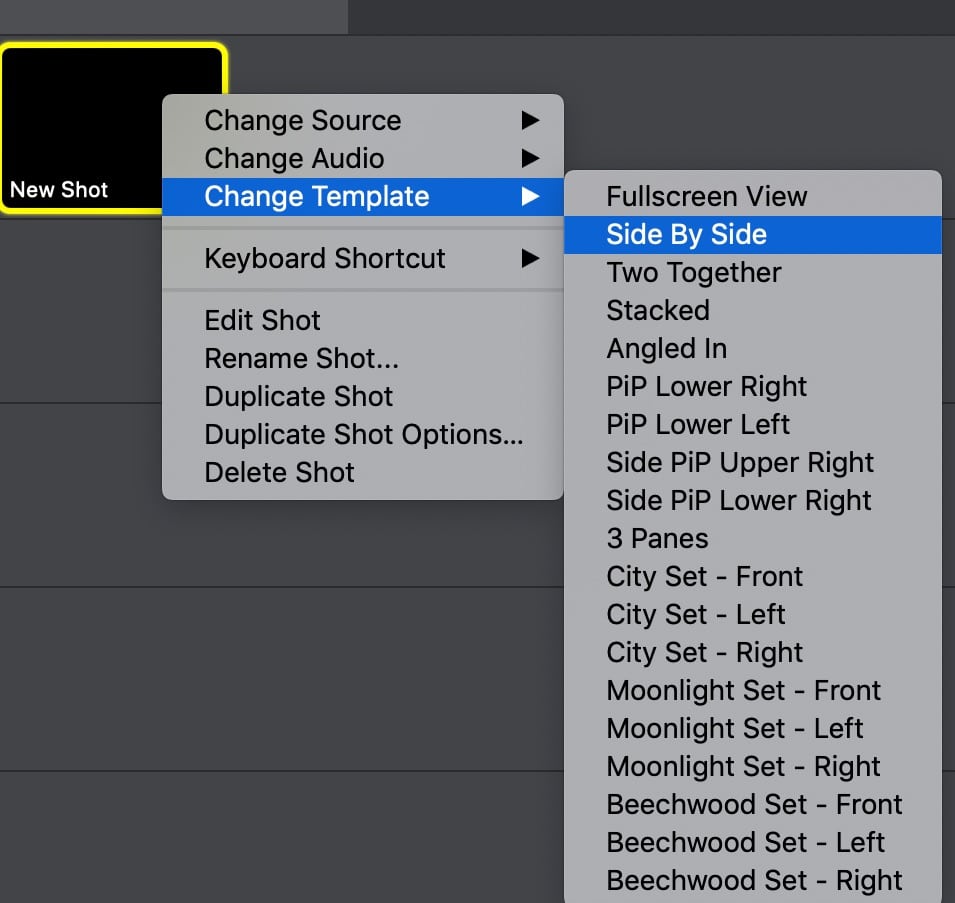

Multiple Scenes
In your show, you could just have one view (or scene) throughout. It could be just your camera - or you and your guest. But that can be very boring for your viewers. It’s best to change the view to create interest.
You also may want to have a show intro video, and perhaps a video to end. In my Confident Live Marketing Show I have lots of different themes that I switch between. They include a show intro video, a couple of different split shots (showing me and my guest), solo shots of me and my guest on our own, pre-recorded videos of my sponsors with me as a picture in picture, and lots more.
Some tools have simple layouts that you can toggle between. For example BeLive and StreamYard have different types of split view layouts showing you and your guest(s) as well as solo shots and a screenshare.
Other tools allow you to create lots of scenes ahead of time which you can then select as you through your show.
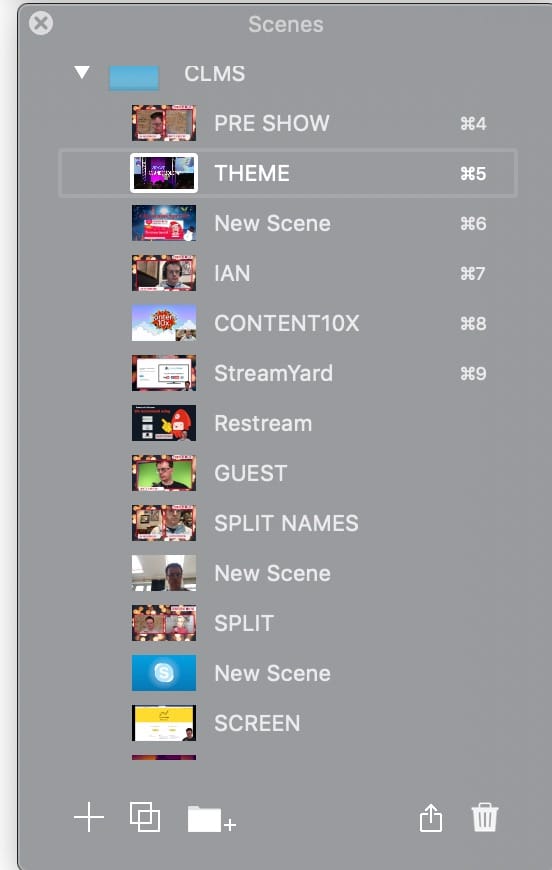

Add Audio/Music
A few tools allow you to add audio files to your scenes - allowing you to add sound effects and music.
Add Pre-recorded Video
Some tools allow you to play pre-recorded video on your broadcast. This is useful if you have a show intro video, or you want to display a video to discuss on your show. Cloud-based tools (such as StreamYard and Restream) restrict the file size of the video you can play (if you upload it to their server). It’s common for a maximum length of 10 minutes and under 200Mb. Desktop apps, usually don’t have any limit to the video you play.
Play Local Video
While desktop apps (such as Ecamm Live, Wirecast and vMix) all play video files stored on your computer (locally), some cloud-based tools (such as StreamYard and Restream) also offer this feature. This gets around the restrictions of playing videos stored on their servers. This feature plays the video on the stream from your computer.
Text
There are lots of different types of text overlays. Some tools have limited types - usually a title which will appear on the screen when you want. Most tools will allow you to add other text on the screen for lower thirds and other things. Some allow you to change the font type, size, color, background and effects such as scrolling.
PDF Overlays
Ecamm Live allows you to add a PDF as an overlay. This is perfect if you want to give a presentation using your PDFs. You can resize the overlay and make it full screen, and you can move through each page of your PDF very easily.
Shortcut Keys
Being able to assign keys for different actions in your live streaming tool can be really useful - particularly for switching scenes. Some tools allow you to assign different keys to switch scenes, starting/stopping your live broadcast, and more.
Stream Deck Integration
Elgato Stream Decks are physical devices with fully customized full-color buttons. You can program them to do different things in your live streams or anything on your computer. Some tools have developed Stream Deck plugins that allow you to switch scenes, display your live viewer count and lots more.
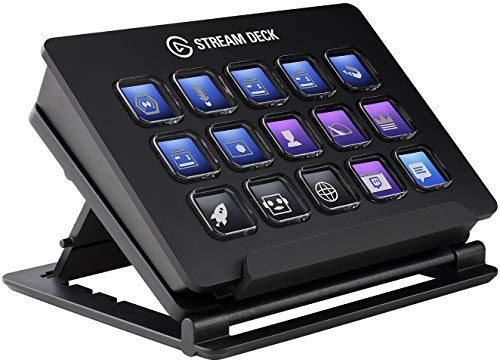
Remote Production
If you don’t want to produce and host your live shows yourself, you could delegate the production to a remote producer. In those situations, your producer can control the broadcast, switch scenes, and even moderate comments while you get on with hosting. Some tools allow a producer to produce the show by logging into a web interface. Where as some tools will require the producer to run the live video streaming tool on their computer and bring you onto your show as a remote guest.
It would also be possible to allow your producer to remotely control your computer and control the tool on your computer.
Scene Transitions
When you switch between scenes, you might want to add some fancy transitions between them. Some tools only offer a simple cut transition and a simple swipe transition. And some offer lots of fancy ones including cross dissolve, zoom, light rays, ripple, copy machine, and more.
Automatic End Fade to Black
At the end of your live video, do you want it to just end, or would you like a nice “fade to black” transition. Ecamm Live offers this option.
Camera Picture Adjustment
Some camera apps allow you to adjust the picture, and some don’t. It can be really helpful to adjust the picture of your cameras within the live streaming tool. For example, brightness, white balance, saturation, gamma, manual focus, color grading LUT, mirror, and deinterlacing.
Camera Digital Zoom and Pan
Being able to zoom and pan in your camera view is useful so that you can get the perfect composition. With some tools you have to crop and zoom, and it can be quite time consuming to sort this out. Some other tools (such as Ecamm Live) allow you to zoom and pan to get the composition you want.
Inputs/Outputs
You’ll want to bring in your camera and microphone into your live video streaming tool. But perhaps you’ll want other cameras and microphones and more advanced stuff.
Multiple Webcams
All live video tools allow you to select which camera you want to use for your live stream. Usually this will be your webcam or it could be a camera connected via an HDMI to USB interface or similar. However, some tools allow you to switch between multiple cameras - giving you different camera angles.
Multiple Microphones
All tools will allow you to select which microphone you want to use for your audio. But some tools allow you to use more than one microphone - useful if you have guests in your studio.
Web Widgets ADVANCED
Some tools allow you to add a web widget either as an overlay or on a scene on its own. Using a service like StreamLabs widgets you can add special effects, chat boxes, alerts donations and more.
NDI ADVANCED
Some tools have an advanced feature which allows you to output your stream or bring in an external source via NDI. This stands for Network Device Interface and is a royalty-free software standard developed by NewTek. It allows the broadcast of high-quality video over your network.
If your tool has an NDI output, it will allow you to display your broadcast on a different device on your network, or use it in a different app. If your tool allows NDI inputs, you can bring in high-quality video from other NDI devices on your networks such as cameras.
Virtual Webcam ADVANCED
Some tools allow you to output the video of your live show to a virtual webcam. This allows you to use your video in another live streaming or video conferencing tool.
Virtual Audio ADVANCED
Some tools allow you to output the audio of your live show as a virtual audio device. This allows you to use your audio in a live streaming or video conferencing tool. Or you could output the audio to an audio tool like Adobe Audition or Audacity to record your podcast.
Direct USB Connection for dSLR Cameras ADVANCED
Webcams such as the Logitech C920 are great to start off with. The Logitech Brio is a great upgrade with 4K resolution. But if you really want to make your live video shows look more professional, upgrading to a digital mirrorless or dSLR camera is the best way.
The standard way is to connect it from the HDMI out of your camera to your computer via an HDMI to USB converter. Not all cameras have HDMI outputs, and not all of them are “clean”. If they don’t output a clean feed via HDMI, you’ll end up with all the camera display overlays such as battery power, crosshairs and more. However, if you have a compatible Canon camera, you can plug it directly into your computer via USB. Ecamm Live will show your Canon camera as a source without any extra software or hardware. You’ll need to install extra tools (such as Camera Live) to make this work with other live video streaming tools.
USB Tablet and Phone Screen Capture ADVANCED
Some tools will allow you to share the screen of your phone or tablet on your live video. With some live video streaming tools, you’ll need to use another tool such as Quicktime (Mac) or Reflector (Windows & Mac) to capture your device’s screen on your desktop, and then capture that into your live video streaming tool. Some tools (such as Ecamm Live) allow you to capture your device’s screen straight in the tool.
Blackmagic Support ADVANCED
Blackmagic make cameras, HDMI converters and more. Some live video streaming tools connect directly to the device so that they can use special features like deinterlacing.
Video and Audio Monitoring/Mixer ADVANCED
If you’re bringing in different guests, playing videos, sharing your screen and more, it’s important to check all your audio levels. Some tools allow you to monitor your video and audio sources in a mixer. This will let you adjust the volume of all your different sources.
Remote Guests
It’s such a powerful feature to bring in a guest or co-host into your show remotely. We’ve seen this done on TV news a lot, and this allows us to have our own live show with guests from anywhere in the world.
Different tools have different methods for bringing in guests.
- Using a video conferencing tool like Skype or Zoom. Some live video streaming tools bring in your guests through Skype. This relies on a separate tool, but the quality tends to be good. It does mean that you’ll need to invite the guest to use that tool, and bring them in that
- Integrated remote guest feature. Some tools have their own built-in remote guest feature. Usually, you’ll give your guests a web link, and they just use their browser to share their webcam and microphone. The quality is pretty good, is easy to use for the guest, and makes it easy to onboard them on to your show.
- No remote guest feature. Some tools don’t have a remote guest facility at all, and you’ll need to do a workaround by screen capturing a video conferencing tool like Skype or Zoom.
For more information on how to bring in remote guests to tools such as OBS Studio and Wirecast, check out my article the Essential Checklist for Facebook Live Guest Shows.
Number of Guests
Although you might only want to interview one guest, it can be fun to have a group. Many tools allow you to have multiple guests on your show - varying from 2 to 50 or more.
Guests Layout
I mentioned how many tools allow you to add layers. This can be the case when adding guests to your show. Some tools such as Ecamm Live, BeLive, and StreamYard make this really easy for you - giving you split screen and solo view views. Some tools allow you to fully customize the view - allowing you to crop, rotate and resize all your guest views.
Guest View
When your guest is on, what do they see on the screen? Do they see what your live viewers will see? Or do they just see your camera? Do they see the comments? It’s really helpful if the guest can see the live stream - that way they can see what your viewers will see. Some live tools allow this, and some, well, don’t!
Guest Green Room
If your guest joins part way through your live show, it’s useful for them to enter a green room (a waiting room). That way, they’re not surprised by suddenly being thrust onto your live show. But it also allows you to make sure everything is set up before and then you can bring them on at the appropriate time. Not all tools have a green room feature.
Private Chat for Guests
Having a chat feature between you, your guests, and an optional producer is a useful feature. It can allow you to let your guests know something privately, for example “try to speak more slowly”, “we need to finish the show shortly”, or “please mention X & Y”.
Conclusion
So, there you have it.
Have any of the tools tickled your fancy?
Have I missed one out?
Is there a missing feature you’d love me to cover?
Get involved in the comments below!
And check out my article on Top Tools for your Live Video Toolbox for other types of tools to help with your live streaming.
What's Next?
I'm constantly updating this article as the tools add new features and things change. Here is what I'll be adding next...
- Feature: YouTube Superchats
- Add Restream and Restream Studio as a main tool
- Managing comments - the ability to reply, react/like, ban and put on pause (for YouTube comments)


Comments