How to Broadcast from your Computer to Facebook Live
Want to use Facebook Live from your Computer?
...On your Facebook Profile, Page or Group?
...For Free? On your Mac or PC?
Since 2016 you have been able to broadcast to Facebook Live from your computer. You can stream to your Facebook profile, pages, groups or event pages.
Facebook allows you to do this simply via the Facebook website.
But in this article, I am going to show you how to take things further so you can use multiple cameras, embed videos and audio files, and overlay images all with slick transitions.
Cool eh? Want to know how? Read on!
Looking for the Facebook Live button to go live with OBS Studio? It's moved!
Just click the button below to scroll down...
Walkthrough Video
#1 Live Video Tools
If you want to broadcast from your computer, you'll need to use a live video streaming tool. This can be a web app that runs in your browser (such as Facebook itself, or a 3rd party tool like Restream Studio, Streamyard or BeLive) or an app that runs on your Mac or PC (usually known as an encoder).
There are quite a few that work with Facebook Live, but the most popular ones are Ecamm Live, OBS Studio, Restream, StreamYard and Wirecast, but there are others.
Top recommendations:
- Ecamm Live (Mac Only, from $20/mth)
My top pick for Mac users - Restream (PC & Mac - Browser-based & multi-streaming service, free & from $19/mth)
Both a web app (Restrean Studio) and a cloud-based multistreaming service that works with other 3rd-party tools such as Ecamm Live and OBS Studio. With Restream Studio, you can bring up to 10 guests) - Streamyard (PC & Mac - Browser-based, free & from $25/mth)
This runs in your browser and so works for both Mac and PC users. Really easy to use and integrates with Facebook, YouTube, Periscope, Twitch and more. Screensharing on the free version and bringing in up to 10 guests. Paid version allows multicasting to up to 10 destinations (web app, free and from $25/mth). - SwitcherStudio (iPhones & iPads only from $49/mth)
Use your iPhones and iPads to create a mobile video studio. Really powerful yet easy to use solution. - OBS Studio (Macs, PCs, Linux - Free)
This is what I cover in this article. My top pick for a free app that works for both PCs and Macs. A bit difficult to use, but extremely powerful and flexible. - Wirecast (Macs & PCs, from $599)
Taking things to the next level - for Macs and PCs. More powerful but also more difficult to use. Gives you the ability to stream to more than one destination at the same time.
Other live video tools:
- BeLive (Browser-based & from $19/mth)
- vMix (PC only & from $50)
- XSplit Broadcaster (PC only & from $13.50/month)
- mimoLive (Mac only, from $199/yr)
- Lightstream (Browser-based, free)
- Zoom - (Macs & PCs, from $14.99)
Then there are some apps and tools that offer video meetings or broadcasts but don't currently integrate with Facebook Live. The good news, you can integrate these with Facebook Live by sharing the window in OBS Studio and Wirecast. Examples include:
- Skype
- GoToMeeting
- Amazon Chime
- Webinar platforms such as GoToWebinar, WebinarJam etc
In this article, I will guide you how to set up the free OBS Studio to broadcast to Facebook Live (to your profile, groups or pages). OBS Studio is incredibly powerful, and it's free!
Both OBS Studio and Wirecast can use many different sources for your live stream including:
- Multiple webcams
- DSLR cameras
- Image and Videos on your computer
- Your phone's camera (via an IP Camera app)
- Your display
- A Window on your computer
They support multiple displays at the same time (including picture-in-picture) and you can easily set up keyboard shortcuts with slick scene transitions. OBS Studio and Wirecast allow you to stream to a plethora of services including Facebook Live and YouTube.
For a full comparison of all the top live video streaming tools, read my full guide on the
Top Live Video Streaming Tools for 2023

#2 Video-Conferencing Tools
If you want to bring in guests, then most of the tools I recommended above allow you to invite guests into your live show very easily. The easiest tools are web apps such as Streamyard and BeLive as these are all done via the browser. Ecamm Live currently integrates really well with Skype - so you just invite your guest via Skype. vMix has a browser-based guest app called vMix Call and Wirecast has one called Rendezvous.
For OBS Studio, you'll need to use a video-conferencing tool. You can integrate these with Facebook Live by sharing the window in OBS Studio and Wirecast. Examples include:
- Zoom (if you don't want to use their in-built live streaming feature)
- Skype
- GoToMeeting
- Amazon Chime
- Webinar platforms such as GoToWebinar, WebinarJam etc
#3 Internet Speed Tools
I'll cover this in more detail shortly, but before you go live I highly recommend you test your internet speed every time. It's important that you have a stable upload speed. The most reliable speed testing tool I've found is Speedtest. It's available as a computer app or a mobile app:
If you're live streaming from your computer, make sure you close down as many apps running in the background - especially internet hogging tools like Dropbox and Google Drive. It's important that your live video streaming tool can use as much internet bandwidth as possible.
There's a cool tool called TripMode which restricts internet use to specific tools. So you can make sure that only your live video streaming tool only has access to the internet.
- TripMode (Macs & PCs)
#4 Managing Comments
Many live video tools allow you to highlight comments from Facebook onto your live broadcast. Streamyard, BeLive and Ecamm Live all do this. vMix and Wirecast have separate software that allows you to highlight comments on the screen.
But, once your live video has ended, don't just leave it there. Make sure you go through your comments and reply to each of them. Show that you care about your audience.
That can be a real pain on Facebook (or indeed LinkedIn or YouTube). That's why using a social media management tool to manage your comments, reply, like, delegate and review is so useful.
 My go-to tool for this is Agorapulse. It has a zero-inbox workflow which means getting through your comments is a breeze. It will display the comments from your Facebook Live Videos in one place (and also works with LinkedIn Live and YouTube Live comments!)
As you go through your comments you can like, reply or delegate to another team member. Once you've done that it will be reviewed and disappear from view meaning you can get down to inbox zero really quickly.

Your Live Video Gear

Your Computer
Streaming to Facebook Live from OBS Studio or Wirecast requires a good internet connection. Check the following:
- Fast Upload Speed:
You'll need a fast internet speed (10Mbps Upload).
It's the UPLOAD speed that counts. Facebook mention you should have at least 3Mbps UPLOAD speed. However, to get good results, I recommend an upload speed of at least 10Mbps is more like it.
I've had reasonable quality with lower (say 4Mbps) and I've heard reports from some who have worked with as low as 2Mbps, but it depends on what quality you are happy with. A good download speed is useful, but it is the upload speed that is important. Check your upload speed with the speedtest tool.

Or try the compari.tech speed test app which donates $0.01 to charity for each user.
Go Wired: You'll get a higher and more stable upload speed if you connect straight to your router with an ethernet cable.
WiFi is great, but your internet speed can reduce rapidly the further away you are from your router. To give you an example, my download speed when plugged in is 200Mbps, but it goes down to 34Mbps when I use WiFi. The same is true for my upload speed - it goes down a lot when I use WiFi. - Fast & Powerful Computer:
You need a pretty powerful computer to broadcast live video.
Ideally, you should have a modern i7 processor and 16Gb of RAM.
Your computer needs to encode the video before sending it over to Facebook. Encoding video requires a fast processor and a modern i7 can cope with this. If you have a dedicated graphics card that helps too - as will a good bit of memory. To help things, it is best to close as many apps running in the background as possible - so that OBS Studio can have as many resources as possible to encode the video. To give you an example, my 6yr old Dell with an i5 processor, 8Gb RAM and a dedicated graphics card almost copes - but it's not perfect. I'm waiting for a new computer as we speak! - Enabling Pop-ups:
If you're using the Go Live button on this page, you'll need to allow pop-ups from this site (iag.me). Usually, the first pop-up will open, but once that closes, a 2nd pop-up should open. If it does not, you'll need to enable pop-ups. - Allow RTMP:
Really, this shouldn't be an issue for most people. However, make sure your firewall, router and ISP all allow RTMP. You don't need to know what that is, apart from that it's the method (or protocol) Facebook Live use for Facebook Live. If you can't connect, you'll need to check your firewall settings or contact your ISP. - If you're still having issues, Facebook recommends you "disable all ad blocking software or browser plugins that could prevent the video player from loading". I think that's a bit extreme, but if you're having issues, it's best to try.

Webcams & Microphones
If your computer has an integrated webcam and microphone, you can get going straight away. However, if you want to enhance the quality, I recommend investing in a decent webcam and if budget allows, a webcam.
Webcams
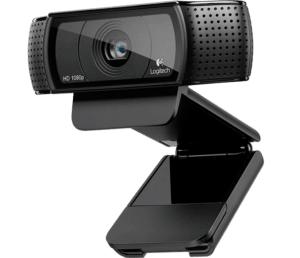 Logitech HD Pro Webcam C920
I recommend the Logitech HD Pro Webcam C920.
There is a newer version, but the C920 works really well, has amazing reviews and is fairly inexpensive.
SLR Cameras & HDMI
If you want to take things to the next level, then you could consider an SLR camera such as the Canon EOS 70D, but you'll need to connect it to your computer via an HDMI capture card.
Microphones
The microphone in the C920 is pretty good, but if you can afford the cost of a microphone, it's well worth it.
Audio quality really matters. If people can't hear what you're saying, they'll just turn off. There are so many amazing microphones out there, and you can get really geeky and get mixing desks, external sound capture cards and more.
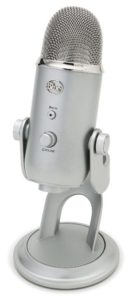 Blue Yeti USB Microphone
I'm really happy with my Blue Yeti Microphone (Amazon) - It's lasted me a while. You do need to set it up correctly and minimize background noise as it can pick up noise from the background very easily. You can plug this microphone straight into your Mac or PC and it should just work! It also can be used with your iPhone or Android (with the appropriate cables)!
Samson Q2U
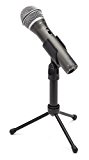 The Samson Q2U is a dynamic microphone with both an XLR and USB output. It's a really high-quality microphone with a great price (around $80) and is used and recommended by many top podcasters around the world.
 Heil PR-40
It's not cheap ($327), but the Heil PR-40 dynamic microphone from Heil is probably the most highly rated microphone by professional podcasters. Cliff Ravenscraft (the Podcast Answer Man) has used it for years. Leo Laporte from TWiT TV uses it and so do many others. You'll need an XLR to USB converter or use a USB mixing desk so you can channel the sound into your computer.
Getting Creative
You can get really creative at this point and invest in multiple webcams. That way you can change camera angles throughout your broadcast. To get an idea of what you can do, check out this live broadcast by David Antunes. He produces live band sessions "David Antunes & Amigos" every week using OBS Studio, his Macbook Pro, 4 webcams and a Bluetooth keyboard which he controls while playing the piano. He regularly gets 50,000 views, with around 1,500 watching live:
Building Your Live Video Studio
In this article, I will guide you how to set up the free OBS Studio to broadcast to Facebook Live (to your profile, groups or pages). OBS Studio is incredibly powerful, and it's free!
Both OBS Studio and Wirecast can use many different sources for your live stream including:
- Multiple webcams
- DSLR cameras
- Image and Videos on your computer
- Your phone's camera (via an IP Camera app)
- Your display
- A Window on your computer
They support multiple displays at the same time (including picture-in-picture) and you can easily set up keyboard shortcuts with slick scene transitions. OBS Studio and Wirecast allow you to stream to a plethora of services including Facebook Live and YouTube.
Boring but Important Stuff!
Copyright Warning!
This is really important! Facebook is very good at detecting the use of copyrighted music. A number of users have been banned from broadcasting to Facebook Live for up to 3 months for inadvertently or intentionally playing copyrighted music. I'd hate that to happen to you.
Facebook Live Specs
You don't need to know this stuff, but it's useful, particularly if you encounter any issues.
- RTMP - Facebook uses RTMP as the method (or protocol) to stream your live video. RTMP stands for Real-Time Messaging Protocol and was developed by Macromedia (and then Adobe) to stream audio and video via Flash.
- Length: 4hrs (or unlimited for a continuous broadcast)
- Resolution: 720p (1280 x 720), although some pages have 1080p enabled
- Aspect Ratio: 16:9 (widescreen), 9:16 (portrait) 1:1 (square)
- Frame rate: 30fps (maximum)
- Bitrate (video): 4mbps (maximum)
- Bitrate (audio): 256 Kbps (maximum)
- Key frame: 2 seconds
- Video codec: H264
- Audio codec: AAC
- Audio sample rate: 48kHz
- Channel layout: Stereo
- Maximum characters in Titles: 255 characters
- Maximum characters in description: 63,206 characters
- Minimum date to schedule a broadcast in advance: 10 minutes
- Maximum date to schedule a broadcast in advance: 1 week
Broadcasting to Facebook Live: Getting Started
#1 Download OBS Studio
As I said, in this tutorial, we're going to be using the free and open source software, OBS Studio:

So, head on down to the Open Broadcaster Software website and download OBS Studio:
IMPORTANT! Please download OBS Studio (for Windows, Mac or Linux) and not the old OBS Classic (Windows Only). OBS Studio has built-in support for Facebook Live while the classic version does not.
#2 Get your Stream Key
In order to start streaming to Facebook Live, you need a Stream Key and the ability to publish a live video via Facebook.
First of all, do you want to go live from your Facebook page or your profile?
There is a different method for each.
The first is for Facebook Pages only. The 2nd method is mainly for Facebook Profiles & Groups, but also Facebook Pages.
Method 1: Facebook Pages Only
The easiest way to go live on your Facebook Page via your computer is to use the button at the top of this page.
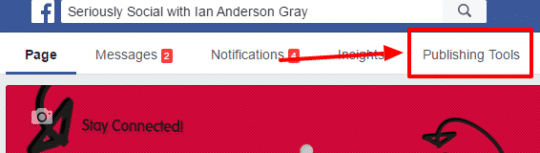
However, the traditional way to go live from your page is to use the "Publishing Tools" on your page.
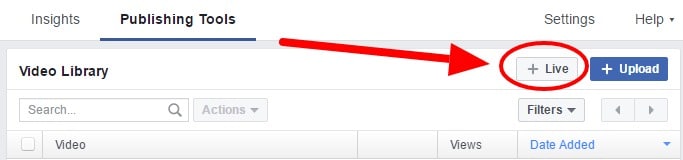
Log on to your Facebook page and click on Publishing Tools in the top menu:
Then click on Videos on the left menu:
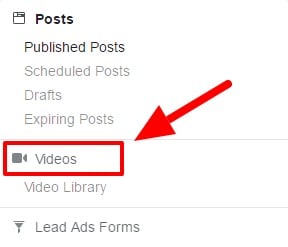
Then click on the +Live button on the top right:
Then copy the stream key in the modal window that appears:
 Then click preview and fill in your update text and video information:
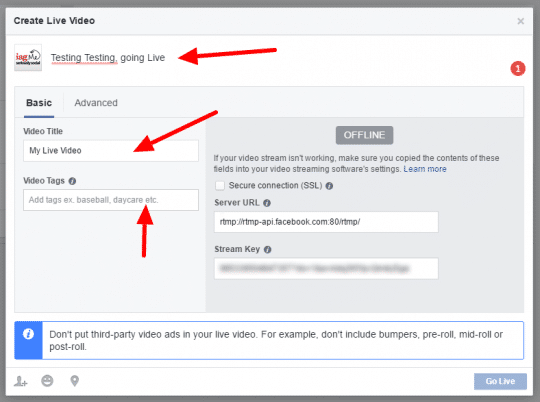
You can't go live yet, since you'll need to enter the stream key into OBS and start your stream so that Facebook can receive it.
Once Facebook receives your stream it will no longer display "OFFLINE" and will start to display your stream preview. Now skip to
Now skip to #3
Method 2: Facebook Profiles & Groups (and pages)
If you want to go live via your Facebook profile and share to your own timeline, a friend's timeline or a group you'll need to do things a little differently.
Facebook doesn't give you Publishing Options for profiles. They do, however, provide developers the Live Video API.
That's fine for developers, but not very helpful for everyone else! So, I've made it easier for you all by creating a button that connects to Facebook Live using the official Live Video API. All you need to do is click the button above!
So what are you waiting for?
Firstly, Click on the "Broadcast on Facebook Live" button above (at the top of this article). You should see a pop up window.
Then, choose whether you want to go live on your profile or group and click next:
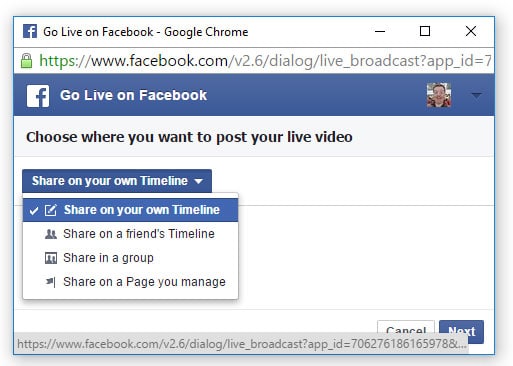
If you select "Share in a group", you'll need to search for the group you want to broadcast to.
Then first pop-up window should close and a second pop-up window should appear.
If this second pop-up does not appear, you'll need to check your pop-up settings to allow pop-ups. See the troubleshooting section at the bottom of this article.
In the pop-up, enter your update text and video information:
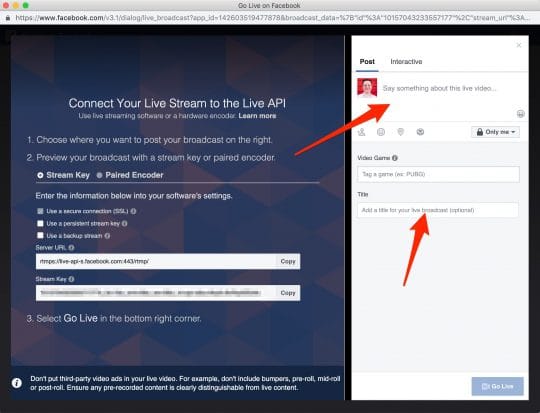
You can't go live yet since you'll need to enter the stream key into OBS and start your stream so that Facebook can receive it.
Once Facebook receives your stream it will no longer display "OFFLINE" and display your stream preview.
#3 Start Streaming
Click settings in OBS Studio and then click stream in the left menu.
Select "Streaming Services" as the Stream Type and "Facebook Live" as the service.
Paste the stream key you obtained from the previous step into the "Stream Key" box:
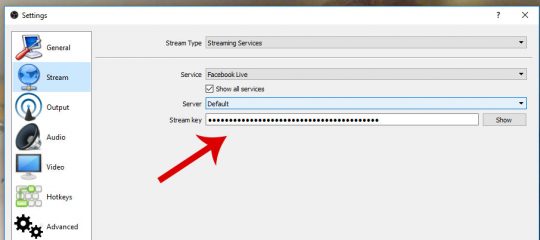
You shouldn't need to enter the server URL because OBS uses the standard URL.
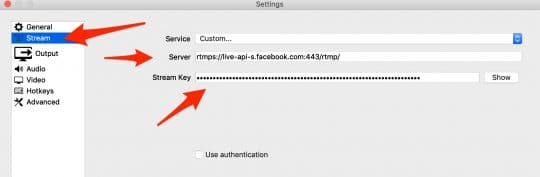
However, Facebook has recently changed this so that it requires a secure connection. As I write this update, OBS Studio hasn't updated it to use the new URL. If you find you can't connect, you'll need to select the custom server and paste in both the server URL and the stream key:
Click Apply and OK.
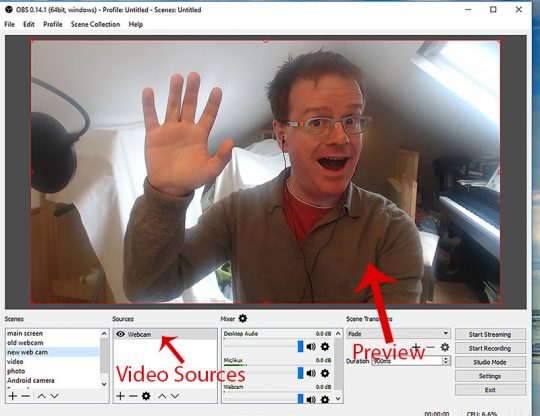
Make sure you have selected a video source (such as your webcam) and that you can see this in the preview section.
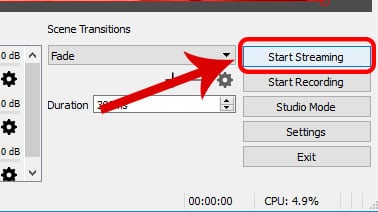
Then click the "Start Streaming" button:
Go back to the Facebook Live pop-up window in your browser.
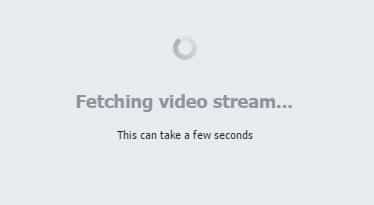
After a few seconds, it should display "Fetching video stream". If it does not, check the troubleshooting section at the bottom of this article for possible causes.
And then after a few more seconds, display your stream in all its glory:
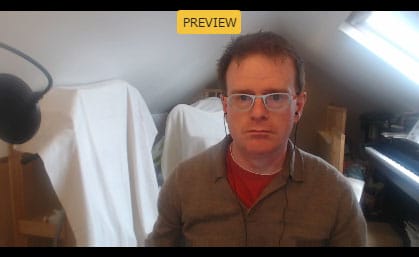
Please note, there will be a 5-7 second delay in the stream. This is normal.
IMPORTANT! If you are testing, it is a good idea to select "Only Me" for the "Who should see this?" option. That way no one else will see the live video while you are testing. You could then view your live video on a secondary device such as your smartphone: 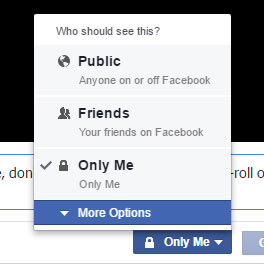 If you are happy to go live click the "Go Live" button in the browser window:
 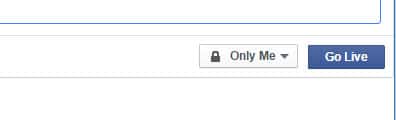 The pop-up window will then close. Don't worry, you have gone live!
Check your feed and you should see your live video has appeared. That's it. Enjoy!
To end your live stream, simply click the stop streaming button in OBS Studio.
Facebook Live Demonstration
Here is a Facebook Live video I created earlier which goes through the set up above
Troubleshooting Guide
Having trouble with the button above?
Do check the comments below, many other people may have asked similar questions to you and will save you some worry!
Here are some common questions and answers...
#1 The first pop-up closes after I select where I want to go live to
When you click the go live button, your browser will normally display a pop-up. You'll be able to choose where you want the live video to be posted to. Once you've done this, this window should close and another pop-up should appear. Here you'll be able to craft your post, get the stream key and see your preview. However some browser's block this second pop up. If this happens to you, check your browser settings to allow pop-ups from this site (iag.me). Check this article out to find out how to allow pop ups for your browser.
#2 I get a "Cannot connect to server" or a blank preview
Something is blocking your connection between OBS Studio and Facebook Live. It's likely that your ISP is blocking your connection. If this is happening to you, could you let me know in the comments below along with the name of your ISP? I'm interested to know. This is happening rarely, but it is happening to some people. If this is the case, I highly recommend that you try connecting on a different internet connection (such as at a friend's house or at your local coffee shop). If it works there then you know it's your internet connection. If it is your internet connection then check you don't have any firewalls that could be blocking the connection. Also restart your router to see if that solves it. If it doesn't then try and call your ISP and ask them to unblock Facebook Live. They'll probably fob you off, but keep trying. Please let me know how you get on in the comments below!
#3 There is a big delay in my stream
This is a more difficult issue to solve. There is always going to be a delay (perhaps up to around 5-10 seconds) but some people have complained of a much longer delay. Firstly make sure you check your upload speed using a service like Speedtest.net. It's not your download speed that makes a difference, it's the upload speed - since you are uploading the video to Facebook in effect. You should have an upload speed of at least 3Mbps, although 4Mbps and higher is preferable. You can use Facebook Live if you have a slower speed, but you may have issues. Also, the speed of your computer is important. Older and less powerful computers will take their time encoding the video. Keep an eye on the CPU usage in the bottom
Also, the speed of your computer is important. Older and less powerful computers will take their time encoding the video. Keep an eye on the CPU usage in the bottom right-hand corner of the OBS Studio window. If it's really high (above 90%) then your computer may be struggling.
In OBS Settings you can change the encoding preset to “ultra fast” or “super fast”. You can find this in Settings->Output.
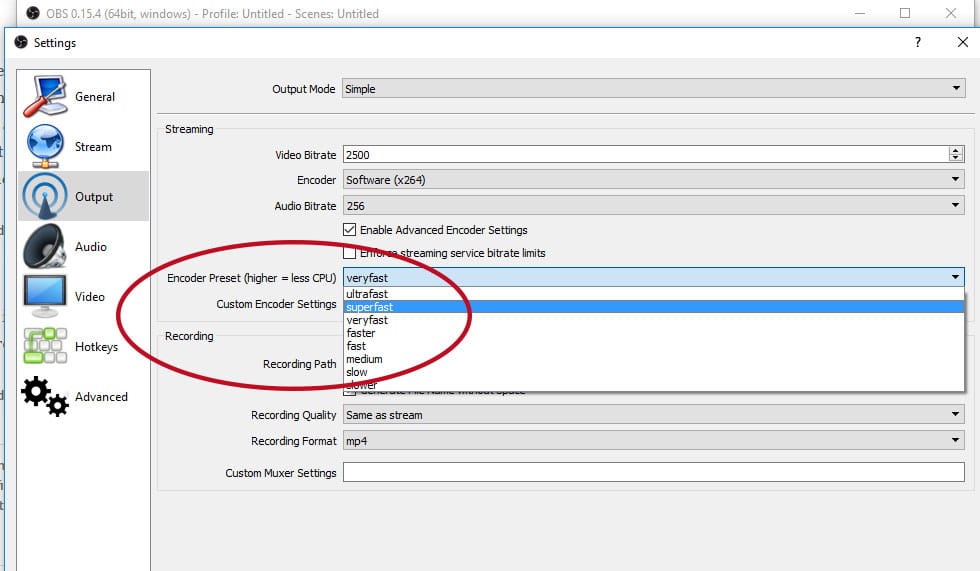
This will mean your computer’s processor will be used a little less.
#4 I use a Mac, and I'm not able to stream the audio from other apps such as Skype in OBS to Facebook Live
Macs handle desktop sound a little differently to Windows. On the Windows version of OBS Studio, the sound from Skype will automatically be captured as desktop audio in OBS Studio. On a Mac you need to route the sound from another app to OBS Studio.
This requires a 3rd party app. Wirecast has this functionality built in (a driver that records desktop audio), but with OBS Studio you’ll need a bit of extra help.
There are a number of options...
- Soundflower - An extension that allows other apps (like Skype) to route audio to other apps. There were some issues with Soundflower not being compatible with later versions of OSX but the developer has made some updates.
- JackAudio - Not tried this, but looks like a good alternative too.
- Loopback - Is a premium Mac app, which is highly recommended by a friend of mine. It costs $99, but apparently, it’s worth it!
- Sound Siphon - Similar to Loopback but cheaper.This was recommended by Leslie Samuel. I've not tried it myself, but it looks good!
When you install one of these, you can then route the audio output from Skype into OBS Studio and it should just work. It’s a pain that you have to jump through a few hoops here, but it’s just the way Macs work.
#5 My webcam appears black!
If your webcam preview just appears black in OBS Studio, you may need to adjust the resolution by changing it to custom. Right-click the webcam source and click properties to change the resolution.
#6 Audio and Video are out of sync
There are a number of factors that can affect a delay between audio and video. The first thing to ensure is that you close as many background apps as possible. Close down as many apps as you can, check for any bandwidth draining apps such as Google Drive, Dropbox etc. You could also see what else is running in the background and shut down any other apps.
The 2nd thing is to check your upload speed. Use something like speedtest.net. If you have at least 3Mbps or 4Mbps upload speed you should be fine. Ideally use a wired connection as opposed to a wireless one.
The 3rd thing is to turn up the encoding preset. Go to settings and then output, and put the encoding preset up to max.
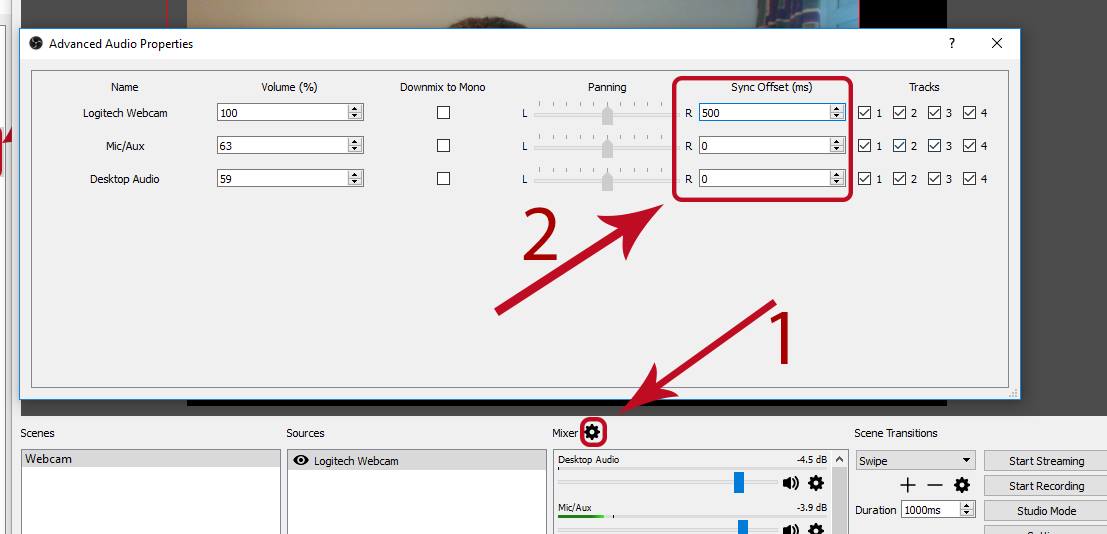
If none of that solves your issue, your computer may just be struggling with streaming the video. Live streaming takes a lot of processing power. Although OBS Studio as amazing - particularly for a free app, it's not quite as efficient as the likes of Wirecast. So, you may need to give it some help and manually fix the "sync offset".
To do this, click on the cog by the mixer on the main screen, and then adjust the sync offset of your audio. There is no ideal setting here, unfortunately, so you'll have to play around until you get a setting that works for you:
About Ian Anderson Gray
 Ian is the founder of the Confident Live Marketing Academy and is the host of the Confident Live Marketing Podcast. He helps entrepreneurs to level up their impact, authority and profits by using live video confidently. He's a geek, husband, and dad to two kids, and trained as professional classical singer. He lives near Manchester in the UK. Find out more
Comments