How to Broadcast to Facebook Live with Wirecast
Looking for the Facebook Live button to go live with Wirecast or OBS Studio? It's moved!
Just click the button below to scroll down...
In this article, I show you how to broadcast to Facebook Live from your computer to your Facebook Profile, Pages AND groups using Wirecast
UPDATE: Wirecast now supports broadcasting live videos to Facebook groups directly from the tool
I wrote an article recently on How to Broadcast to Facebook Live from your Computer using the free software OBS Studio.
This free software works really well, runs on Macs, PCs and under Linux and you can stream to your Facebook page, profile and groups.
However, there is another tool on the market that is highly recommended, and that is Wirecast from Telestream. There's no question, this is the professional live streamer's tool. Wirecast Studio costs $449 and Pro costs $699.
I'll be giving a full comparison of OBS Studio and Wirecast soon, but for now I wanted to walk you through how to broadcast from your computer to Facebook Live using Wirecast. Many marketers are choosing Wirecast as their main tool including Mari Smith, Guy Kawasaki, Joel Comm, Jeff Sieh and Mike Stelzner.
Going Live from your Computer?
Facebook Live launched last year with a feature to stream live video from your phone. It started rolling out to verified users first, and then to iOS users and Android users have begun to receive access to Facebook Live on their profiles recently. It's also possible to go live to groups and pages from your smartphone.
But, Mark Zuckerberg has his sights on something much bigger. At the recent F8 Facebook developers conference, Mark Zuckerberg displayed drones, 360 cameras, studio set ups and more - all of which integrate with Facebook Live. Combine that with Facebook acquiring virtual reality headset company Oculus VR and the future of Facebook Live is very exciting!
You can now broadcast live from your computer, using multiple cameras, webcams, share your screen, apps and even your smartphone to all your friends, group members and business page fans.
You can do this for free using OBS Studio (see my guide here) or using the professional software Wirecast here.
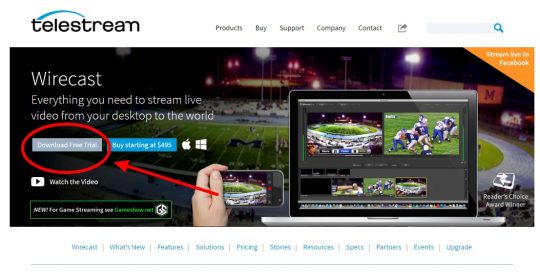
#1 Download and Install Wirecast
Wirecast is paid tool (starting from $495); however, they do have a free trial. I highly recommend trying both Wirecast and OBS Studio to see which one is going to be the best for you.
Wirecast allows you to stream to multiple sources, including Facebook Live, and you can capture any of the following:
- Multiple webcams
- DSLR cameras
- Monitor displays
- App windows
- Images, videos and media files
- Your smartphone display
Like, OBS Studio, Wirecast supports multiple displays at the same time (including picture-in-picture) and you can easily set up keyboard shortcuts with slick scene transitions. In fact, Wirecast has more varied scene transitions than OBS.
#2 Set up for your Profile, Page or Group
Like OBS Studio, Wirecast supports Facebook Live out of the box. Wirecast in some ways is a little easier to set up than OBS Studio, as you can just click a button to connect to Facebook as opposed to fiddling with stream keys.
Until recently, Wirecast did not allow you to broadcast live video to your Facebook groups.
In a recent update, however, Wirecast allows you to broadcast live video to your Facebook groups as well as your pages and profile. However, I've kept the alternative way of broadcasting to Facebook Live using the RTMP protocol because it does allow a bit more flexibility. If that means nothing you don't worry, just choose the easy option!
Go Live with your Profile, group or Page...
There is a "go live" feature in the publishing tools section of our Facebook pages, but you don't need to use this with Wirecast. You can connect your Facebook account with Wirecast directly.
Click Output settings:

Then select "Facebook" from the Output Destination drop down:
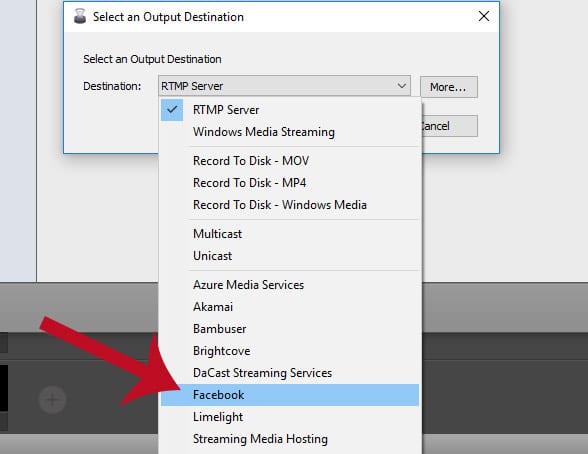
Click OK
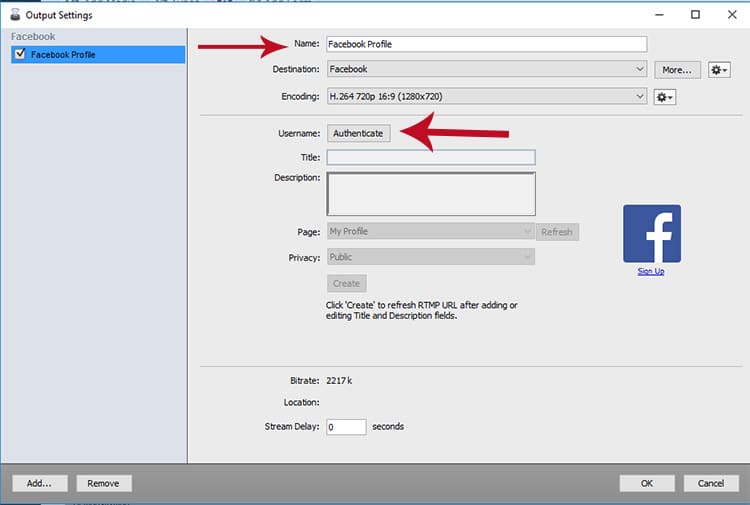
Enter the name of your Facebook Profile, then click Authenticate:
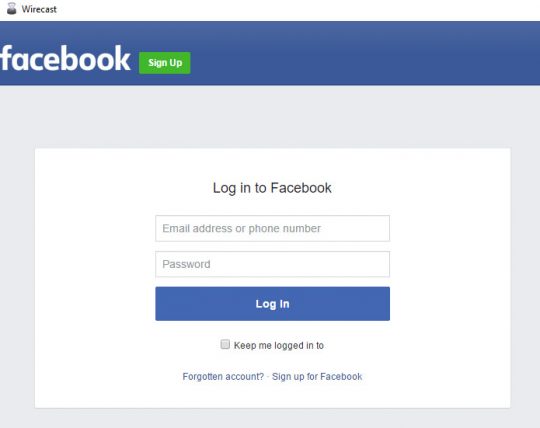
Log in to Facebook in the pop up browser:
Enter your Facebook Live video title and description, then select your profile or the page/group you want to go live to:
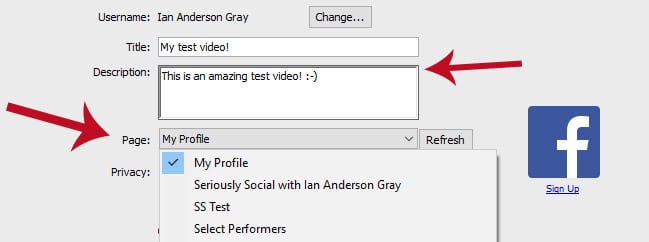
If you are going live to your Facebook profile, you can also select privacy settings to share publicly, with only your friends or just with yourself.
I recommend sharing only with yourself while you are testing, so you can watch later, just to make sure everything is working properly:
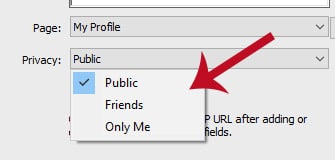
Click Refresh, then click OK.
Once you've set up your webcam or screen sharing you are ready to go live. Skip to #3
Alternative way...
There is a different way to stream to Facebook Live from Wirecast. In this, you can create the post on Facebook directly and mention other profiles and pages.
This uses a similar method that I outlined in my previous article on How to stream from your computer to Facebook Live.
We're going to connect with Facebook using the Facebook Live Video API. In Wirecast, we'll choose the RTMP protocol and you'll need a "streaming url" and "streaming key".
That’s fine for developers, but it's not easy for the rest of us. Where do you get the streaming URL and key?
I’ve made it easier for you all by creating a button that connects to Facebook Live using the official Live Video API. All you need to do is click the button at the top of this article.
Click on the "Broadcast on Facebook Live" button above (at the top of this article).
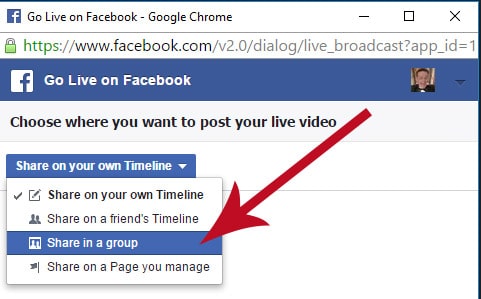
Then, you need to select where you want to post the live video - your own timeline, a friend's timeline, a group or a page you manage:
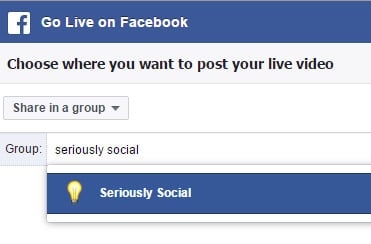
If you chose a group or a page, start typing the name of the page or group, click to select, and then click next:
A pop-up window should appear. If it does not, you'll need to check your pop-up settings in your browser to allow pop-ups.
In the pop-up, enter your update text and video information:
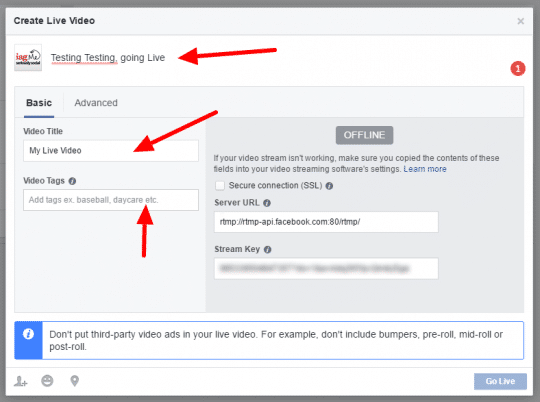
You can't go live yet, since you'll need to enter the stream url and key into Wirecast and start your stream so that Facebook can receive it.
Once Facebook receives your stream it will no longer display "OFFLINE" and display your stream preview.
Now we need to give Wirecast the correct settings so that it can connect with Facebook.
Click Output settings:

Then select "RTMP Server" from the Output Destination drop down (should already be selected):
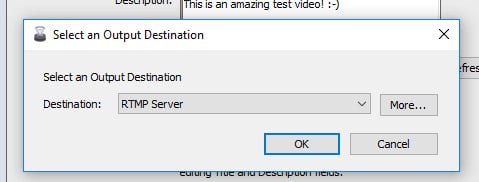
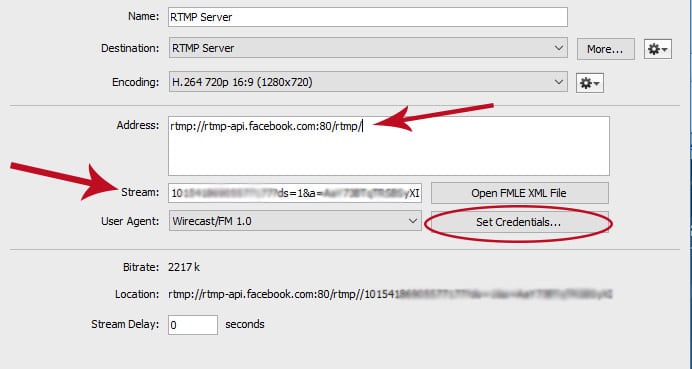
Then, paste in your stream URL (from the previous Facebook Live pop up window) in the address box...
Enter your Stream Key into the "Stream" box...
And click the "Set Credentials" button:
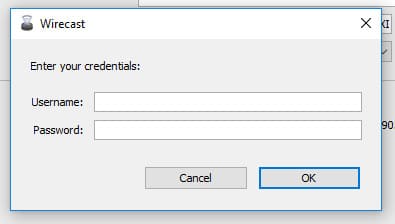
Enter in your Facebook username and password into the pop up window, then click OK.
Click OK.
Once you've set up your webcam or screen sharing you are ready to go live!
#3 Start Streaming
It's now time to go live.
If you are streaming the normal way to your profile or page, Wirecast makes it easy:
Click Output, then "Start/Stop Broadcasting" then click your Facebook Live stream that you created earlier.
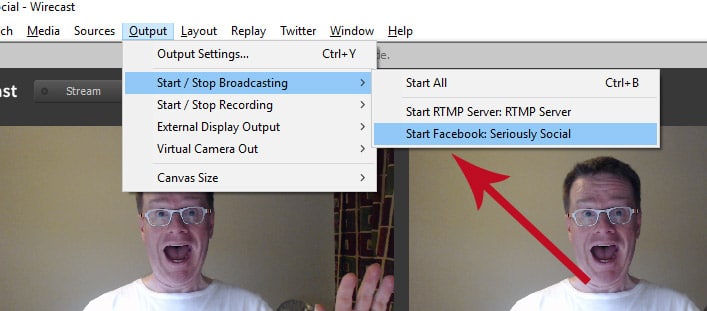
You are now live!
If you want to stop your broadcast, simply click Output, then "Start/Stop Broadcasting" then click your Facebook Live stream.
For going to live using the RTMP method, it's a little different...
Click Output, then "Start/Stop Broadcasting" then click your RTMP Server Stream that you created earlier.
Now, return to the Facebook Live pop up that was launched from the "go live" button above.
You should see a preview of the stream Facebook is receiving from Wirecast:

Enter your update text and the video title and optionally some video tags.
Now, it's your moment of glory. Click the "Go Live" button to go live:
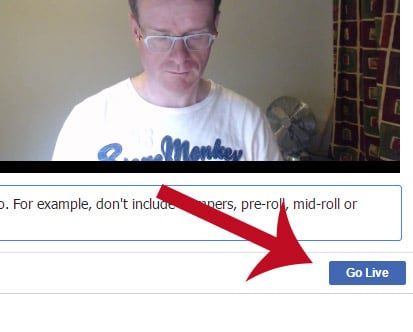
When you want to stop your broadcast, simply click Output, then "Start/Stop Broadcasting" then click your RTMP Live stream.


Comments