5 Hidden Features of Adobe Express

Please note: I’m an ambassador for Adobe Express. But all views in this blog post are my own.
Are you struggling to create visually stunning content quickly and easily?
Do you wish you could streamline your design process so you can create stunning videos and graphics to market your business?
In this blog post, we will be uncovering five hidden features of Adobe Express that will streamline the way you create visual content.
Whether you're a professional designer or just starting out, these features will help you work smarter, not harder.
Are you ready? It’s time to take Adobe Express for a test drive and unlock its power!
#1 Quick Video Editing
Adobe Express is a visual creative tool. But that doesn’t just mean images. Adobe Express helps you edit and create videos.
Quick Actions are a powerful part of Adobe Express with some really cool video editing tools. Of course, Adobe is behind the hugely popular and powerful professional video editing tool Premiere Pro. So Adobe know what they’re talking about when it comes to video editing!
You can upload your video to your Adobe Express library and then:
Trim
If you want to trim your video to the perfect length, you can use the Trim Video Quick Action. This allows you to select the start and end times with a slider. This is great for uploading to social and connect channels such as Instagram, TikTok and Twitter, where there are restrictions on the length of videos. For example, Instagram story videos used to have a maximum of 15 seconds and now have a maximum of 60 seconds.
You can either enter the start and end time in minutes/seconds /milliseconds, or you can drag the start and end of the slider below the video.

The Trim Video quick action also allows you to change the aspect ratio of the video. So you can convert to landscape (16:9), square (1:1) or portrait (9:16). When you change the aspect ratio, you then have the option of zooming in to fill the screen (with a crop) or leaving it with black bars (top or bottom).
If you select fill screen, you then have the option to pan the video within the crop. If you want to be able to control the zoom of the video, you have more options in the next video quick action; Resize.

Finally, you can mute the video if you don’t want the final video to have any sound.
Resize your video
Although you can resize your video in the Trim video quick action. The Resize video quick action tool gives you more control.
Adobe Express provides all the sizes (aspect ratios) for all of the major social networks and content platforms. This includes Instagram, Facebook, Twitter, YouTube, Pinterest, LinkedIn, Snapchat, and TikTok.
For example, for Instagram, it gives you the sizes for the main feed (square - 1080x1080), Stories and Reels (portrait - 1080x1920), landscape, IGTV and more.

If those options aren’t enough, the Resize video quick action tool gives you a custom option where you can select the exact width and height and pixels.

You can adjust the zoom of the crop by dragging the video scale slider. So you no longer have to worry about chopping off your head or cropping away from the action. And you can also trim the video by adjusting the start and end of the video with the slider.
Merge
Do you have two or more videos you want to join together? Perhaps you have a short intro or a promotional video that you want to add at the end?
With the Merge video quick action tool, you can upload your videos and join them together. You can change the aspect ratio, trim each video to the perfect length and fill the screen. You can also mute each video too.

Convert to gif
I love the Convert to GIF quick action. If you want to turn a short snippet of one of your videos into an animated GIF, this is the tool for you.
Once you upload your video, you can trim the video. To avoid large file sizes and slow-to-load GIFs, trim your video as much as possible. Adobe Express gives you three compression options - Large, Medium and Small. The Medium option is the best to try first since it offers that sweet spot between file size and looking good. But if you can get away with the small-size option and it still looks good, go for that.
The tool also allows you to crop the video into different aspect ratios - Square (1:1), Landscape (16:9) and Portrait (9:16).

Crop video
All the previous Quick Actions allowed you to crop your video as well. But if all you want to do is crop your video to a specific aspect ratio, then choose this option. It gives you the options of Landscape (16:9), Portrait (9:16) and Square (1:1). There’s also a freeform where you can drag to the perfect crop on the screen.
Finally, you have the option of muting the video.

Change speed
Do you want to adjust the speed of your videos? The Change Speed quick action allows you to make your videos slower or faster.
You can go really slow motion with “Super Slow”, which is 25% of the original speed. There’s also Slow and Normal. If you want to speed your video up, you’ve also got Fast (150%) and Super Fast (200%). I would have liked to see a slider option here, so I could slightly speed up (or slow down) my video. But Adobe is constantly adding new features, so hopefully, that will be coming in the future.

Convert to MP4
There are so many different video file formats. But MP4 is the most popular file format. If you’ve ever been asked to send your video in MP4, but your video is in MOV or some other format, this tool is for you. Simply upload your video, and it will convert it on the fly to MP4. Job done!
Reverse video
If you’re feeling a little creative, why not use the Reverse Video quick action tool? I had a lot of fun filming a video of my son sliding down the stairs. Then I reversed the video, and it looked like he was magically sliding up the stairs. You can have a lot of fun with this tool!

As well as reversing your video, you can also slow down or speed up your video. And you can mute the sound too.
#2 Scheduler
Did you know that Adobe Express has a full social media scheduler built in? This is huge! Especially if you’re using another tool like Buffer or Hootsuite.
It lacks some features of a full social media management tool. For example, at the moment, it doesn’t give you a social inbox or reporting or analytics. But it gives you a very powerful social media scheduling tool with a calendar front and centre.
It integrates with Twitter, Instagram, Facebook Pages, Pinterest and LinkedIn. Once you’ve added them to your Adobe Express, you’re good to go!

You can create posts for your channels on the Adobe Express Calendar. You can post to one channel or multiple channels at the same time. One cool option is to select media (videos or images) from your Adobe Express library. Once you’ve selected your media, just add the text and the date and time you want it to go out. You can then either schedule it or add it as a draft.

Once you’ve created your posts, they will appear on your Adobe Express calendar. You can view by weekly or monthly.

And you can filter what you see with the Filters option. This allows you to view just draft, scheduled, published or failed posts. Or you can view posts from just one channel.

#3 Templates
Once you create a project with Adobe Express (whether it’s an image or a video), it gets added to your library.
You can share individual projects or whole folders (or libraries within your main library) with other people. This allows you to collaborate with other members of your team. Or you could invite an external designer to create your videos or images for you.
Once you start creating your projects, you will probably find that you’ll want to create very similar projects.
For example, a recent project I’ve created is a carousel for Instagram of quote images from one of my podcast episodes.
Adobe Express allows me to convert this project into a template. A template makes a project reusable!
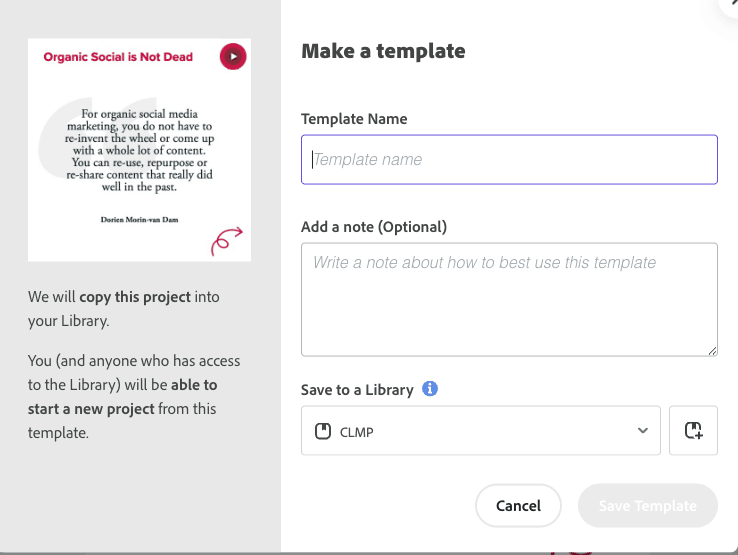
You can convert any project into a template by clicking the Share button at the top right of the
project you are editing and then selecting Make a template.

Then enter the name of the project and optional note, and then select which folder in your library you want the template to be stored.

And that’s it!
#4 QR Codes
First of all, I think we should talk about what QR codes are and why they’re helpful. If you’re already convinced, skip the next few paragraphs.
QR codes have been around since 1994. They were invented by a Japanese company called Denso Wave, which is now a subsidiary of Toyota.
They are special types of barcodes that you can scan with your smartphone camera. They look like a bunch of black and white squares arranged in a pattern. When you scan them, they can take you to a website, show you a message or even make a phone call.
For marketers, QR codes can be really useful because they make it easy for people to find out more about a product or service. For example, if a company puts a QR code on a poster for a new movie, someone could scan it and be taken to the movie's website. Or, if a store puts a QR code on a product, someone could scan it and see a video of the product in action.
So, QR codes are like shortcuts that make it easy for people to learn more about something, and marketers can use them to help people find more information about their products or services.
Adobe Express has a Quick Action for creating QR codes quickly and easily.

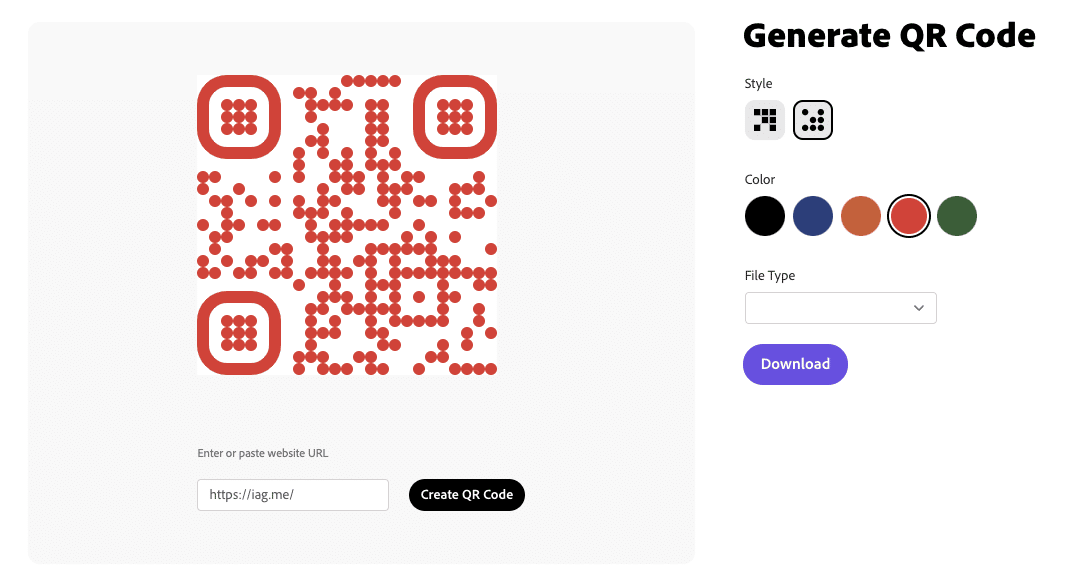
All you need to do is enter the URL and click Create QR Code. You can change the colour (there are 5 options). It also gives you two styles - the traditional block QR code or a more rounded version.
Finally Adobe Express allows you to download your QR code either as a PNG image, a JPEG image or as a vector file (SVG). That’s pretty neat!
#5 PDF tools
So far, I’ve covered Adobe Express’ image and video editing tools. But Adobe Express can also do PDFs. That’s perhaps not surprising since Adobe is behind the PDF tool, Acrobat.
You get some of the same professional PDF management tools as the professional version of Adobe Acrobat.
This includes converting from a Word, Excel, Powerpoint or image file into a PDF file.
You can convert from a PDF file into Excel, Powerpoint, PNG, JPEG, RTF or Word.
And you’re able to open up a PDF in Adobe Express and be able to edit the text and images.
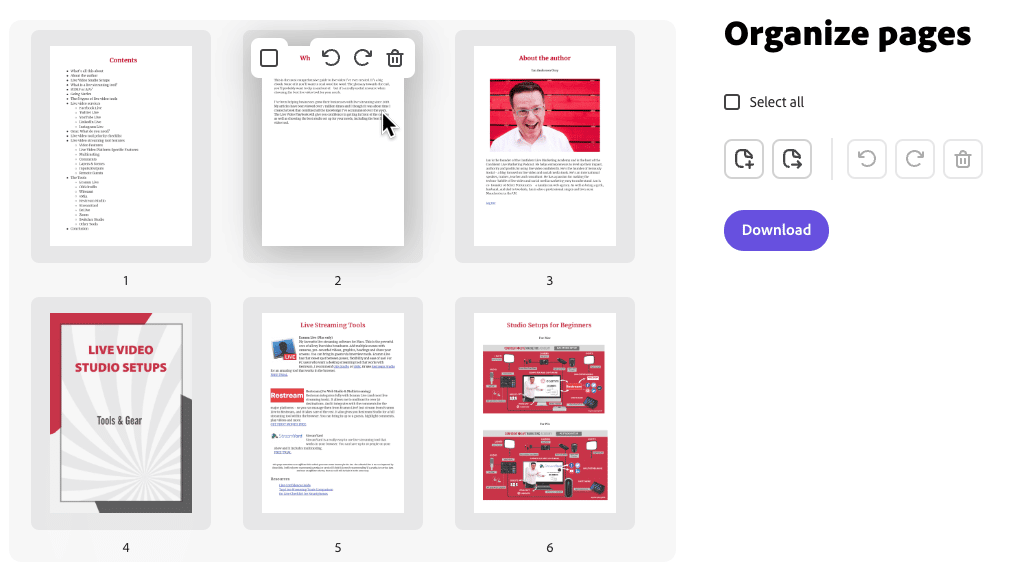
You can also organise pages in your PDF files. That means re-ordering pages or deleting some pages.

And finally, you can merge multiple PDFs together to form one PDF. Or combine other formats together, including Excel, Powerpoint, PNG, JPEG, Rich Text Format, and Word documents.
Summary
As you can see, Adobe Express is an incredibly powerful tool for creating visual content, and with these five hidden features, it becomes even more versatile.
From quick video editing to scheduling your social media content, from visual templates to QR code generation and PDF tools, Adobe Express has got you covered. These features can help you streamline your design process and help you create stunning visual content.
So, whether you're a professional designer or just starting out, give Adobe Express a try and elevate your designs to new heights.


Comments